Alveolar Ridge Split Techniques: Simultaneous Implant Placement (Part 2)
Contents
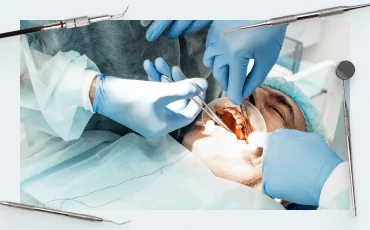
In this part of the article, we will continue to examine the nuances of implant placement in a split ridge. To do this, we will revisit specific clinical examples and also demonstrate how to practice ridge split using bovine ribs as training material.
A narrow alveolar ridge is not an obstacle to implant placement
As mentioned in the first part of the article, the width of the alveolar crest is not as critical as a sufficiently wide angle between the lingual and buccal walls. The picture below depicts such a case.
 Youtube / Dr. Kamil Khabiev / Dental Guru Academy")
Successful placement of two implants in the third quadrant with a narrow alveolar crest (approximately 1-5 mm) YouTube / Dr. Kamil Khabiev / Dental Guru Academy
The buccal wall was successfully displaced, and the implants were properly positioned, as confirmed by an orthopantomogram. The placement process and bone type for this clinical case are described in detail in the section: Features of a ridge split in D1-D2 bone.
Considerations for ridge split in D3 bone
The initial steps of the procedure are standard. A longitudinal incision is made with a piezotome to a depth of approximately 10 mm, or slightly deeper than the length of the implant (+ 1 mm). Next, a pilot hole is created with a lance drill to the full depth of the implant. Remember that a lance drill has smooth edges and compacts the bone tissue without aggressively cutting into the thin buccal wall. This gently displaces the lingual and buccal walls.

The first stage of implant placement using the ridge split technique in D3 bone YouTube / Dr. Kamil Khabiev / Dental Guru Academy
With D3 bone, vertical releasing incisions in the cortical layer to weaken the buccal wall are generally unnecessary. Furthermore, in this less dense bone, bone expanders are often not required. After using a 1.5 mm lance drill, a 2 mm twist drill with a stopper can be used to prepare the final osteotomy.

The second stage of implant placement using the ridge split technique: expanders are not necessary; conical implants can expand the ridge during placement and achieve acceptable primary stability YouTube / Dr. Kamil Khabiev / Dental Guru Academy
Conical implants (4x10mm in the illustration) can then be immediately placed.
The radiograph below illustrates a specific clinical example.

A radiograph of the initial clinical situation: missing teeth in the posterior mandible. The left side was treated YouTube / Dr. Kamil Khabiev / Dental Guru Academy
Here, we have a narrow ridge with a good divergence angle and soft D3 bone. This means that a single longitudinal incision with a piezotome and a 2 mm pilot hole may suffice for a split. To prepare the osteotomy, first, use a 1.5 mm lance drill, followed by a standard 2 mm or 2.5 mm twist drill with a stopper (2.5 mm if the width of the alveolar ridge allows).

Preparing a site for bone implants type D3 – real case YouTube/Dr. Kamil Khabiev / Dental Guru Academy
Because the apex of a conical implant is approximately 2 mm in diameter, the implant will fit well into the prepared site, especially if the site is slightly larger (e.g., 2.5 mm).

Stages of implant placement in a split ridge YouTube / Dr. Kamil Khabiev / Dental Guru Academy
The technique for implant placement in this situation is as follows:
- Insert all implants approximately halfway.
- Alternately tighten all the implants, moving from the most mesial to the most distal, then back a couple of turns on each, until they reach their planned positions. This ensures that the walls are split smoothly and gradually.
 And With Implants Inserted Into The Split Ridge (Bottom) Youtube / Dr. Kamil Khabiev / Dental Guru Academy")
Clinical picture during site preparation (top) and with implants inserted into the split ridge (bottom) YouTube / Dr. Kamil Khabiev / Dental Guru Academy
IMPORTANT! Implants placed using the ridge split technique should be positioned 1-2 mm below the crest of the bone (subcrestal placement). For example, if the piezotome incision is 10 mm deep, use an 8-9 mm implant. This ensures sufficient bone volume for osseointegration and adequate space for a soft tissue attachment. Additionally, dual platform switching abutments are recommended for an optimal emergence profile, as shown in the radiograph below.
, Conical Abutment With Platform Switching Youtube / Dr. Kamil Khabiev / Dental Guru Academy")
Recommended implant placement just below the crest of the alveolar ridge (subcrestal), conical abutment with platform switching YouTube / Dr. Kamil Khabiev / Dental Guru Academy
The following pictures demonstrate this technique, which yielded excellent results.

Subcrestal placement of implants and excellent results after healing YouTube / Dr. Kamil Khabiev / Dental Guru Academy
Features of a ridge split in D1-D2 bone
Let’s return to the clinical case mentioned at the beginning, illustrating that a narrow alveolar crest is not an obstacle to implant placement. Now, let’s examine this case in more detail. The initial situation:
- Narrow alveolar crest.
- Bounded edentulous space – with adjacent natural teeth.
- Bone type between D1-D2: strong cortical layer, but not very thick.
First, let’s review the protocol for a ridge split in D1 bone.

Longitudinal incision with a piezoelectric surgical instrument YouTube/Dr. Kamil Khabiev / Dental Guru Academy

Deepening the incision to 10 mm along the entire length YouTube / Dr. Kamil Khabiev / Dental Guru Academy

Releasing cuts on both sides of the area to be split YouTube / Dr. Kamil Khabiev / Dental Guru Academy

Pilot osteotomy with a lance drill at the implant sites YouTube / Dr. Kamil Khabiev / Dental Guru Academy
Note that in D1 bone, even when placing two implants, an additional hole is created for expanders. This third point acts as an additional wedge.
. Sequential Increases In Expander Diameter Gradually Deflect The Buccal Wall, Splitting The Ridge Youtube / Dr. Kamil Khabiev / Dental Guru Academy")
Introduction of expanders to expand the site (acting like a wedge). Sequential increases in expander diameter gradually deflect the buccal wall, splitting the ridge YouTube / Dr. Kamil Khabiev / Dental Guru Academy

Additional expander between future implant sites for smoother ridge split YouTube / Dr. Kamil Khabiev / Dental Guru Academy
The procedure for using expanders is standard and was described in the first part of the article. In this case, a 2.4 mm expander is inserted into the first hole, removed, placed in the central hole, and a 2.8 mm expander is then inserted into the first hole. This sequence is repeated, incrementally increasing the diameter of the expanders until the buccal wall is displaced sufficiently for implant placement.

Sequential increase in expander diameter YouTube / Dr. Kamil Khabiev / Dental Guru Academy

Widening the gap between the lingual and buccal walls using a sequential increase in expander diameter YouTube / Dr. Kamil Khabiev / Dental Guru Academy
The goal is to have a 3.8 mm expander in the central hole while placing implants in the side holes. In this example, 4 mm diameter and 10 mm length implants are used. The central expander is crucial. When the cortical plate is thick and strong, it tends to return to its original position, causing the split to collapse.

In the central hole, a 3.8 mm expander continues to act as a wedge, preventing the bone walls from coming back together, allowing for implant placement with minimal effort and reduced risk of complications YouTube / Dr. Kamil Khabiev / Dental Guru Academy
In practice, this procedure looks like the picture below. Note the hole in the center without an implant. This hole is left by the additional wedging expander. The space from the expander will completely fill in, especially if osteoplastic material is added.

An example of placing implants in D1 bone: a hole remains in the center from the additional expander YouTube / Dr. Kamil Khabiev / Dental Guru Academy
Let’s return to our clinical example. The initial steps are standard: reflecting a flap and making a longitudinal incision. First, the groove is made to the required length, then deepened to 10 mm.

Longitudinal incision of the alveolar ridge in D1-D2 bone YouTube / Dr. Kamil Khabiev / Dental Guru Academy
Because the cortical layer is very strong and there are adjacent teeth, releasing incisions are made near the teeth. Then, when the buccal wall is displaced, the risk of cracks or periodontal damage to healthy teeth is eliminated.

Vertical releasing cuts for ridge split YouTube/Dr. Kamil Khabiev / Dental Guru Academy
Since the bone is hard, expanders are used as described in the first part of the article.

An example of using expanders to widen the gap between bone walls YouTube / Dr. Kamil Khabiev / Dental Guru Academy
The next picture shows the result. The implants are placed quite deep, about 2 mm below the lingual wall, which is the optimal position.

Successfully placed implants in the bounded edentulous space, 1.5-2 mm below the level of the lingual wall YouTube / Dr. Kamil Khabiev / Dental Guru Academy
Here’s a before-and-after photo. Notice the significant difference in alveolar ridge size. Osteoplastic material will be used to fill the gap. However, even if the defect were filled with PRF clots and covered with a PRF membrane, bone tissue would still regenerate in the required volume. Because both bone walls, despite the split, are “alive” and actively supplied with blood, healing occurs very rapidly.

Pictures before and after ridge split YouTube / Dr. Kamil Khabiev / Dental Guru Academy
All procedures were performed precisely according to the protocol, and here is a radiograph showing the final result. Even the most critical experts will find no shortcomings. There is excellent bone volume, with at least 2 mm of bone on both sides of the implants.

Successfully placed implants using the ridge split technique in D1-D2 bone with a narrow alveolar crest YouTube / Dr. Kamil Khabiev / Dental Guru Academy
How to practice the ridge split technique – without experimenting on patients
There are many ways to practice, but we suggest considering one of the most obvious and safest. Purchase bovine ribs and secure them to simulate a working model. The size, shape, and density of a bovine rib are very similar to a human alveolar ridge with D2-D3 bone density.
The rib can be secured in an ordinary vice or a stand made from Speedex C-silicone. The shape can be arbitrary, but a slide (pyramid) is ideal, with the bovine rib placed at the top.

Beef rib as training material for practicing the ridge split technique YouTube / Dr. Kamil Khabiev / Dental Guru Academy
Next, take a piezotome and make a longitudinal incision. Remember not to apply too much pressure. The pressure should be similar to that when using a drawing pencil.

Preparing for an incision with a piezoelectric surgical instrument YouTube/Dr. Kamil Khabiev / Dental Guru Academy
Initially, create a groove approximately 1 mm deep to the required length to prevent the instrument from slipping, then deepen the incision. It is easiest to work by moving the tip of the instrument toward you. Step back, apply the tip with the teeth to the bone, and draw a groove toward yourself. Using the same movements, deepen the incision to approximately 10 mm, or the length of the implant plus 1-2 mm, to allow for subcrestal placement. The tip of the instrument should be perpendicular to the plane of the ridge. Never tilt the instrument to the side, especially after penetrating the bone.

Creating a longitudinal cut in a beef rib YouTube / Dr. Kamil Khabiev / Dental Guru Academy
The width of the initial incision is small, slightly more than 1 mm, which is normal for both bovine ribs and human alveolar ridges.

Completed longitudinal incision before ridge split surgery YouTube / Dr. Kamil Khabiev / Dental Guru Academy
Next, make vertical releasing incisions. The cut is not strictly vertical, but slightly angled, as shown in the picture below. In the case of D1 bone, make two such cuts on each side of the longitudinal cut. If the bone is type D2, one incision is sufficient. If the bone is D3, the incision is only required in cases with adjacent teeth. Otherwise, split may cause a crack that extends to the periodontium of adjacent teeth. Releasing incisions are made to the depth of the cortex. Use the piezo instrument to ensure that there are no attachments and that the saw slides easily within the longitudinal and vertical cuts.

Vertical releasing cut: use a piezotome to confirm that the longitudinal and vertical cuts are connected YouTube / Dr. Kamil Khabiev / Dental Guru Academy
Although bovine rib is softer, we will make two releasing cuts, as in the case of D1 bone or a bounded edentulous space.

Beef rib with two releasing cuts YouTube / Dr. Kamil Khabiev / Dental Guru Academy
IMPORTANT! Make releasing cuts very carefully in the apical area. Never touch the lingual wall with the piezotome. Only the buccal wall should be moved and split off, never the lingual wall.
Next, use a lance drill, which compacts the bone tissue rather than aggressively cutting it into chips. The lance drill also slightly wedges the ridge, increasing the gap between the cortical plates.
IMPORTANT! A Lindemann toothed drill should not be used for the ridge split technique, as it may accidentally perforate the buccal wall or significantly reduce its thickness.
 Drill Youtube/Dr. Kamil Khabiev / Dental Guru Academy")
Preparing the implant site with the first (lance) drill YouTube/Dr. Kamil Khabiev / Dental Guru Academy
Bone chips formed during the procedure MUST be removed from the surgical area. Some can be collected for incorporation into osteoplastic material; the rest should be washed away.
Next, split the ridge using expanders. First, take the 2.4 mm expander and insert it at a low speed (20-30 rpm).


Inserting an expander into the hole left by a lance drill YouTube / Dr. Kamil Khabiev / Dental Guru Academy
Note that even with the insertion of the first expander, the buccal wall has already noticeably moved.

Successfully placed first expander and noticeable cleft between the lingual and buccal walls YouTube / Dr. Kamil Khabiev / Dental Guru Academy
Remember that there are two methods for working with expanders. First, the expander from the first hole can be removed and placed in the second hole, then the next (2.8 mm) expander is screwed into the first. Alternatively, the first expander can be left in place while the second expander (2.8 mm) is inserted into the adjacent hole. We will use the second option in our example. However, if the 2.8 mm expander seems ineffective, remove it and the first expander. Then, follow the first protocol, twisting the 2.4 mm expander into the second hole. Always remember the elasticity of bone tissue. The bone wall stretches gradually, so there should be no sudden movements. Perform all procedures smoothly and slowly, increasing the gap millimeter by millimeter.
 Into The Second Hole, While The First (2.4 Mm) Remains In The First Hole Youtube / Dr. Kamil Khabiev / Dental Guru Academy")
Insertion of the second expander (2.8 mm) into the second hole, while the first (2.4 mm) remains in the first hole YouTube / Dr. Kamil Khabiev / Dental Guru Academy
After both expanders are fully inserted, remove the first expander and install the next diameter (3.3 mm) to further deflect the buccal wall. The picture below shows the degree of buccal wall displacement when a 3.3 mm expander is in the left socket and a 2.8 mm expander is in the right socket.
, Left (2.8 Mm) Youtube / Dr. Kamil Khabiev / Dental Guru Academy")
Ridge split using expanders: right (3.3 mm), left (2.8 mm) YouTube / Dr. Kamil Khabiev / Dental Guru Academy
Next, remove the 2.8 mm expander and insert the final expander (3.8 mm) if 4 mm implants are planned, as is the case here.

Next, remove the 3.3 mm expander (left) and immediately place a 4 mm implant in its place. The second (3.8 mm) expander holds the bone walls and prevents them from collapsing. Set the torque on the wrench to 50 Ncm, which provides excellent primary stability.
 Into A Split Ridge On A Model Bone (Bovine Rib) Youtube/Dr. Kamil Khabiev / Dental Guru Academy")
Placement of the first implant (left) into a split ridge on a model bone (bovine rib) YouTube/Dr. Kamil Khabiev / Dental Guru Academy
Next, remove the remaining expander and place the second implant.
 In The Split Ridge On A Model Bone Youtube / Dr. Kamil Khabiev / Dental Guru Academy")
Placement of the second implant (right) in the split ridge on a model bone YouTube / Dr. Kamil Khabiev / Dental Guru Academy
Ensure that the implants are placed 1 mm below the level of the lingual bone. When the buccal wall is displaced, it rises slightly, and the implant will be approximately 2 mm below its new level (see photo below).
 Youtube / Dr. Kamil Khabiev / Dental Guru Academy")
View from the back side: the implants are placed 1 mm below the level of the lingual bone (in the model, this is a wall without vertical cuts) YouTube / Dr. Kamil Khabiev / Dental Guru Academy

Successfully placed implants in the split beef rib YouTube/Dr. Kamil Khabiev / Dental Guru Academy
There is the potential problem of sharp edges on the buccal wall, which can perforate soft tissue during suturing. Therefore, use a piezotome again to carefully trim the sharp edges of the elevated buccal wall.
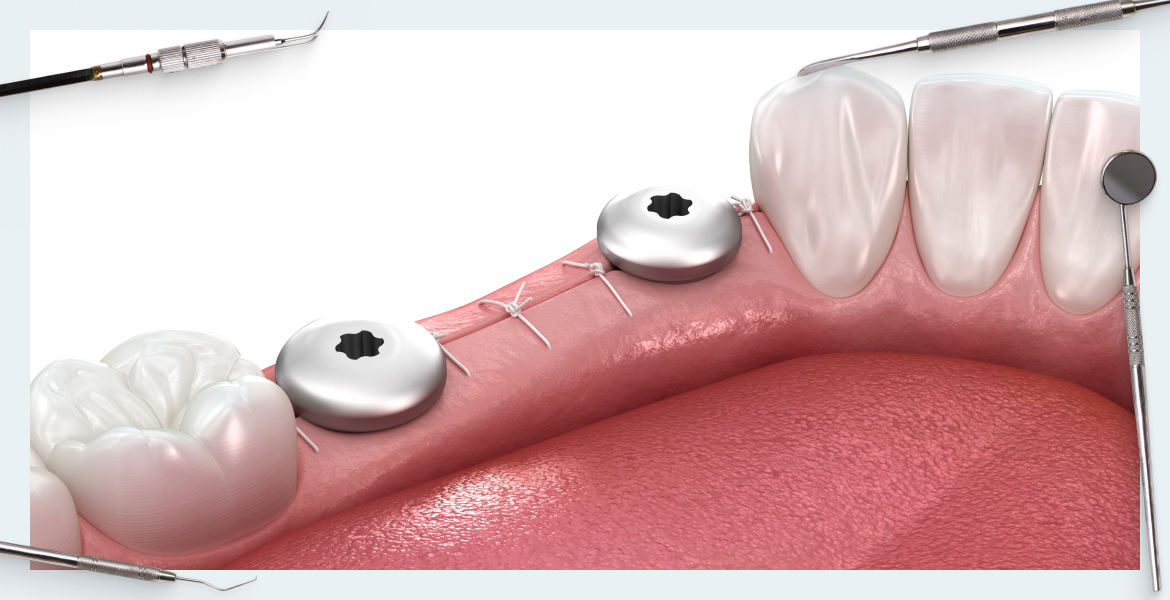
Next, place healing cups into the implants, fill the gap with osteoplastic material, and suture the soft tissues.
Immediate placement of healing cups is not recommended because the buccal wall is slightly mobile, and chewing forces may still be applied to the abutment. Micromovements of the implant slow down osseointegration, and strong pressure or impact on the cup can fracture the buccal wall.
After three months, dentures can be placed, which is a significant advantage of the ridge split technique.
That’s all for now. Stay tuned for the next publication.