Procedures from the first moment the patient comes to the clinic until the end when he has his crown
Hello everyone. Welcome back to Uniqa Dental Show, where we discuss interesting cases and new procedures in the field of dentistry. Today, we’re making a special video for patients for your better understanding of the procedures that you will go through from the first step that you go into the doctor’s office, and until the last step that you have crowns. We will do it with Dr. Yaniv.
Where does the diagnosis of the patient begin
Today, what we want to discuss is, as you said, from the first moment the patient comes to the clinic until the end when he has his crowns. This procedure can be broken down into few steps. The first step is the diagnosis. In the diagnosis, as the doctor, I need to know, for implementations, if we have enough bone to know if there is enough bone for implants. The x-ray exam that we’re doing is called the CBCT.
It’s a cone beam computer tomography. CBCT gives us in the end, a cut of the jaw where you can examine the height and the width of the bone. You can see also the teeth. You can have all the information from this exam.
Cone beam computed tomography differs significantly from classical computed tomography, which also allows you to see the structure of the bone.

Scarfe, w. C. , & farman, a. G. (2008). What is cone-beam ct and how does it work?. Dental clinics of north america, 52(4), 707-730.
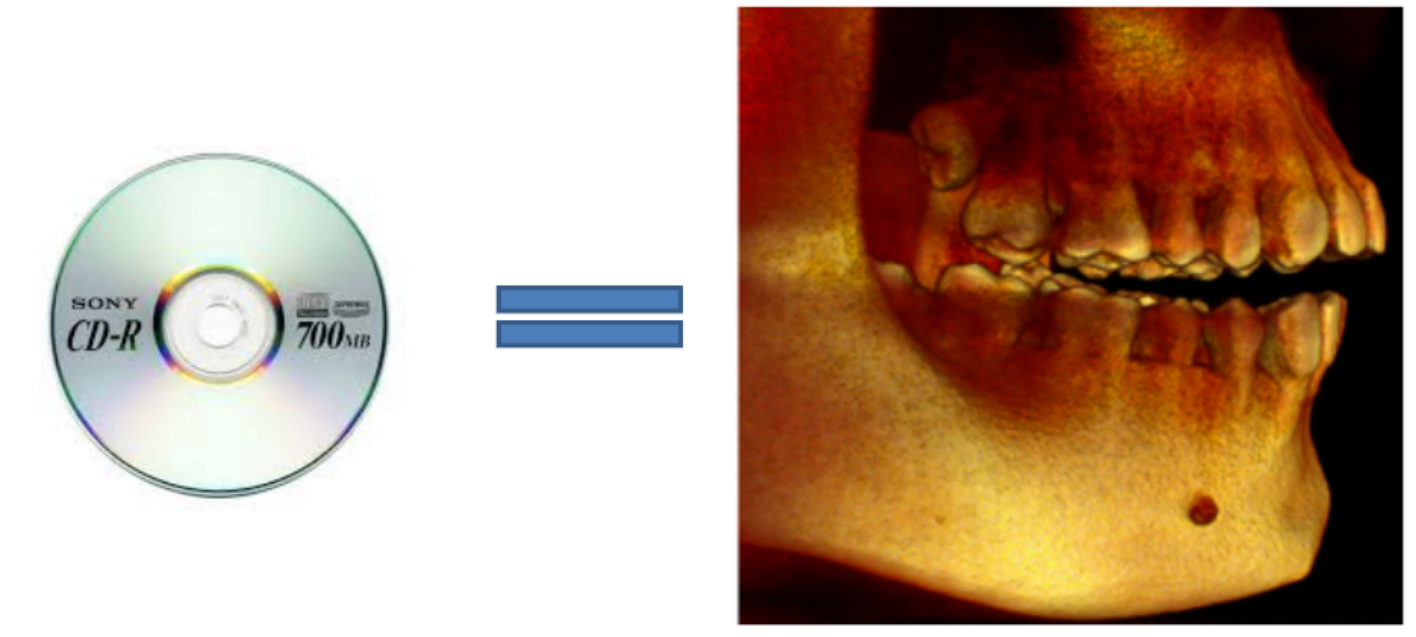
In CBCT, what you have is the machine is making a lot of slices and then the computer collects all the slices and process them to a 3D model of the jaws, of the bone, of the teeth. And you can have even the gingiva and the soft tissues. You can see the nerves; you can see all the other structures that you need for this procedure. But everything here is row data. You can have it on a disc and you can have it send through the mail.
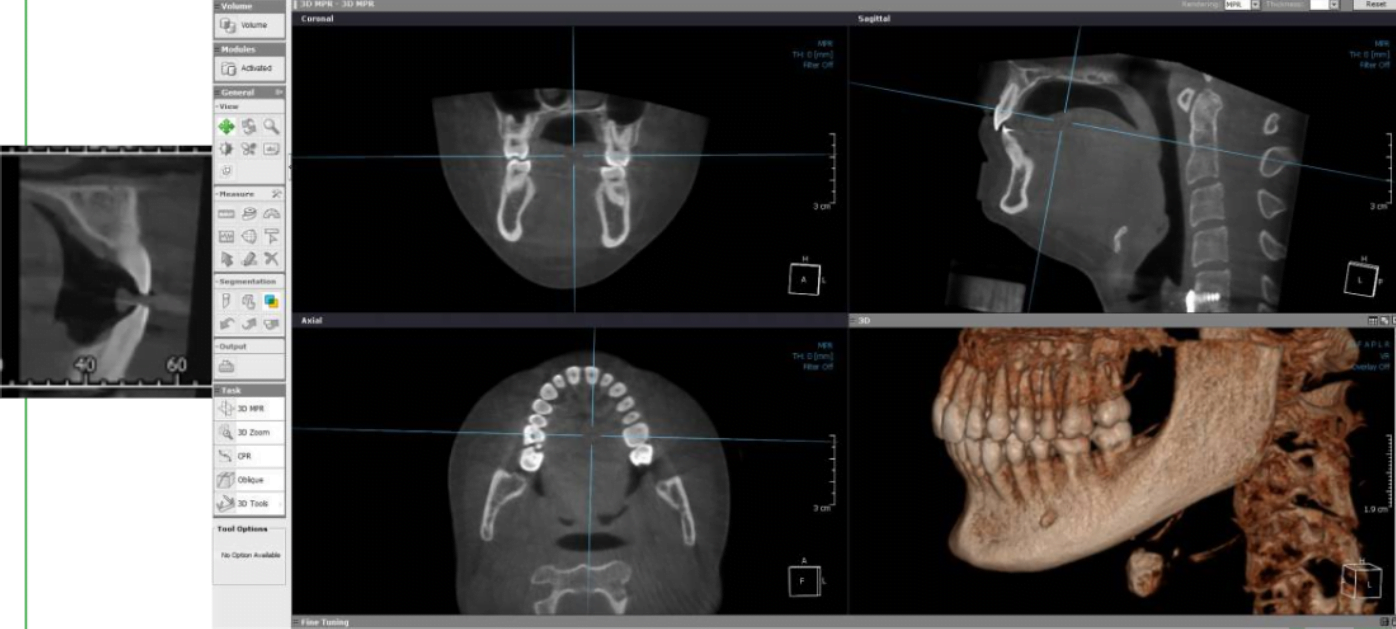
But as a doctor, I can’t do anything with this 3D reconstruction. I can’t know all the dimensions or the heights that I need to place the implants or to choose what implants I need to place. So, in the first place, I take the 3D reconstruction of the bone, and I cut it into three different slices.
I have the horizontal slice. I have a vertical slice and have another vertical slice; it’s called the coronal slice. It is from left to right from, front to back, and the horizon part. In here, you can see the front to back. In here, you can see left to right. And this is the horizontal. In here, I already have much more information because in this part I can see in the anterior area, the frontal bone. I can see the height of the bone. I can see the width of the bone. I can see the teeth, the cut of the teeth itself. In the left to right slice, I can see in the lower parts, the height and width of the bone. I can see the teeth. I can see different structures. For example, the sinuses. In the horizontal part, in this case, it gives me less information because I don’t need to measure anything in the horizontal slice, but these two slices are used in most of the cases.
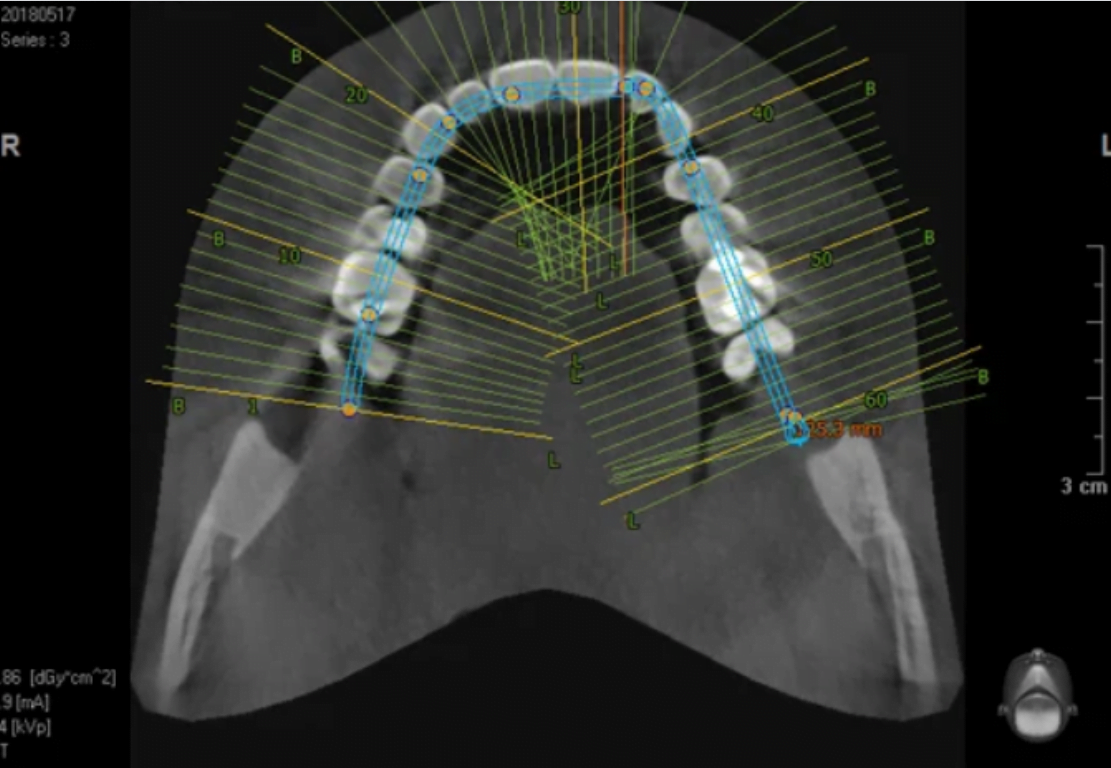
These two slices are not enough because if I want to put an implant, not in the back area or in the front area, the slices will give me not the straight cut of the jaw. I need a perpendicular cut of every place in the jaw or all of the places that I want to place the implants in. So, in this case, we need to make some modifications for these slices. The end result that I want to get is I want to have a perpendicular slice for every dot in the CT. You know that it’s perpendicular. You can see the height, the width, all of the parameters. From the section on the left side of the slide at the top, you can choose which implants I should use and how I can restore them in future treatment. So, the first thing that I’m going to do is make a line that is going through the whole jaw.
As you can see the blue lines. The blue lines go with the arch of the jaw, across all the teeth. To this line, I have perpendicular lines that goes each one millimeter and every line has its own number.
It’s a perfect perpendicular cut of every step of the arch of the jaw. So, if in the future slices that I’ll have, I’ll know that number 10 is this slice. If I want to place implants in this area, I can use the slices of number 10. And by this slice, I can measure the implant that I can place in this place – the height and the width of the implant. In here, you can see the reconstruction of the jaw.
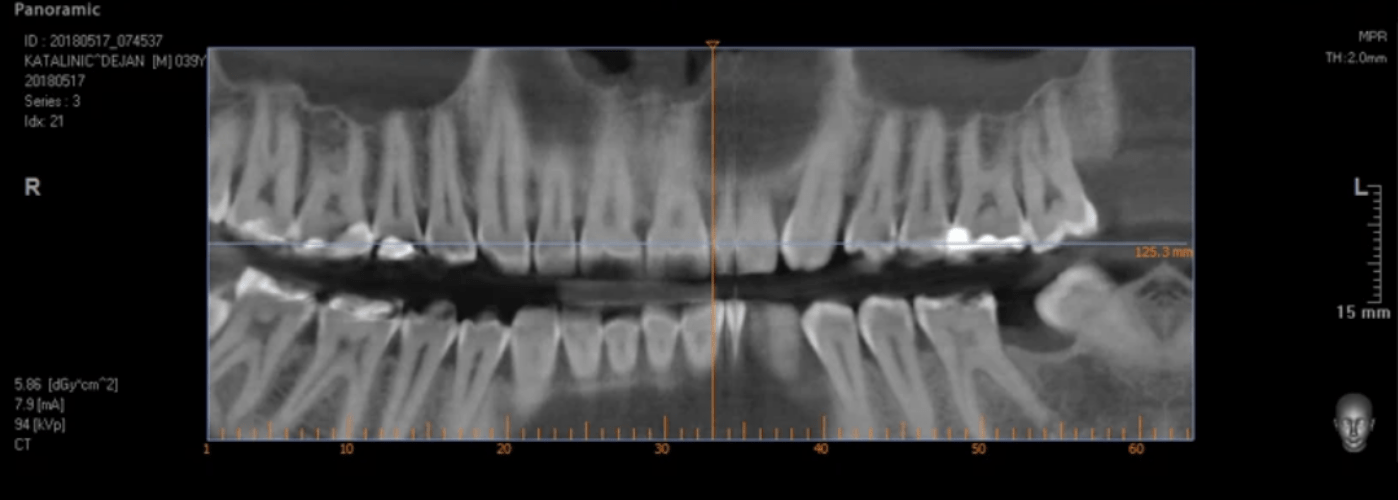
If I will use only the blue lines, that we showed before, but on this reconstruction, you already have a ruler.
You can see all the numbers below., All those numbers showing perpendicular cuts each one millimeter, and they have their own numbers. So, as we talked before, slice number 10 is going to be here around this tooth. I can now, by this cut I’ll know where they’re going to be. And later on, I’ll get from this cut, the particular slice of the jaw.
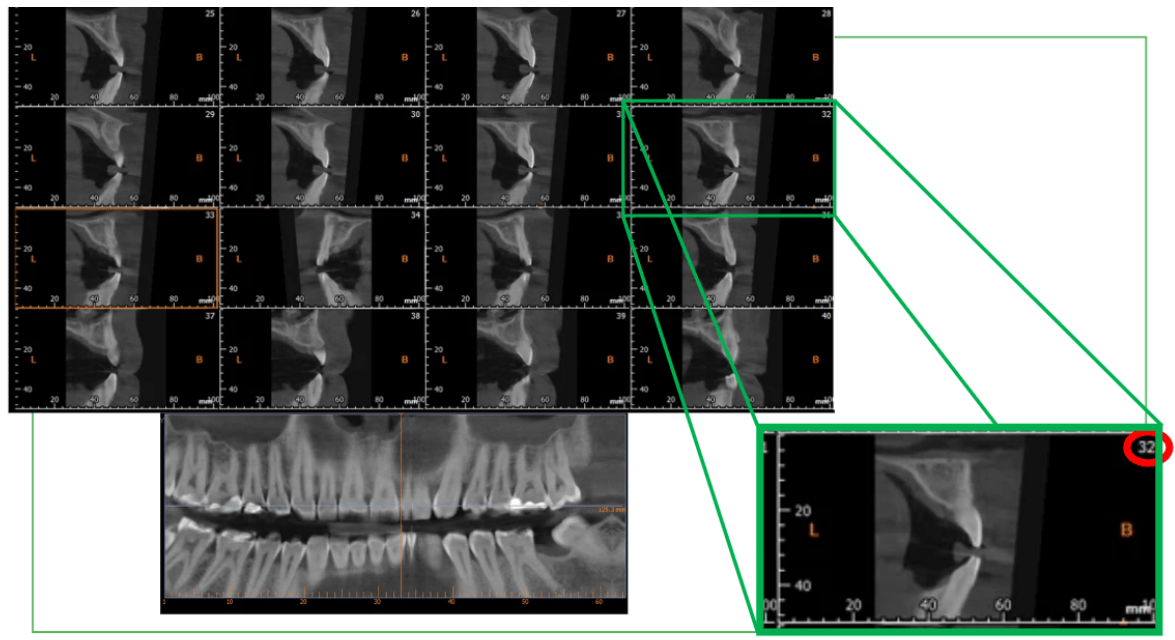
These are all the individual cuts. As a doctor, in the end, I get a few pages of a lot of cuts. In each cut, I know the number of the cuts, and I have a ruler so I know I can measure the bone.
I know this is 10 millimeters. I can see in here, I have around six millimeters, for example of bone. In the width of the jaw of the bone I have about three, four. I can know and choose different types of implants, and different sizes of implants for each place to position. It’s something that can be made just with a CBCT x-ray and not with any other technique.
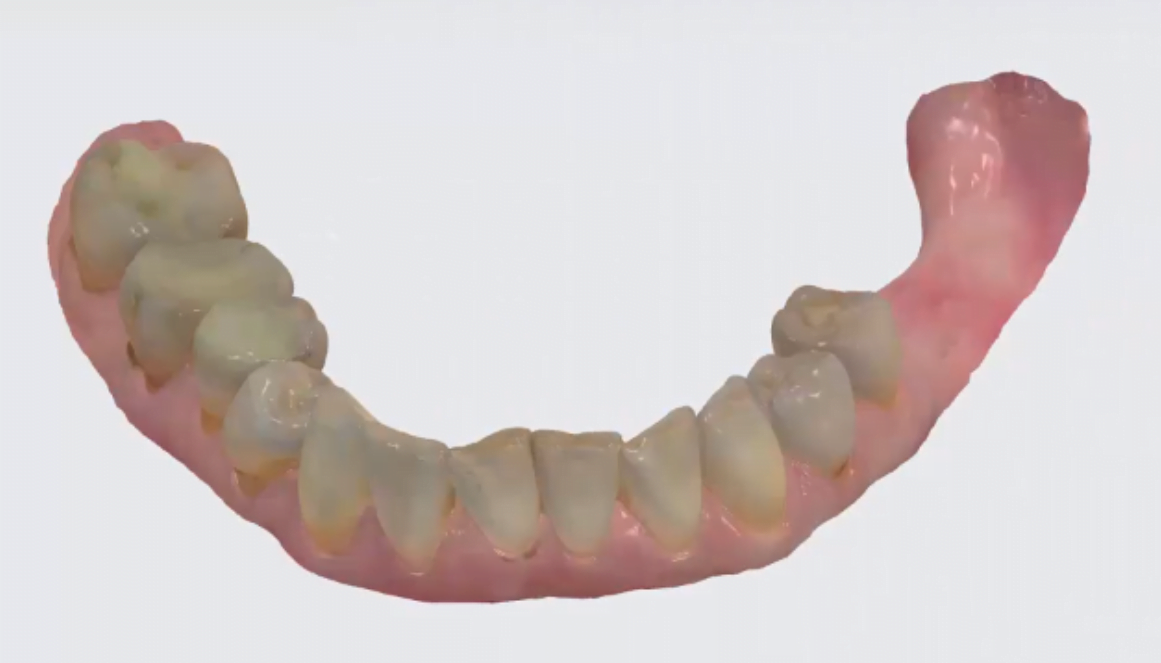
On the next slide you see the model of the jaw.
Now that I know where I want to place the implants, now that I know which implants, I can place in this position, I need to know how to place the implants, because even in the same area, I can place the implants in different angulations. I can move the implant a little bit forward, or a little bit backwards. I have a little bit of game. In here, you can see that I don’t have the posterior teeth, and I know that I can move the implant a little bit back, and a little bit forward. There is no one place for the implant. You can a little bit play with it. So, in this case, in the first place to place correctly, the implants, I need to have some design of the future crowns that I want the patient to have.
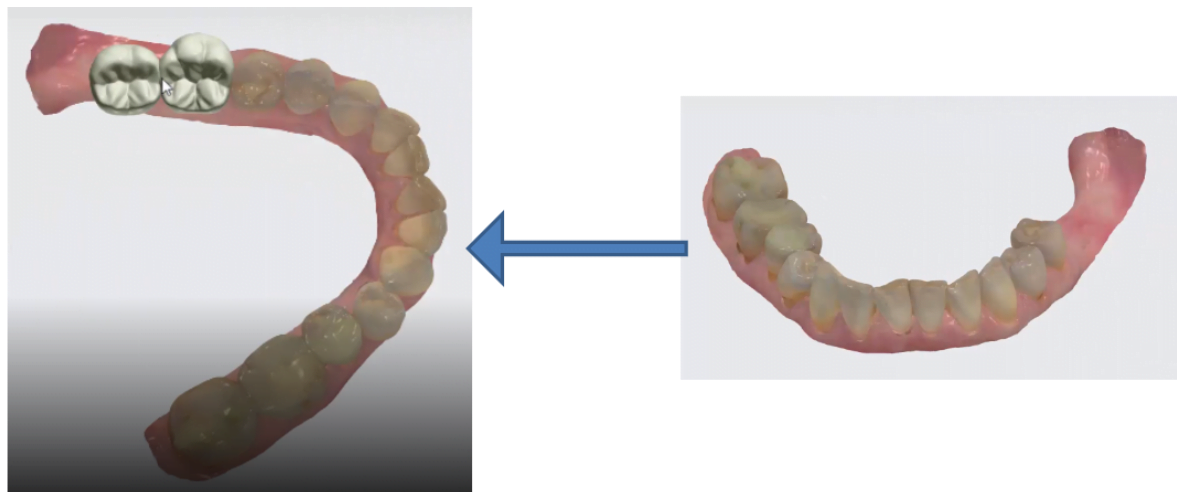
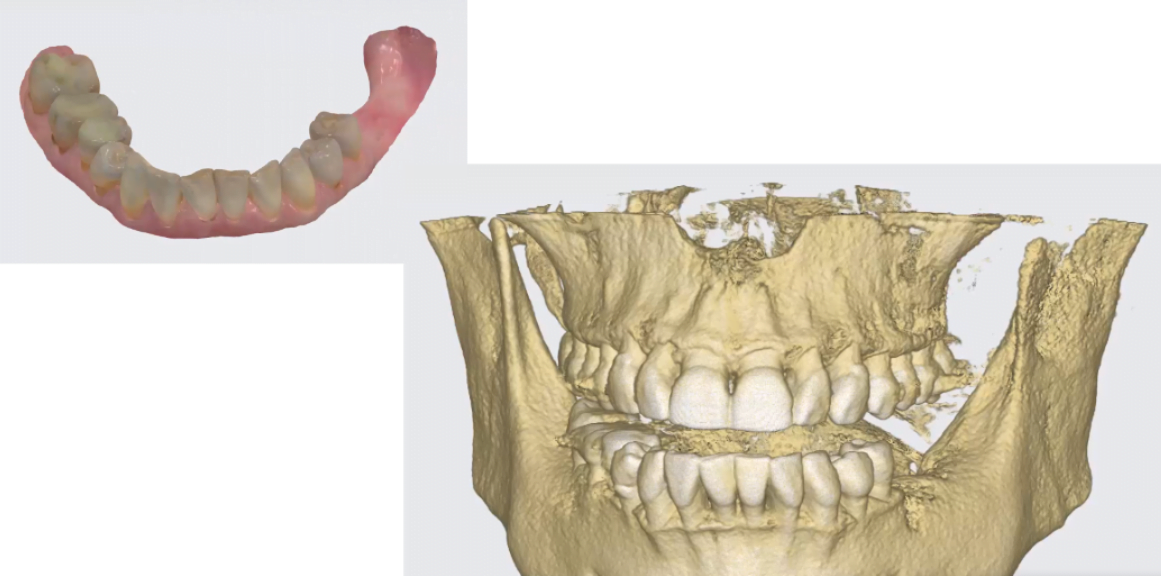
In this case, we’re doing everything in CAD/CAM on the computer. We designed the crowns in the computer. I have the jaw. In this area, I design the two teeth I want to be in the future. I have the morphology, the anatomy of the teeth. Now I know the shape and of the teeth. And from the shape of the teeth, I know where the implant should be. From the place where the implant should be, now I can make the implantation itself to place the implants. Because I had the 3D reconstruction before, and I have the 3D model of the patient, I can superposition the 3D reconstruction with the 3D model one on top of the other.
Further you can see here that I have a CT that I did, I have the bone, the 3D reconstruction of the bone. I have the impression of the jaw that they made, and I super positioned them one onto another.
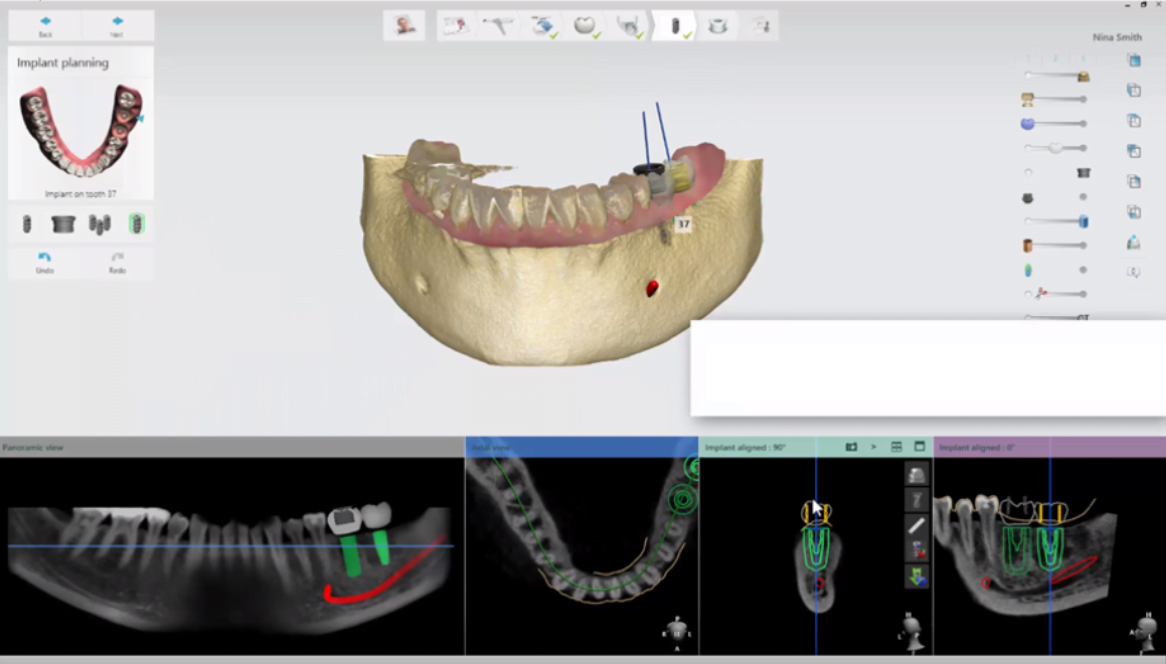
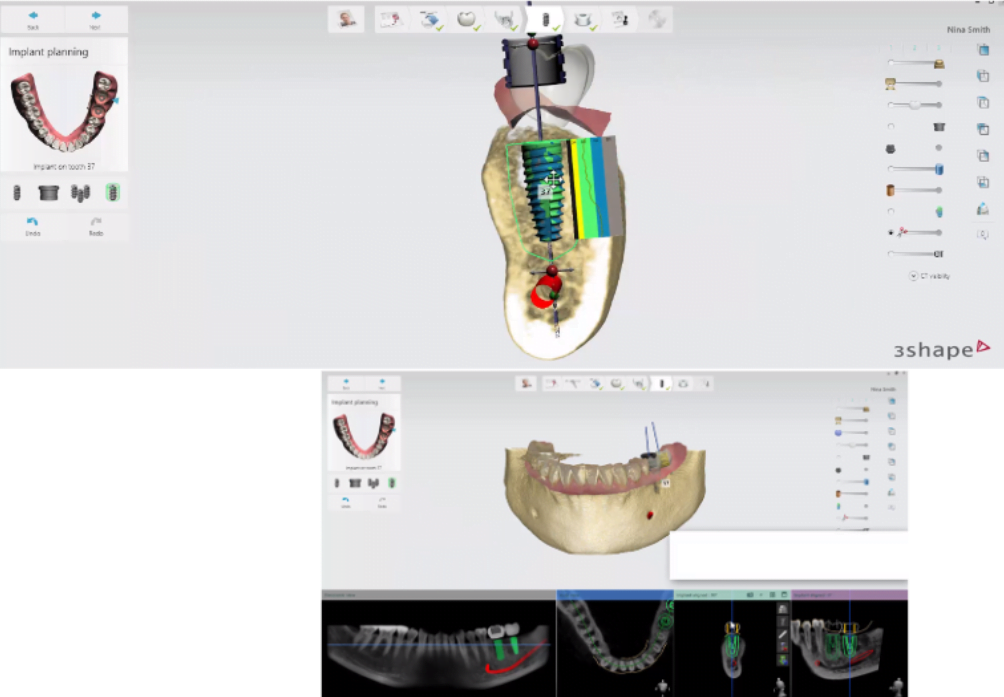
So, in here, I see both of the crowns I designed. These are the crowns of the patient. This is his CT. And in here, I can see how to place the implants. I know that the crown is supposed to be in this area. So, the implant probably should be below the crown. So, it’s the best place for the implant. So, I know the angulation. I know the position, the best position of the implant. I can see even different structures.
The red line is my lowest part of the implant that I can go to because in the lower jaw, we have a nerve that is responsible for the feeling of the lip, of the gum.
If you use too long implant and you harm the nerve, you can lose feeling in the lip. So, this is the lowest part that you want, you even want to use a shorter implant, to be sure that you won’t go to the nerve. So, in here we can choose the implants. We know we have a safe space between the implant and the nerve, our anatomical structures. Everything is done according to the crowns that we designed before. The crowns that we know where they should be, and this way the implant will be positioned perfectly, according to those crowns.
Why do I need a surgical template when installing dental implants
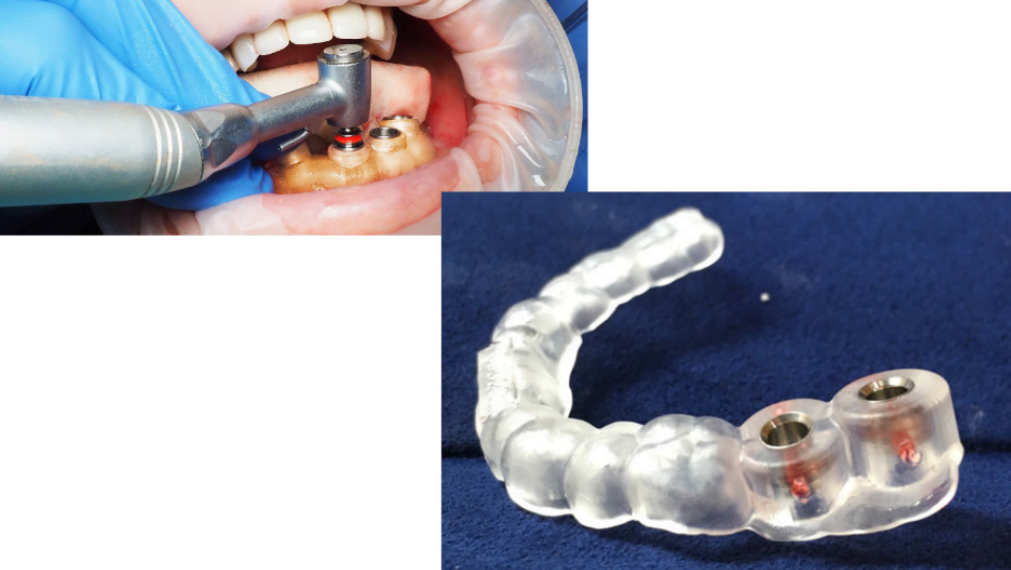
Now, we can make a surgical guide, or if the position of the implant is very easy, we can position even free handed. In these cases, we will show with surgical guide. The surgical guide is something that when we position the implant in the program, and there are a lot of programs in here, you can see a simulation from three shape program. We can print a guide that will guide the implementation process.
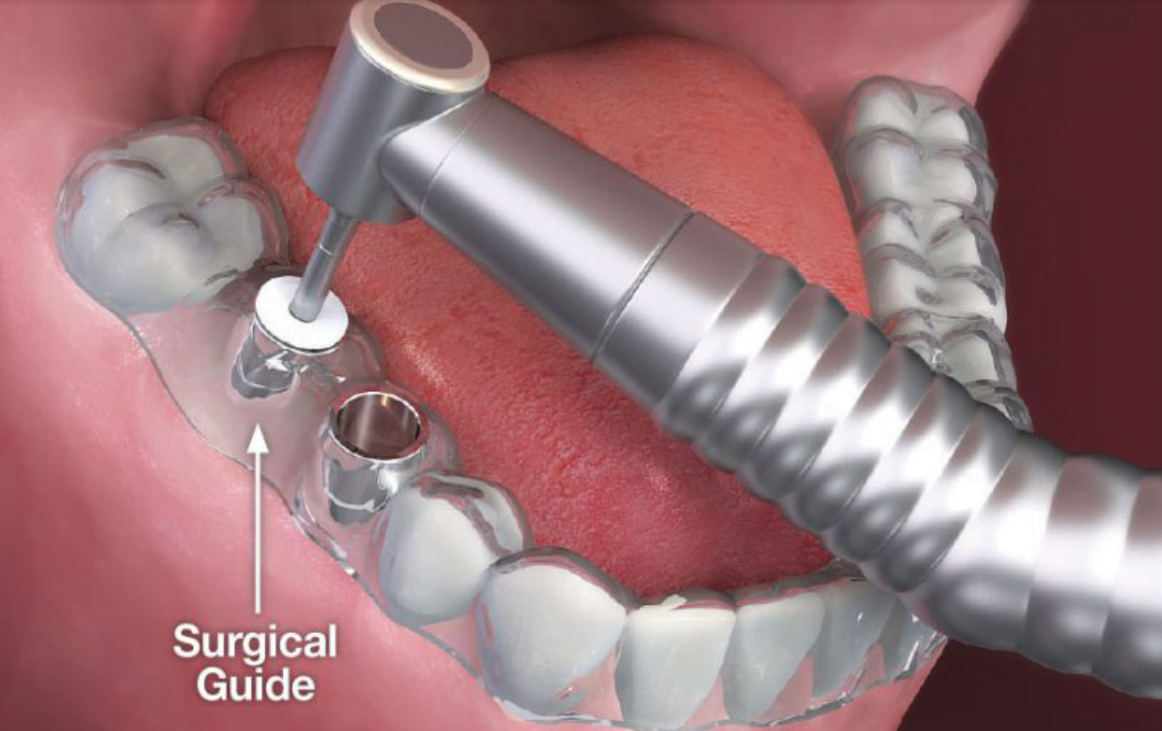
In the implementation process, the surgical guide will guide the drills. And later on, it will guide the implant to be inserted in the same position as we placed in the model digitally. So, this way we can ensure that the implants will be right under the crown and everything will go smoothly.
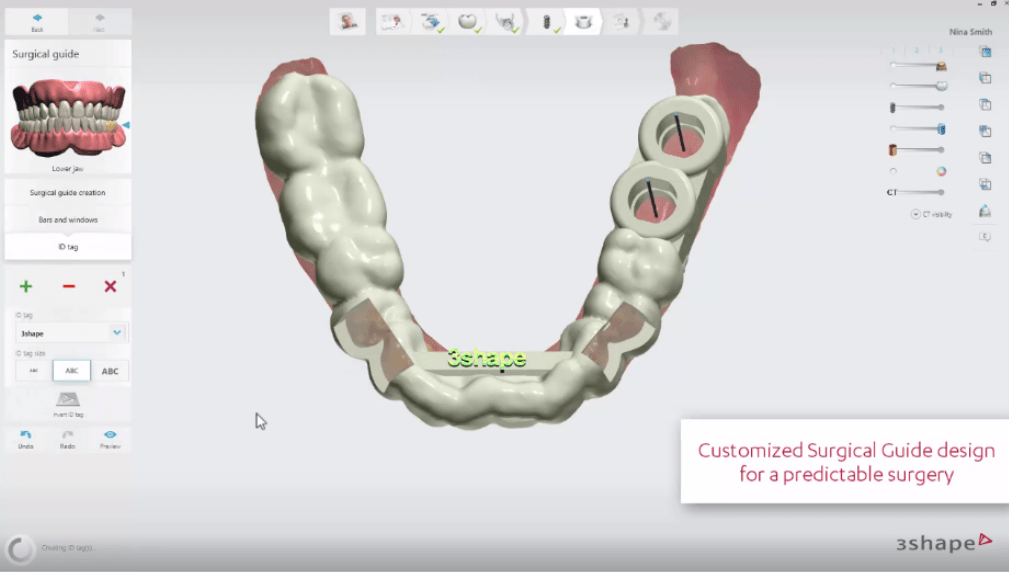
In here, you can see the program exported to our guide. You can see two places for two implants as we design those two crowns. You can write the name of the patient. You can do everything with the guide. It goes onto his teeth. And then you just drill through the guide, the surgical guide, and place the implants also through the surgical guide.
In here, you can see the surgical guide. You can see place for two implants.
You just put it on the patient’s teeth and you drill through the surgical guide and then place the implants also through the surgical guide.
The surgical guide is printed from some kind of plastic that you can sterilize before the procedure. And in the surgical guide, you insert metal sleeves for the drills to go smoothly through the surgical guide.
How to adjust the abutment to size if you need to make a cement fixation
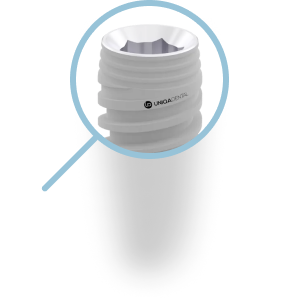
Now, in the last part, you have the implant in the jaw. The doctor makes an impression. He sends it to the technician and the technician needs to design a crown for this implant.
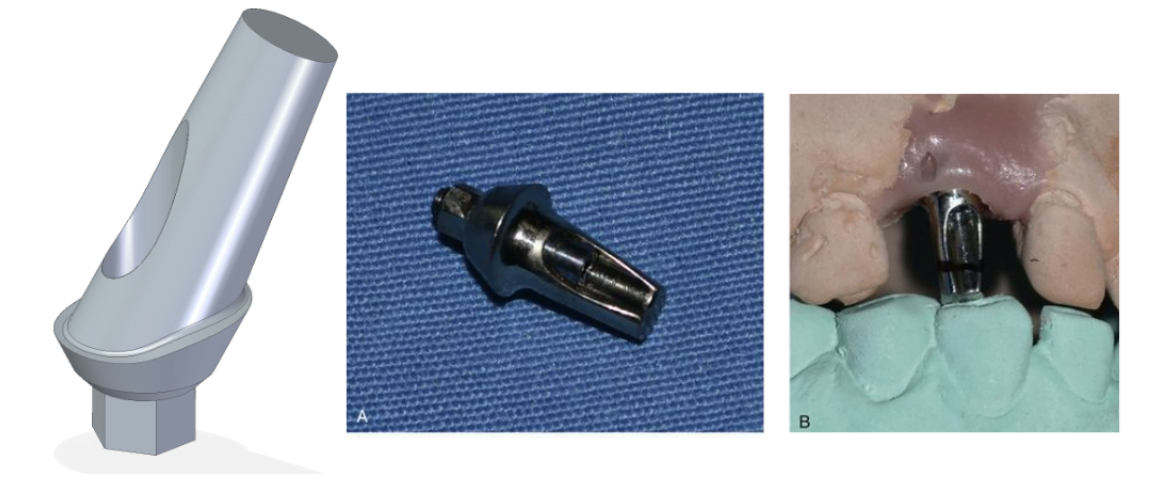
I’m going to show a cementable crown in this case, because it’s the probably easiest to explain. In these cases, we have one implant and we want to have a restoration on one implant. So, we take a metal part, that’s called an abutment. The abutment, it serves as the crown of the tooth. If we wanted to make a crown on a tooth, we will make a preparation of the tooth.
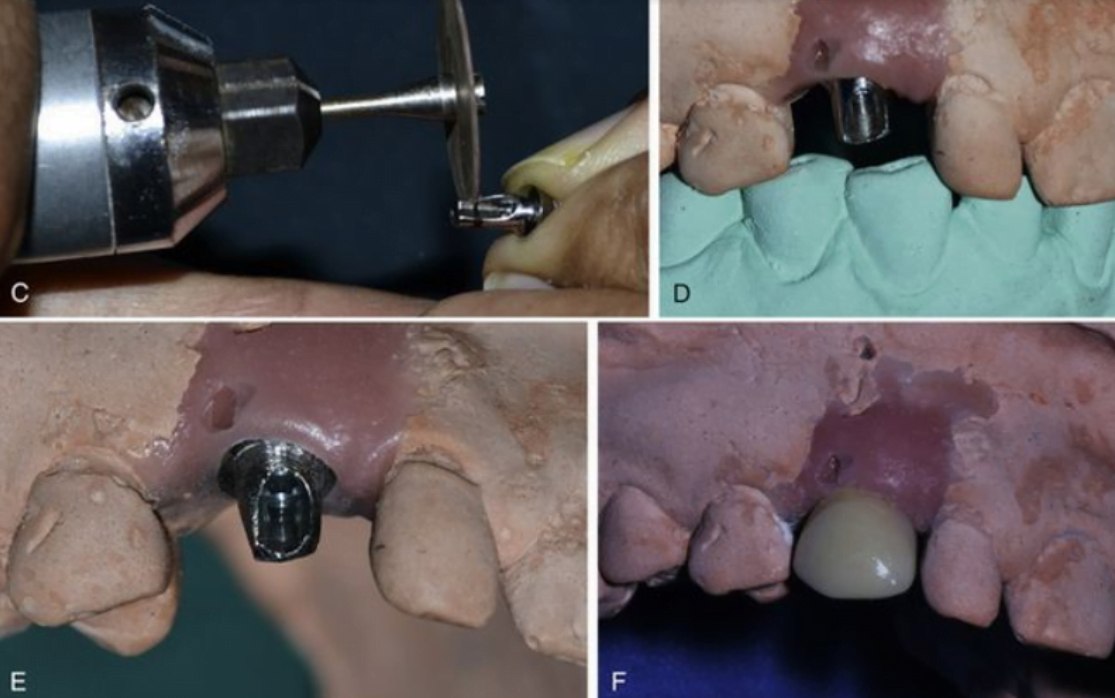
The preparation would be conical, and onto this cone, we would cement or glue later on the crown. So, in this case, we take an abutment that was a prefabricated in the factory. The abutment fits the implant. The abutment comes in a much higher version. You can just cut the abutment.
And then by the design of the abutment, you can make the crown itself. So, you just cut the abutment, you measure the height of the abutment, you process it a little bit, and then you just make the crown in the end. This crown will go into the patient’s mouth.
On the slide, this is a model, but then in the next step, which we do not see here, the technician sends the crown with the abutment to the doctor. The doctor assembles the abutment onto the implant and cements the crown.
I hope you enjoyed today’s video. I hope it enlightened you. Have a great day. Don’t forget to like, share, subscribe, follow, send us your interesting cases. And we’ll see what Dr. Yaniv has to say about them.


