Cemented restoration vs Screw Retained restoration in lack of space
Hello everyone – welcome to the Uniqa Dental channel – in this section we introduce new procedures in the field of dentistry and discuss interesting clinical cases to show how doctors use our products to solve complex dental problems. Don’t forget to subscribe and follow us to stay updated! Today, Doctor of Dental Medicine Yaniv, who teaches at Gerber University, helps us. So let’s get started.
What is the complexity of the clinical case
Today we’re going to take a look at a case where we didn’t have enough space due to two things – the first is the position of the implants & the second is due to the lack of space between the gingival & antagonist teeth.
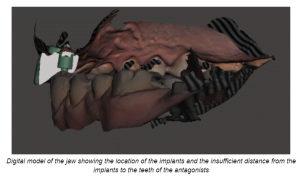
This happened because the position of the implants were very palatal. Due to the position of the implants, you don’t have enough space between the implant and the antagonist. And in the buccal area you have enough space. But, for the abutment itself you don’t have enough space to position and make the crowns.
Now, if you want to make a cemented restoration than you may not have a strong enough base to hold the crown because of the fact that you won’t have enough surface for the crown & the abutment itself. Due to this, you need to use a non cemented solution and in this case – the doctor used the screw retained restoration.
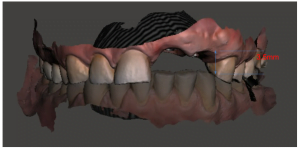
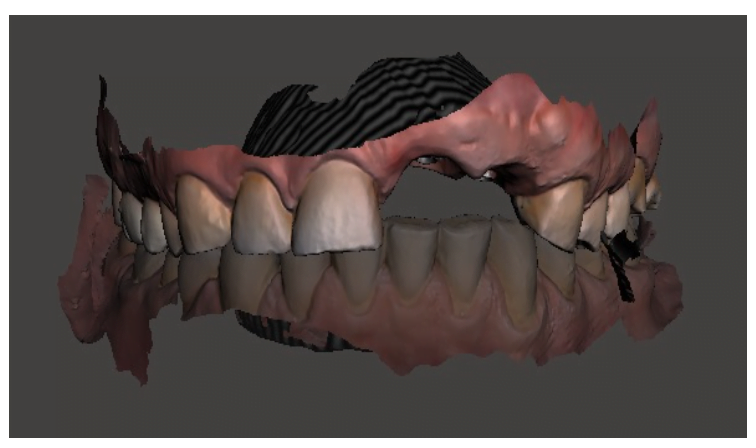
The height from the base of the implant to the antagonist’s tooth is only 3.5 mm, and this is very small
In this particular case – we need to analyze this in two aspects: the first one is the height. If you choose between cemented restorations and screw-retained restorations, one of the biggest advantages of the screw-retained restorations is the fact that you don’t need enough height for the abutment. In a cemented restorations, like you see here, you have three and a half millimeters from the gingiva, so you’ll have an abutment for two and a half millimeters. Now to cement something on a two and a half millimeters abutment is going to probably fail because you have de-cementation almost always.
In this case you have to do a screw-retained restoration. Screw-retained restorations you have two types that you can use. The first one – you can do a PFM bridge on those two implants, and the second one is you can do a zirconia bridge. PFM bridge – because it’s in anterior positioning, will probably not be the best idea because you`ll have some greyness in the gingiva, and in the frontal teeth you will want it to be as esthetic as possible.
In most cases, when you choose between cemented and screw-retained in the frontal areas, the inclination of the implants goes buccally. So, if you want to have the best result, you probably would use the cemented restoration, because in the buccal area you’ll have the screw channel, and the screw channel is closed with composite. Over time it changes the color, and it’s going to be problematic.
In this case you`ll have the implants quite palataly. Which might also cause a little bit of problem, but we still want to have the screw channel palatal. But if you use cemented restoration, let’s forget about three and a half millimeters for cementing, the finished line is supposed to be around the gingiva, because you don’t want to cement the crowns in this case above the gingival line. Because you have the residues of cement around the crown it’s a little bit harder to clean it up and you’ll have inflammation. SO this is why this case is the perfect case for screw-retained restorations and not cemented ones.
Now, we know today that more and more people want zirconia because it looks nicer and much more esthetic. Zirconia crowns are not screw-retained directly to implant. In zirconia crowns you have some cementation, because if you screw onto zirconia, you’ll have a problem. Most likely, the zirconia would break, because it’s a more ceramic like material. So you need to cement something into the crown.
However, when you’re using zirconia and you’re milling with CAD/CAM – you’ll have zero degrees between the sleeve that goes into the crown and the preparation of the crown itself, so It’s a much better option than cemented restorations.
How was the problem with the restoration of the dentition solved
In this case when you’re making zirconia you’ll have it on multi-units – then on top of the multi-units you’ll have a sleeve and then the sleeve would be cemented to the zirconia. So, in here, when you have the three-and a half millimeters between the gingiva and the antagonists – you’ll probably use a three millimeters sleeve.
However – It’s not a standard height, the standard height is about four to four and a half millimeters, but for this case the best option would be to have it a little bit lower. The cementation can be a little bit more problematic – you’ll need to have retention inside the crown which you would with your hands using a small burr before the cementation and then you’ll cement the sleeve and then it will hold perfectly. The height shouldn’t be too big of an issue as long as you have a passive fit, the right cementation with the right material & everything will go smoothly.
I’m sure you’re wondering if you’ll have enough space for a zirconia crown so let’s get into it. In most cases – no. When you’re using the screw-retained restorations, in standard parts – the minimal height of the multi-units is around one to one and a half millimeters. There are companies that the minimum height is one and half millimeters. So when you have about four millimeters you can’t do screw-retained restorations at all on multi-units. And the minimal height of the sleeve is about four and a half, so the minimal height that you’ll get all in all, including the multi-unit and including the sleeve – you’ll have about five or six millimeters.
In this case – the multi-units that were used were zero point five millimeters, and the sleeve is three millimeters. So the height of the metal is about three and a half, and you’ll have a little bit more for the zirconia. The thickness of the buccal part is good enough to have a great esthetics and on the occlusal part – you’ll get around zero point five millimeters for the zirconia – which is fine but it’s not the best. It also won’t affect the esthetic at all!
So this case was probably made with the smallest multi-units and the smallest possible sleeve that can be done. Because of this – you can in four millimeters – have the screw-retained restoration on multi-units, something you can`t do with standard types of multi-units with sleeves.
You’ll have great esthetically pleasing results due to the multi-unit position which is quite palatable and you’ll have a lot of buccal space for the esthetics. The only problem in this case if we look at it is the palatal position of the implants or in other terms – the angle of the implant.
If the angle was a little bit buccal, you could have made a cemented restoration, and it would have been really nice. But in this angle it’s impossible to have cemented – it’s very hard to have screw-retained restoration, doesn’t matter what type of restoration. So in this case, the only option is using these parts if you want to have a good esthetic with the zirconia bridge.
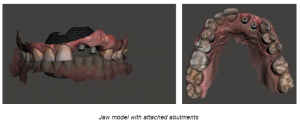
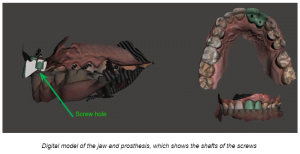
In addition to all of this, scan abutments were also used! If you want to have zirconia – it’s impossible not to use scan-abutments. Everything is digital. You can see by the models that it was made on an Exocad, and the bridge was designed and later milled. You can’t do zirconia without scan-abutments.
But don’t you worry – Intra-oral scanning and CAD/CAM is an interesting topic, and of course we will be doing a whole other video about it but for now, Thank you everyone that joined in to learn some new & interesting information – make sure to stay tuned for more and of course don’t forget to subscribe, like and follow! Thank you & see you next time


![Drilling procedure for UNIQA Dental Pure & Porous Implant UH8 UV11 [ 5.0 mm | D4 bone density ]](https://img.youtube.com/vi/Jb9a4saRWbI/maxresdefault.jpg)


