Do you need to use a Ti base? The different types of dental parts & digital impression
Hello everyone – welcome to Uniqa Dental. We are here discussing new procedures in the field of dentistry. Today will also be an interesting occasion to show how doctors use our products to solve complex dental problems. Today, Doctor of Dental Medicine Yaniv, a lecturer at Gerber University, is helping us. Don’t forget to subscribe and follow us to stay updated! So let’s get started.
Analysis of the patient’s clinical condition
Today we’re going to show a case for when we want to make a restoration on a single frontal tooth. And in these cases, if we want to make the restoration from the cornea, the only part that we can use is the T-bases.
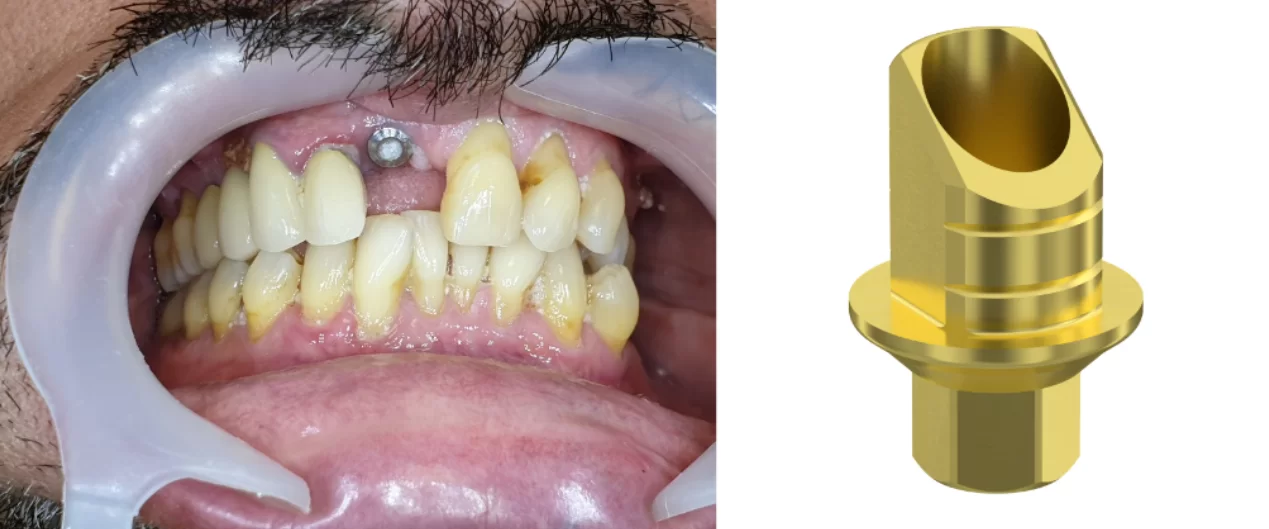
We’re going to show different types of parts and where we can use each one. In this case, we used a T-base with an angulated top, because you can see already here that the implant is buccally inclined and the screw channel will come right in the middle of the tooth. If you won’t change the angulation of the screw channel, it would come out right in the middle of the tooth. So, in this case, we wanted to show that we don’t always need to change the inclination of the screw channel to the palatal area, but sometimes when we have a level smile line, we can angulate the screw channel, not palatally but buccally, and this way, when the patient smiles, you won’t see the screw channel at all.
You might be wondering, since we’re only making one tooth restoration on one implant, will it hold on a single tooth? The answer is yes, it will hold. But because it’s only one tooth and only one implant. Typically, we don’t want to do immediate loading with one done to make the implantation and right away the restoration. If we are going to make it, we’ll want to have a smaller tooth that won’t touch anything because in all types of movements, in eating, speaking or chewing gum, you have big forces applied on that single implant. And the highest failure rate in implants is probably in the immediate loading in the frontal areas.
In this case, the most important part is when you use a T-base, you want to make sure you have a T-base with a hex with an anti-rotational element between the implant and the T-base so it won’t rotate. If it won’t rotate, it won’t unscrew. If you have a round T-base, for a single implant, it can rotate, and these micro movements can unscrew the screw, and the crown will start moving. When the crown starts to move, if the patient bites on the crown in the wrong angulation, you can break the implant or even break the screw in the implant. You can have a ton of failures. And in some cases, you won’t be able to restore this implant.
How to make a digital impression for a T-base abutment
Let’s talk about how we took impressions. We took impressions with the intraoral scanner. You can see the scan abutment and the positioning of the scan abutment in the mouth.
This case is probably the ideal case for the restoration to learn how to use the intraoral scanner, because you have all the teeth, you have only one scan abutment, and you can scan it quite easily. You won’t have any interference between the teeth and the scan abutment. In many cases, when you have only one implant and when you have an approximation between this implant and the tooth, you have a problem with the scan abutment because the scan abutment won’t fit. It would touch the tooth.
And if it touches the tooth, you’re not sure that the impression you’re going to take is accurate. Maybe you’ll have an inclination of the scan abutment, for example. So, you take off the scan abutment. These cases aren’t good examples for that. It is a perfect case for first time users with intraoral scanners. All the scanners probably can take impressions for a single implant, even the old ones. However with the new ones, you can just make the restoration using libraries and it will be simple. And you get to know how to use the intraoral scanner.
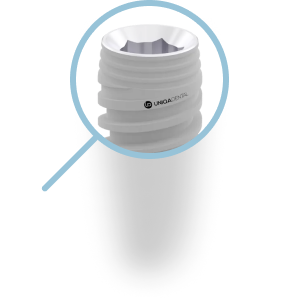
If you take impressions on a single implant, you have to take it on implant level because you need to know the orientation of the hex. Everything is based on single tooth restoration & on anti-rotational elements. You must have an anti-rotational element between the implant and the T-base. In this case, it’s a hex, it’s an implant with the internal hex and you have a hex in the T-base. You have later on, an anti-rotational element between the T-base and the crown. The T-base is not round all along. So, you need to have anti-rotational elements between each of the parts. So, if you use scan abutment, you have to use it on implant level, and to have a scan abutment with a hex. If you don’t have a hex, you don’t know the orientation of the screw channel, and the ground will be rotated.
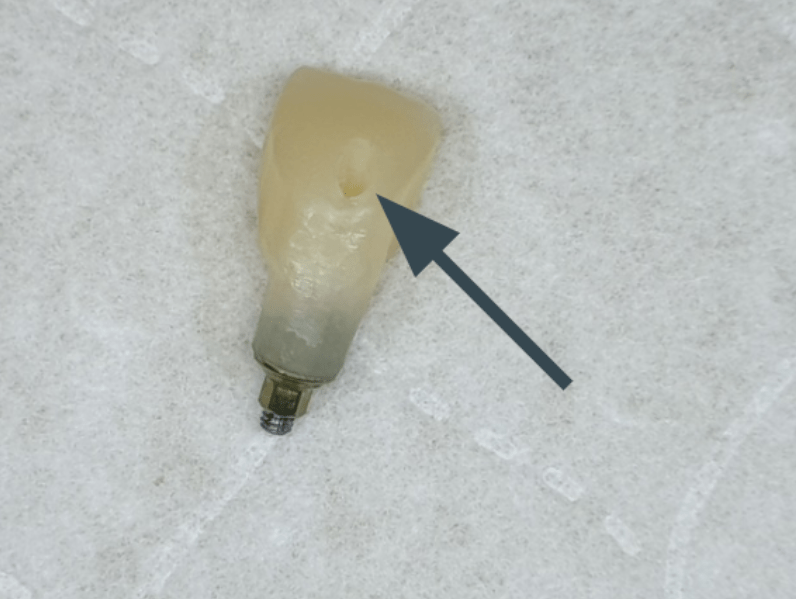
In here, you can see the provisional crown, the PMMA crown that was made on the T-base. You can see the screw channel. It goes right in the middle of the tooth. And because you have buccal inclination and the angulation of the tooth is parallel to the implant, the screw channel looks much bigger because the cut of the screw channel is elliptic. You can see in the left simulation that if you cut the screw channel angularly, you’ll have an elliptical screw channel. So, the surface of the screw channel will be much bigger and you’ll have a bigger problem for the screw channel, because you need to mask it, you need to close it or it will be seen.
And in this case, the screw channel will be right in the middle of the tooth. So, here, what we wanted to do is we wanted an angulated screw channel, not palatally because in this case, you don’t have enough space to angulate it more palatally. You can’t angulate it right to the most palatal area. In this case, you want to angulate it to the opposite direction, because if you angulate it to the buccal part, this screw channel will go up. And the surface cut of the screw channel will be much smaller. So, if the patient doesn’t have a high smile line, the screw channel won’t be seen at all, and you won’t have an aesthetic problem.
With time, maybe you need to change the material that you closed the screw channel, because it can absorb pigments, it can have slight color change. If the patient has a high smile line, you don’t see it. So, if you have a slight color change, it doesn’t matter because you need to raise the lip.
We got feedback regarding confusion on what part to use in which cases, so let’s elaborate. We have different parts for schooling restoration for different types of cases. So, you have the T-bases and you have the multi-units.
We’ll use the multi units for cases when we have bridges, not for single crowns. We would never use a single crown – we would use a multi-unit, because we don’t have anti-rotational elements between the multi-unit and the implant for straight ones. In straight multi-units, as we spoke about before, we need to have anti-rotational elements between the implant and the abutment and between the abutment and the crown. So, in straight ones, you see that you have a thread and you don’t have any anti-rotational element between the multi-unit, which is the abutment and the implant. So theoretically, the multi-unit can rotate and then unscrew.
In the angulated multi-units, in most of the cases you have hex. You have an anti-rotational element between the multi-units, which is the abutment and between the implant. The multi-unit won’t unscrew from the implant, but in the upper part, you don’t have any anti-rotational elements, so the crown can unscrew from the multi-unit. From all the multi-units that we know, you can’t use the angulated multi-units, and you can’t use straight multi-units for single crowns. For single crowns, you can only use the T-bases.
Now, you also have two different types of T-bases. The T-bases we’re talking about when we want to have a single crown is the T base when we have a hex between, which is the anti-rotational element between the implant and the T-base. And we have some anti-rotational element in the upper part in the connection between the crown and the T-base. You have a variation of the T-base where you don’t have a hex, but you have a round surface, and you can rotate the T- base according to the implant. So, these T-bases you can’t use with single crowns, these T-bases you would use when you have parallel implants, and you want to make a bridge on T-bases.
The upper part of the T-bases also has a cut. You want the cut in the buccal area because when the implant is buccally inclined, this corner of the T-base will interfere with the design of the crown. You won’t be able to move the crown palatally to have it in the arch. You want to have the crown in the arch, so in most cases you just need to manually remove this part. In this T-base, this part is cut. So, you can just place the T-base with the cut part to the buccal area and go forward with the design of the crown.
Let’s talk a bit about the differences between the V-type and the D-type. The D-type is a more standard type of multi-unit. You have a straight one and you have an angulated one. That means that you can use the same sleeve for both of them, and you have the same screw for both of them. So, you can make a kit that has one type of sleeve, one type of screw. You have the different heights of the straight multi-units, and you have different heights of the angulated ones. But you can connect/assemble everything with everything. You use one type of sleeve and one type screw in different types of multi-units.
In the V-type, it’s not the case because for the V-type, you have different types of sleeves because the V-type is intent for cases when you don’t have enough space, or you want to make a metal base structures, and you want the base of the structure to be as small as possible. So, you have different types of sleeves. You have small sleeves, you have sleeves from one and a half, two, three, four and six millimeters. You have different screws between the V-type and the D-type. So, if you have a case that you don’t have enough space, but in the posterior parts you need to use angulated multi-unit, for example. You’ll have two types of screws. It can be confusing a little bit because the screws look kind of the same. It’s hard to know what screw goes where. It leads to different types of mistakes.
Now, you can use the T-base without the hex for multiple implants, but they need to be parallel because you won’t be able to feed the bridge on top of these multi-units. But it’s not always recommended because you don’t know the angulation of the implant. You can use the V-type with the D-type, but in this case, you need to write everything down in it. You need to know what goes where, because it has a lot of different parts and a lot of different parts leads to a lot of confusion and can lead to mistakes where the doctor doesn’t know what goes where, and the bridge doesn’t fit and he doesn’t know why.
So, let’s get back to our case. This is the temporary restoration. You can see the crown color is not perfect.
It was made from PMMA. The screw channel is closed with composite material. You can still see the difference between the screw channel, probably because the picture was taken with a lot of light. You can see it probably if the patient smiles, no one will see.
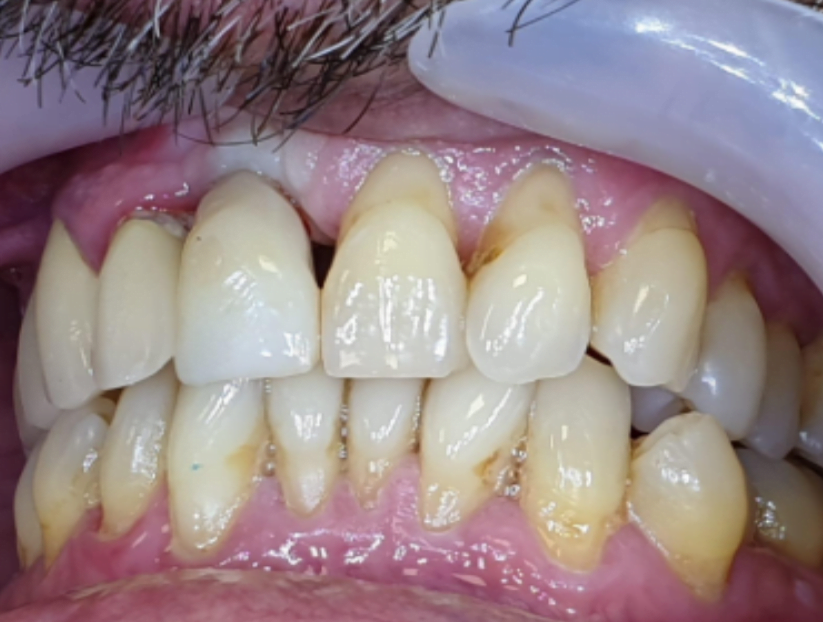
In there you have less light. You almost can’t see the screw channel. That’s why we moved the screw channel not palatally, but buccally. We raised the screw channels, so even in the highest smile that the patient has, you won’t see the screw channel. You can see here that the crown is not in the arch with the implants because the lower teeth interfere a little bit, but the design of the crown will probably be the same. We will want to move the crown a little bit palatally because we want to mask the difference between those two teeth. And we want to have them on the same level. So, that’s what we talked about before. The T-base corner is cut. So, the cut gives us the option to move the crown palatally. Which gives a more aesthetic look. Now because of this option, we can move to the same level as both of the crowns. And here you can see the cornea crown. You almost don’t see the screw channel.
Now maybe in a few years, five, 10 years you’ll want to change the composite material that closes the screw channel. But in the next few years, it won’t be seen. Even when he smiles, you don’t see it. You can see that in the final work, we moved the crown because we had the space in the buccal area. We moved the crown more palatally so those both teeth are almost in the same level, even though the original teeth were not. You don’t see it at all, you can see in the reflection that it’s not exactly flat.
Thank you everyone that joined in to learn some new & interesting information – make sure to stay tuned for more and of course don’t forget to subscribe, like and follow! Thank you & see you next time

