Prosthetics in dentistry | There were 4 dental implants, to which we added another 2 | All on four
Hello everyone – welcome to the Uniqa Dental channel. Here we discuss new procedures in the field of dentistry, using interesting cases as examples. Complex clinical cases are well suited to show how doctors use our products to solve complex dental problems. As always, Doctor of Dental Medicine Yaniv, who teaches at Gerber University, helps us. Don’t forget to subscribe and follow us to stay updated! So let’s get started.
Overview of the clinical picture and installation of additional implants
Today we’re talking about a case where the patient has upper dentures that are based on implants & we’ve also added some implants, taken impressions & made the bridge. Here you can take a look at the upper denture.
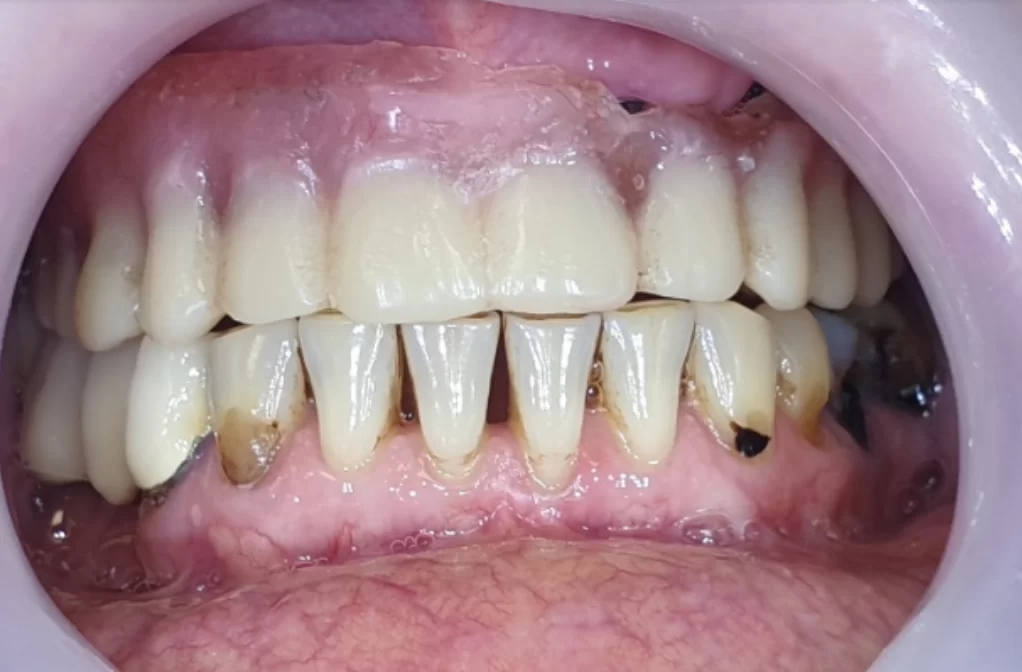
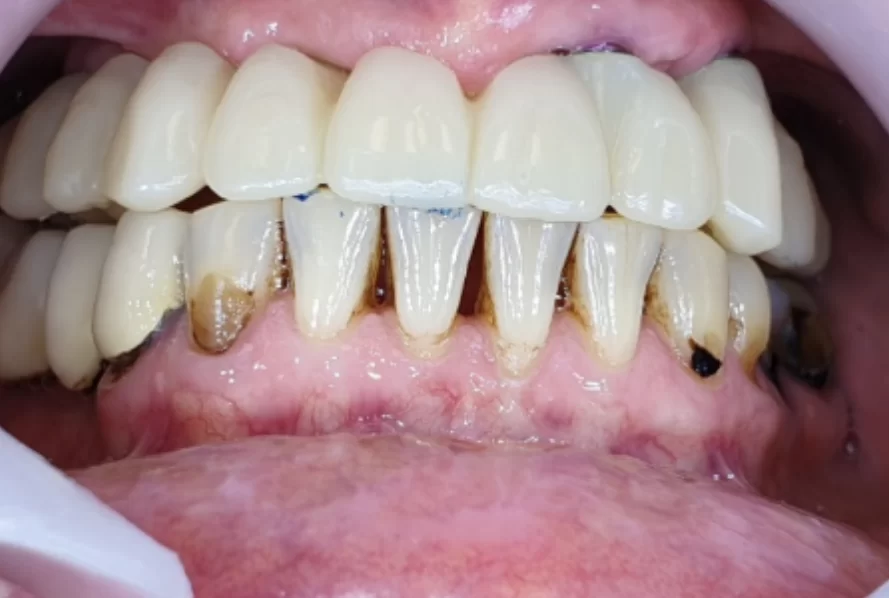
The old prosthesis with which the patient came – there are chips and gaps between the teeth are poorly expressed
Now the patient wasn’t pleased about the esthetic aspect of her teeth. You can see that it’s chipped in certain places & to be fair – the esthetic is not so great. You can’t see any separation between the teeth, the dentures are very old & she wanted a change. Here you can see the difference it made by adding some implants & how much better it looks.
The old prosthesis with which the patient came – there are chips and gaps between the teeth are poorly expressed
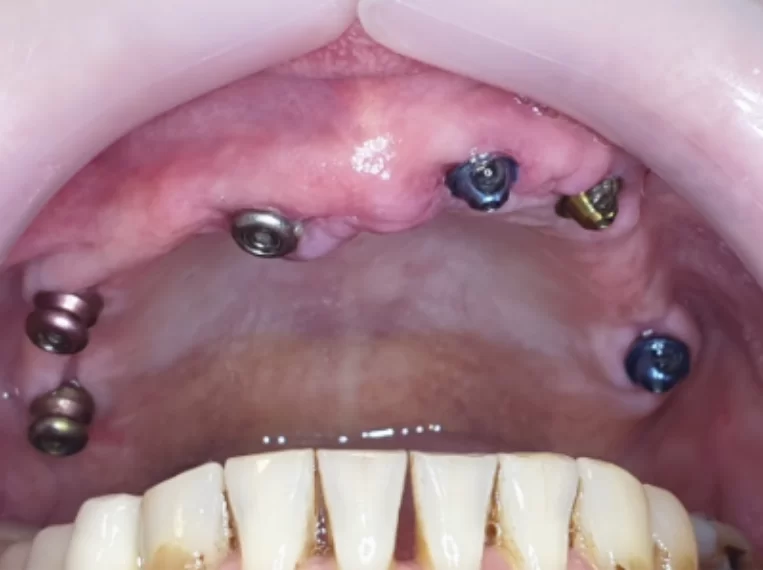
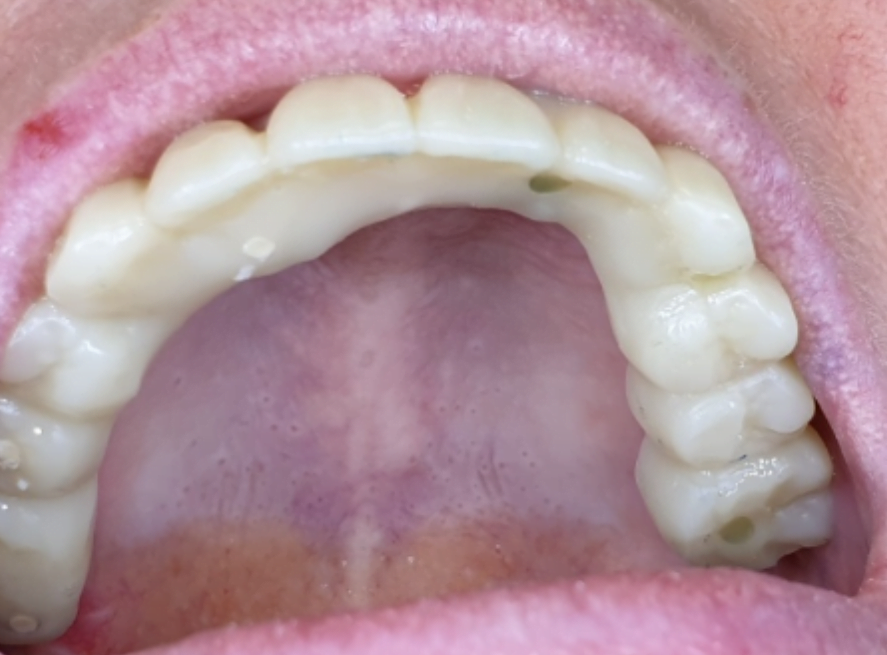
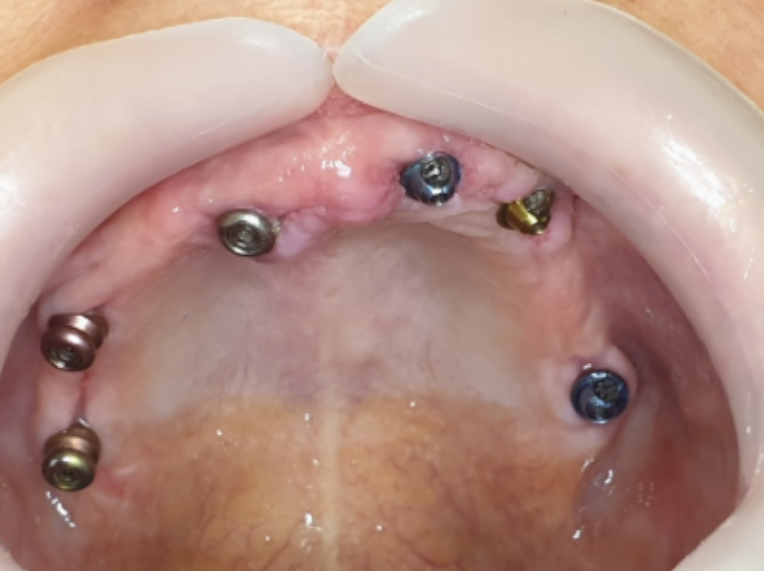
We have about six implants, you can see those three are angulated and those three are healing caps on a straight multi. So all-in-all six implants, three angulated, three parallel on straight multi-units. Those two were added, those implants are the old ones, so we’ve added two implants straight, they were added pretty good with the proper angulation. In the end of the case you’ll see the problem with angulated multi-units because they will have some buccal bulge and you see the multi-unit. But In this case you don’t have another option. It’s either the bulge or you have a screw-channel going from your frontal tooth.
How the problem of taking a quality impression was solved
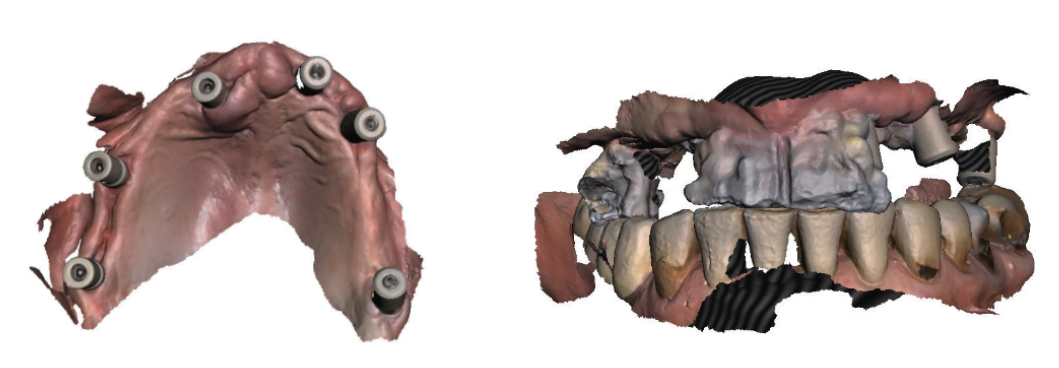
When you’re taking impressions on a toothless jaw – you have a problem because you don’t know the relations between the impressions. Realistically, you can make really good impressions of the upper jaw using only scan abutments however you won’t have any relation to the lower teeth. So how can you make a bridge without the proper relations? Well actually this is where the CAD/CAM technology really helps us out because we are able to take different impressions. We can take impressions of the upper jaw & also have all of the palatal surface – so that we are able to correlate different impressions using the palate. Which would be very difficult to do if we’re taking traditional impressions.
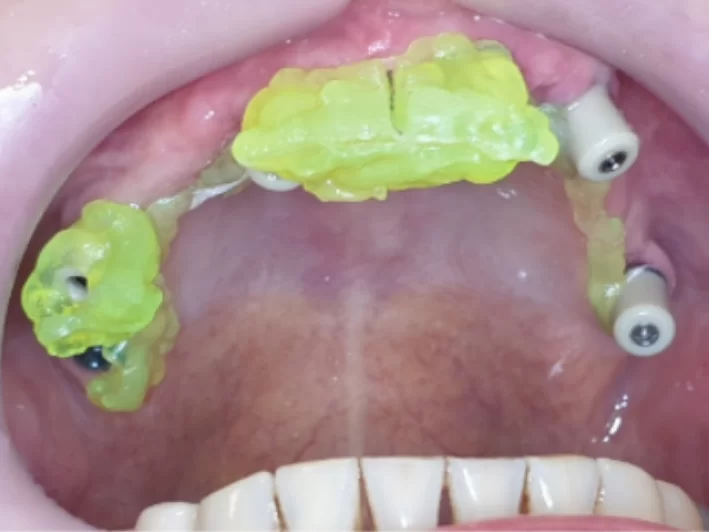
So, here you can see different parts that were used. First – you can see scan-abutments, the white ones you can see the composite material that was used to take the relations between the jaws central line. At first, we took the impressions just with scan-abutments on multi-unit level. We have all the information but we don’t know what tooth we need to do, we don’t know anything because we don’t have relations with the upper and lower jaw.
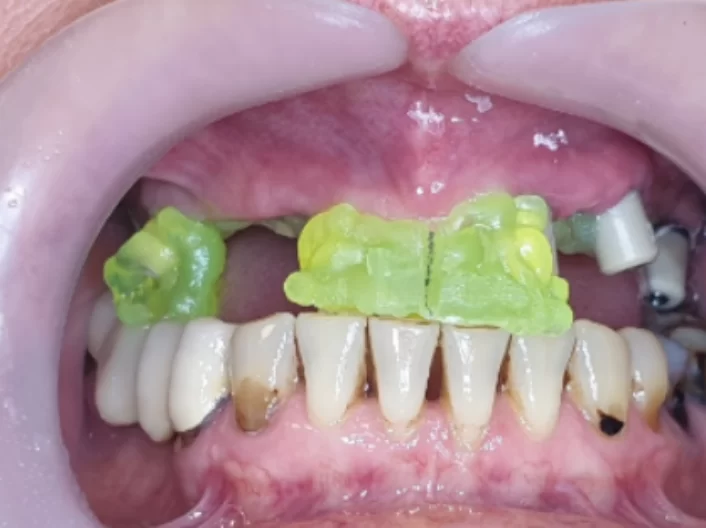
Here are some of the scan-abutments we covered with a composite material. The greatest advantage of the composite material is that it’s very hard – so the patient will close his mouth each time the same way. When you use wax you have a problem because it forms. Each time he closes his mouth he closes a little bit differently. So, in here when we use the composite material we just cover the lower teeth. We know the height that we want, we can see how the patient closes his mouth, his lips, all the soft tissues, and this is how we know what to do.
When you use wax – in most cases you use a very thick plate of wax and you don’t have any soft tissue management – you don’t know how the lips would be, you don’t know the height, you don’t know how the soft tissues in relation to the wax will be. In here the composite is very thin. He just closes his mouth on the composite and that’s all. You don’t need to cover all of the scan-abutments, you just need to have the relations.
With composite material we will have all the indicators that we need.
We believe that in many cases this material is much better than wax. You can have much better results, you will have the consistency of the closure of the teeth. You have the same result each time.
From this type of scanning you can extract any type of information you want. Because if you want the midline – you can just mark it and then scan it – you have the midline, like you see here. If you want to know where the canine is supposed to be – you can add a little bit of composite and mark. You know the height because the upper and lower jaws are in occlusion. You can have any information you want – you even can mark the upper teeth if you think they need to be mark separated in the end. You scan it if you use intra-oral scanner with colors – you can just mark it with a pen. It will scan the color and you’ll know all the information you need.
The final result – a zirconium prosthesis and installation in the patient’s oral cavity
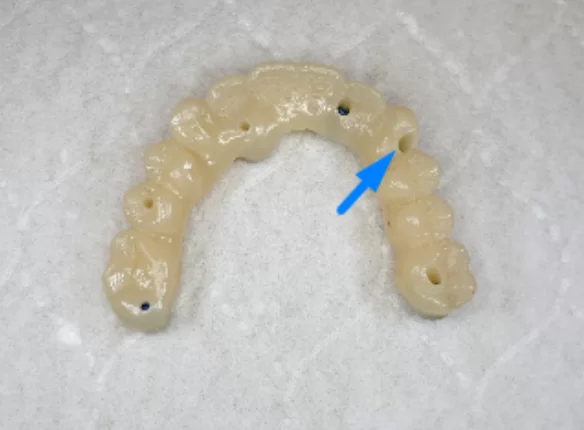
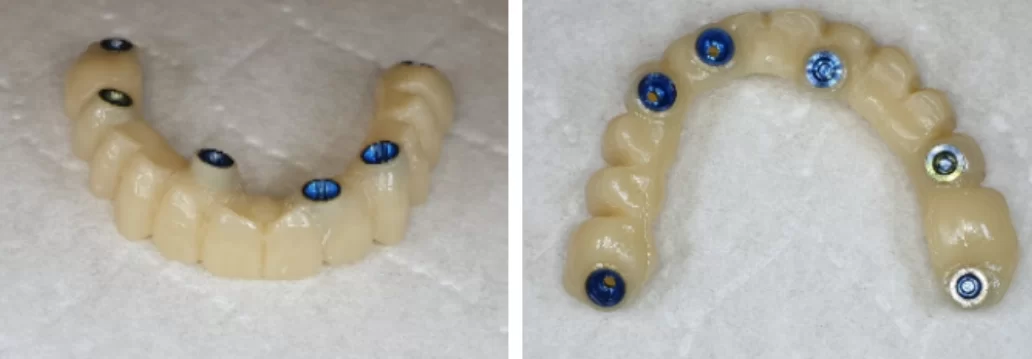
Later on you just make a bridge on those scan-abutments. You can see we have here three angulated ones like we`ve said before, that we used to correct the angles. We have three implants that we`ve used on a straight multi-units. Both were used with a standard sleeve of four millimeters. You see all the screw-channels, except this one which is perfect.
This one we`ve already used angulated multi-unit so we can have much better result but because its a distilled canine, you don’t see the screw-channel, it’s still not like screw-channel goes from the buccal of the frontal teeth. You can see that you have from the start quite good occlusion without touching anything. You see the teeth exactly as we placed them. You can see the angulated multi-unit.
Like we said we used the angulated multi-unit but you still see a little bit of the metal. You have to compromise when you have angulated multi-units. On the one hand you don’t want to have a screw-channel going out of your frontal teeth, and on the other hand we didn’t really have a choice – she has enough gingiva and it’s much better not to have screw-channel going from right here so we used an angulated multi-unit. We saw in her smile that you don’t see this metal and from an esthetic point of view it’s a good result because you don’t see anything.
All-in-all the bridge is in occlusion, but you have a great occlusion from the start. This is the temporary bridge. After that you’ll have to wait for adaptation, you need to have some corrections. This is why taking impressions with the intra-oral scanner, making two impressions – one impression clean, the other one that with composite material and comparing one to another – gives you good results. You’ll have all the information you need – if you look on the midline it’s like what you have on the impression. You have a little bit of the shift to the right side of the patient but there is the slight shift in the lower teeth. So in this case – it’s a great result.
Thank you everyone that joined in to learn some new & interesting information – make sure to stay tuned for more and of course don’t forget to subscribe, like and follow! Thank you & see you next time
