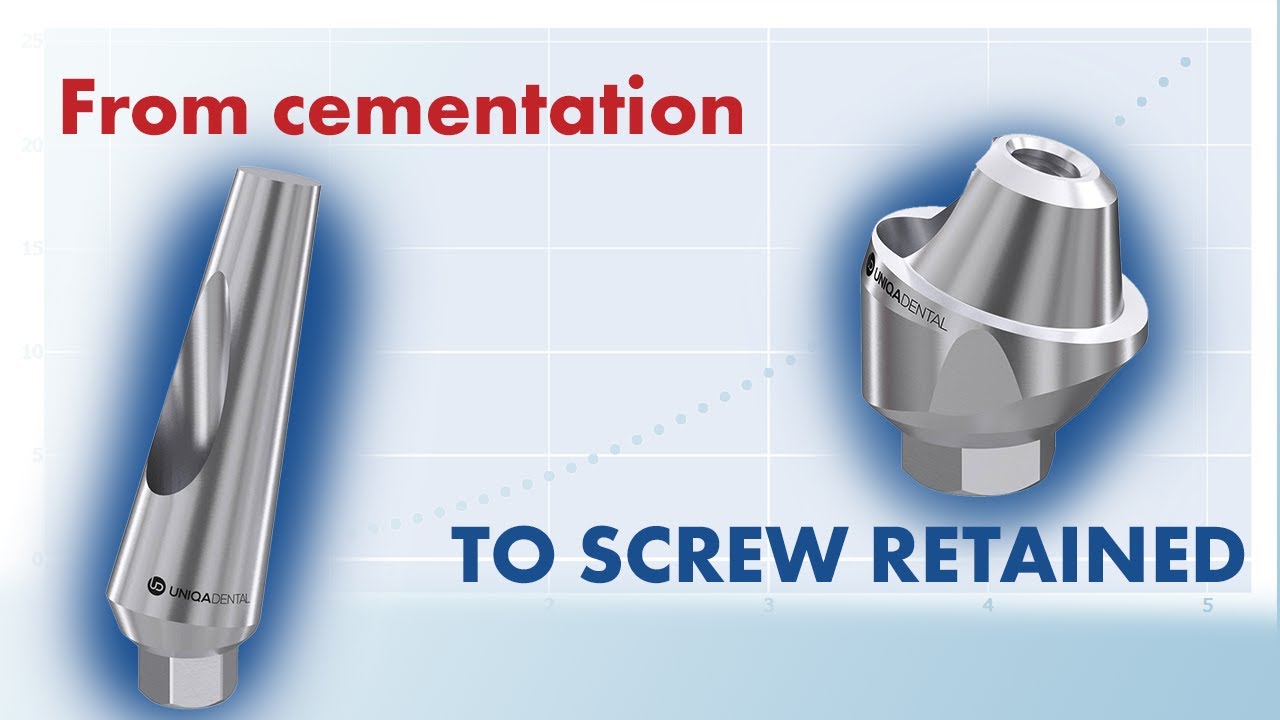
We typically recommend doing THIS with screw retained instead of cemented
Welcome to Uniqa Dental. We are here to discuss new procedures and interesting cases in the field of dentistry. We break down unusual cases to show how doctors use our products to solve complex dental problems. Today with us is Doctor of Dental Medicine Yaniv, who teaches at Gerber University. Don’t forget to subscribe and follow us to stay updated! So let’s get started.
Reason for removing the prosthesis
Today, I want to show some inflammation around the implants and around the crowns, and how you need to maintain it as a dentist. As a doctor, you take the crown and clean it. In these two crowns, you can see it’s a bridge of two implants.

Inflamed gum around one of the implants
You can see the inflammation in the gingiva & you can see it’s swollen a little bit and that the color of it is red. What we want to do is a little maintenance for the gingiva & for the crowns to return to a good condition and then move from there.
Basically what we do is, take off the crowns and clean it a little bit with a brush. Leave it like that for about a week or two for it to heal by itself. Then clean the crowns and put them back in. In the meantime you can switch from multi-unit to healing cap.

Healing caps installed on implants for the period of gum healing
You can assemble a healing cap on top of the multi-unit. The best thing is not to leave the multi-unit exposed because you have a thread in the multi-unit. And if some food or residues of something goes into the thread, they can harm the thread. And then you’ll have a problem in certain back disc crowns.
We typically recommend doing this with screw retained instead of cemented because with cemented you may have a problem. In order to take off the crowns you might have to break the bridge to remove the crowns. You can’t be sure that you’ll be able to remove the crowns right away. In extreme cases, without breaking them, you need to make a hole inside the crown, but when you go back to them, it’s like screw-retained. And you need to blindly search for the screw. So, you can have a huge screw channel by the end of this process, when you’re looking for the screw channel.
The patient underwent the CT x-ray, so you can see both of the implants. You can see the multi-units, the height of the multi-units.

A picture of implants with a bridge that shows a slight loss of bone tissue
This is a smaller multi-unit. This is a little bit larger multi-unit. You can see two crowns. You can see that between the implants, there is some bone absorption, but still the implants are in the bone. You don’t need to take out the implants. You don’t need to do any extreme procedures. You just need to take off the crowns. You need to clean this area and you need to put back the crowns.
We do an xray to see the condition of the bone and to see the condition of the implant. You can check with probing. You can see the depth of the pockets around the implant, but an x-ray is always best because you can see the height of the bone. You can see if there is a big recession or some other problems, because if you lost all of the bone and you have a one millimeter in the end of the implant, you can clean that up. In about a couple of months, if you have the same problem, it will be much worse.
All of this is after we took off the crowns. You can see in this slide, the multi-units without the crowns. And here you can see the crowns, and here you can see the healing caps on top of the multi-units.

Multi-unit abutments and removed 2-crown bridge
So why is it not on the gingiva line? Well you see here the inflammation. Probably the multiunit that was chosen a couple of years ago was one height with the gingiva. But with inflammation there, the gingiva is swollen. The gingiva is larger than it was. It went on top of the crowns. The crowns shaped the inflamed gingiva around the multi-unit. And you can see the height of the multi-unit is practically inside the gingiva, inside like three millimeters which is a lot.
She came to us with a problem with the inflammation. Probably it was inflamed around a couple of weeks, maybe months, maybe even a year or more. Here, we just took off the crowns which we just screwed them out. This is the greatest part of screw-retained restorations. When you don’t need to break anything, you don’t need to apply force. You don’t need to do anything. You can take everything out and you can insert it back the same way it was. And you have the same occlusion. You have the same everything. In here, it’s just to take off the crowns. Later on, when it’s healed, when the gingiva looks fine, you just put them back in. Which is a procedure of a couple of minutes. Let’s say it takes about 10 minutes to take out the crowns, put in the healing caps, wait about a month and then screw them back in.
All of this without a scan. You don’t need the scanner because you have the bridge. You don’t need to change the bridge. If you have a very big recession and you want to change the height of the multi-unit, for example, you want to make this restoration from the beginning, you can take impressions, you can do everything. But the question is, if you need, if you can see it, does the patient have a problem with inflammation. Is that all, or does she have some aesthetical problems too?
The question may arise that with a cement restoration you would have to break the bridge.
Not necessarily, you can try to take it out easily without breaking anything. But sometimes it’s a problem because if you have very parallel abutments and the height of the abutment is large enough, you have very retentive restoration. It will hold very strong and you’ll have a problem getting it out, releasing it from the abutments. It can be quite a problem. You’re not sure if you can take it out. For example, if you have screw loosening in cemented restoration, it’s the same. You’re not sure if you can take out the crowns or just leave it there or what you need to do. And if you’ll be able to return the same restoration as it was before.
So, screw-retained restoration is much easier to maintain in the long run. In the long run, there are places that makes screw-retained restoration, and every half a year to a year they take it out, they clean everything, and put them back in every year. So, in cemented restoration, if it’s all on four® out of six®, it’s a problem. You can take it out once, twice. But in the long term, in 10, 20 years, the doctor is unlikely to be able to take it out and put it back in. Without breaking it, because it can be very fragile. The bridge is very long. It’s very fragile.
We always mentioned that screw-retained restoration is easy to fix, is easy to maintain, and easy it to use. But again, the question may arise, if you have only two multiunits here, will it not fall off?
You can have screw loosening in multi-units. You can have a screw breakage, but you have it also in cemented restoration. There are pros and cons in cemented restoration and screw-retained restoration. With cemented restoration, it’s little bit easier to make everything because you have more space between the abutment and between the bridge itself or the crown. So, if it doesn’t fit or you have any problem, you just can take a little bit of the crown. You can check where it doesn’t fit, and you can try to correct it. You, in the worst-case scenario, you use a little bit more cement and everything fits. You’ll have a better fit.
But in screw-retained restoration, you need to have everything correctly. You need to have everything rigid. You need to have everything as much precise as possible. Because if you have some small unalignment, you’ll have a problem with the screws. You can have a screw loosening, screw breakage. But on the other hand, if you have, in the long run, some problems with the restoration and you did the restoration good, where you have a passive fit, and you have everything that you need, it’s very easy to maintain. It’s very easy to remove, to put back in. A lot of issues you don’t have with the screw-retained restoration. It’s probably a little harder to make in the first place, but in the long run, it’s a much more reliable restoration.
You always want to go to the long run. And that’s why the world of dentistry moving through the screw-retained restoration, you have a better machine. You have better scanners. The procedures itself are starting to be more and more precise. So, it’s easier to make a precise screw-retained restoration.
Let’s get back to medical caps. On the next slide, you can see the change in color and size of the gum.

The condition of the gums after the patient walked for some time with healing caps instead of a denture
And the next slide is the already installed bridge after the healing process. You can see the gingiva, the color of the gingiva. You can see it’s little bit of a pinkish white.

Dental bridge where you can see that the gum is healthy, and one of the crowns is very small and it is extremely problematic to perform such a restoration with cement
You can see the height of the multi-units. The height of the multi-units is probably the same as it was before. This one is even a little bit above the gingiva. And this one is a little bit below, but it’s not deep like it was before. Also here you can see that the right crown is very small. The question arises whether cement can be used here.
Probably no, because you don’t have enough space. For cemented restoration, you need to have three, four, five millimeters, at least. Four, at least, maybe. But you don’t have enough crown space from the gingiva line to the height, the highest part of the crown, you can make cemented restoration because you’ll have a de-cementation in the process.
Pay attention to the next slide. In here, you can see the before. You can see the inflamed gingiva, and here you can see the after.

Pictures of the patient’s oral cavity at the time of treatment and at the time of installation of the prosthesis in place after the healing of the gums
Because the healing caps was little bit smaller in the diameter, when we put it back in the bridge, you can see a little bit of pressure on the gingiva. This pressure will go away in about one, two hours. So, it doesn’t really matter.
All this procedure looks like it took 10 minutes to solve this problem.
Actually longer, but you can really solve this problem very quickly. It’s a problem that can occur in many cases, in a big screw-retain bridges and small screw-retained bridges. The bigger the space between the crowns and the gingiva, the better the possibilities the patient have to clean below the gingiva and below the bridge, between the bridge and the gingiva, the lesser the chances this will occur, but the possibility always remains.
The question may arise – do I need to remove the bridge from time to time to clean it.
If you don’t have any problem, you shouldn’t do that. But if you can see that there is some kind of inflammation, if you can see that taking out the bridge, cleaning and returning it back will have some positive effect, then I don’t see why not.
Thank you everyone that joined in to learn some new & interesting information – make sure to stay tuned for more and of course don’t forget to subscribe, like and follow! Thank you & see you next time!