Low-Traumatic Tooth Extraction: How to Preserve Hard and Soft Tissues for Immediate Implantation
Contents
In this article we will discuss the methods and tools used for tooth extraction. We’ve opted for the term “low-traumatic removal” rather than the popular term “atraumatic removal” because it’s impossible to completely avoid tissue injury, but it is possible to minimize its extent.
When is Low-Traumatic Tooth Extraction Especially Important?
Preserving gum and bone tissue is crucial for immediate implantation protocols. When performed correctly, this approach can minimize the need for soft tissue and bone grafting procedures. However, a small amount of bone graft and a strip of connective tissue graft are often used, especially when working in the aesthetic zone.
Even when immediate implantation is not planned, a low-traumatic extraction protocol is recommended. This reduces healing time and patient discomfort.
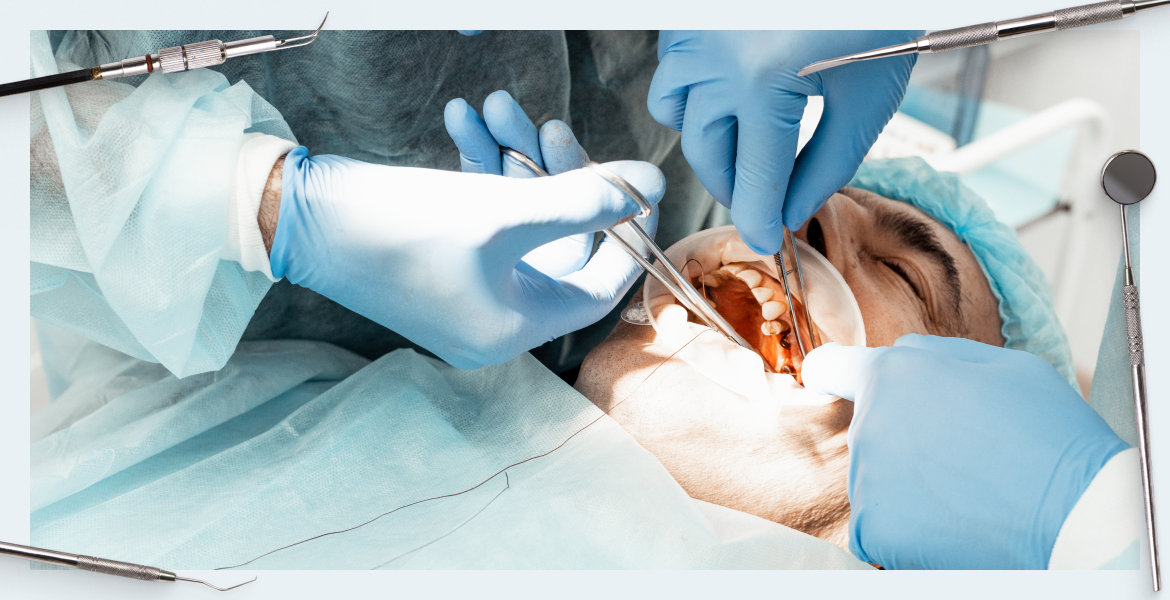
An example of a successful extraction with minimal damage is shown below:

Successfully performed tooth extraction using a low-traumatic protocol YouTube / Dr. Kamil Khabiev / Dental Guru Academy
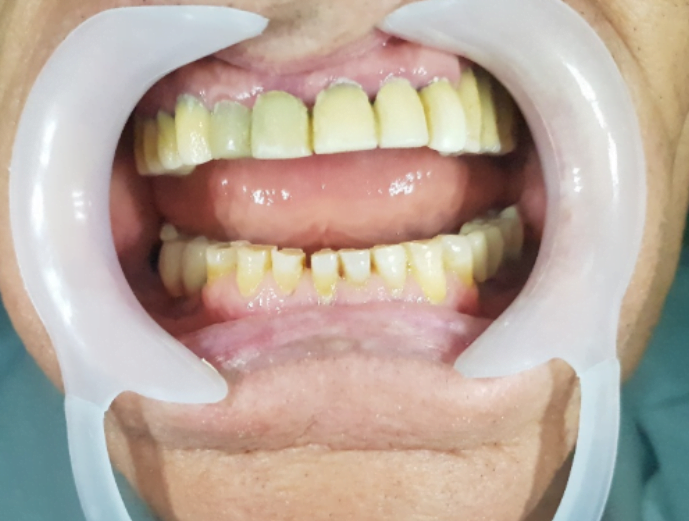
The following image demonstrates how well temporary crowns can look if the gum profile is preserved:

Temporary restoration after immediate tooth extraction and implant placement YouTube / Dr. Kamil Khabiev / Dental Guru Academy
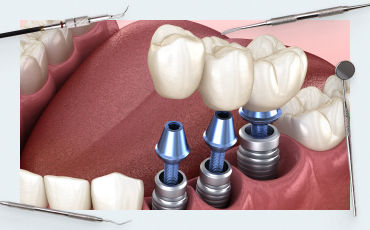
Here’s another example where hopeless teeth were extracted while preserving the gum contours, allowing for high-quality restoration of four teeth (two premolars and two molars). Soft tissue and bone grafting were not required.

An example of restoration using a one-stage implantation protocol with low-traumatic tooth extraction without the need for soft tissue plastic surgery YouTube / Dr. Kamil Khabiev / Dental Guru Academy
If you’re reading this, you understand the importance of proper tooth extraction techniques for both surgeons and general dentists.
A Little History
For centuries, tooth extraction was an extremely painful and barbaric procedure. We can learn about the evolution of dentistry from preserved instruments, descriptions, and even artwork.

Antique dental instruments and illustration of the extraction process YouTube / Dr. Kamil Khabiev / Dental Guru Academy

Dentistry in historical painting YouTube / Dr. Kamil Khabiev / Dental Guru Academy
Anesthesia and modern surgical concepts appeared relatively recently. Previously, teeth were extracted as quickly as possible, with no regard for the integrity of gums or interradicular septa. Skills like strength, speed, and determination were paramount, despite patient resistance and distress.
It’s no surprise that patients feared dentists of that era. Note the villainous expression on the face of the doctor extracting a tooth in the left illustration above. Consequently, teeth with curved roots were often extracted along with bone fragments, or root fragments were left in the wound.
Thankfully, we now have modern methods and tools that allow us to work carefully and correctly. While speed and efficiency are beneficial, quality takes precedence.
Tools for Low-Traumatic Tooth Extraction
Numerous tools are available, but we’ll focus on the essential set:
- Forceps
- Elevator
- Luxators
- Periotomes
- Apex Removal Tools
Auxiliary Tools
- Proximators
- Piezo surgery devices
Special tools
- Easy X-trac
Tooth Extraction Forceps: Types and Technique of Use
Forceps are arguably the primary tool. All other instruments – elevators, luxators, and even piezo surgery devices – are used to prepare the tooth or its fragments for extraction. Although designs, techniques, and steel quality have improved, the fundamental concept of forceps remains. Modern classification distinguishes two main types of forceps:
- English design forceps Intended for extracting a tooth with an intact crown. Their beaks do not fully close, and they often have notches that wear down over time.
 Youtube / Dr. Kamil Khabiev / Dental Guru Academy")
Tooth extraction forceps (English design) YouTube / Dr. Kamil Khabiev / Dental Guru Academy
- American design forceps: A more modern option, suitable for removing whole teeth or fragments after sectioning. The tips of the beaks converge and are shaped like elevators, providing a strong, reliable grip without notches. They essentially function as two opposing elevators.
 And More Modern American Design (Right) Youtube / Dr. Kamil Khabiev / Dental Guru Academy")
Different approaches to making forceps: English design (left) and more modern American design (right) YouTube / Dr. Kamil Khabiev / Dental Guru Academy
A key difference lies in the technique for using American-design forceps, namely the reverse grip, as shown below:

Proper grip of American design forceps YouTube/Dr. Kamil Khabiev / Dental Guru Academy
This is logical because the patient should be supine during the procedure.

Recommended patient position when removing maxillary teeth YouTube / Dr. Kamil Khabiev / Dental Guru Academy
This technique has several advantages:
- The patient’s head is supported, allowing the doctor more freedom of movement; it’s easier to reach for forceps when not having to support the patient’s head.
- Provides a complete visual overview of all upper and lower teeth.
- The reverse grip enables the use of stronger muscles, including the biceps, deltoids, and shoulder girdle when needed. The illustration below shows the points of force application and the doctor’s range of motion. The doctor can work in a range from 7 o’clock to 4 o’clock, requiring the assistant to change positions, which is common practice.

Red ovals indicate areas of the doctor’s body that he can use from the hands to body movements YouTube / Dr. Kamil Khabiev / Dental Guru Academy
The doctor uses the wrist for fine, less powerful manipulations. The elbow and shoulder, and therefore the biceps, triceps, and deltoid muscles, provide stronger movements. A direct grip puts more load on the deltoid muscle, making the procedure more challenging.
Note that different forceps are required for the upper and lower jaws.
When working on the upper jaw, the forceps tips are curved slightly upwards to allow the doctor a clear view.

Capture when removing a tooth in the upper jaw YouTube / Dr. Kamil Khabiev / Dental Guru Academy
And, when working on the lower jaw, forceps are curved in the opposite direction for the same purpose.

Grabbing forceps when extracting a lower jaw tooth YouTube / Dr. Kamil Khabiev / Dental Guru Academy
This shape allows both luxation and rotation, making the procedure easier for the dentist and less uncomfortable for the patient.

Forceps for extracting lower jaw teeth YouTube / Dr. Kamil Khabiev / Dental Guru Academy
This extraction technique is more physiological, as lower jaw teeth are often tilted forward with curved roots. The optimal direction of force is slightly backwards, as shown in the illustration below.

The optimal direction of movement of the dentist’s hand when extracting teeth of the lower jaw YouTube / Dr. Kamil Khabiev / Dental Guru Academy
Another key detail is grabbing the tooth along its long axis. The correct grip is shown on the left, and the incorrect grip (that can cause a crown fracture) on the right in the illustration below:
 And Incorrect (Right) Version Of Grabbing A Tooth With Forceps Youtube / Dr. Kamil Khabiev / Dental Guru Academy")
Correct (left) and incorrect (right) version of grabbing a tooth with forceps YouTube / Dr. Kamil Khabiev / Dental Guru Academy
Experienced dentists can extract teeth with forceps even when only 1-2 mm of the tooth is visible above the gum line, as shown below. The dentist was able to grip the remaining crown without crushing it.

Extracting a severely damaged tooth with forceps without using other tools YouTube / Dr. Kamil Khabiev / Dental Guru Academy
Elevators were not needed in this case. The forceps tips are below the gum line. A crescent-shaped instrument is recommended to separate the gum from the tooth prior to grasping.
Features of the Technique of Working with Forceps
For low-traumatic extractions, luxation should be performed carefully. Aggressive rocking can damage the buccal and lingual walls of the alveolus. Similarly, rotation can injure the bone, as tooth roots are rarely round.
With a low-traumatic protocol, luxation is done with smooth, spiral movements, as shown below:

Visual image of what movements to do when extracting teeth YouTube / Dr. Kamil Khabiev / Dental Guru Academy
Movements should be small and without sudden jerks. A figure-eight motion is also an option, as illustrated by the knot in the picture. Both methods allow more amplitude of movement towards the lingual or palatal wall, which are typically thicker and stronger.
This technique can help preserve the interradicular septum in the sockets of multi-rooted teeth in 90% of cases. The septum is critical for single-stage implantation.

Preparing the implant site in the interradicular septum YouTube / Dr. Kamil Khabiev / Dental Guru Academy
Forceps with sharp tips can also be used to remove crowns and bridges of 3-4 teeth.
Static luxation is another method for low-traumatic removal. The tooth is tilted lingually and held for approximately 30 seconds, then buccally. This ruptures the ligaments, and blood enters the periodontal space, where it coagulates and further disrupts the ligaments, acting as a liquid scalpel.
When to Section a Tooth and Extract Roots in Parts
For molars, sectioning the crown and roots is almost always necessary, unless roots are fused and do not diverge. Long, carbide fissure burs are used for sectioning, as shown in the photo below.

The sectioned tooth is prepared for extraction in parts YouTube / Dr. Kamil Khabiev / Dental Guru Academy
For deep cuts, titanium carbide-coated (black) fissure burs are better than diamond-coated burs. Diamond burs tend to clog with dentin, losing their effectiveness, though they are excellent for “opening” the crown.
Extraction should begin with the most mobile area. However, the mesiobuccal root extraction is often the most difficult, being tightly wedged between the septa. The palatal root can also be challenging. The distal buccal fragment is typically the easiest, though this can vary. Always check and move all fragments with a luxator or elevator.
Remaining fragments will be easier to extract because pressure on the bone septum will be reduced.
When is Bone Grafting Necessary in the Socket, and When is PRF Sufficient?
Bone grafting is required only when the alveolar socket walls are thin, most often in the aesthetic zone. For premolars and molars, a PRF clot around the implant is usually sufficient to facilitate new bone formation from the blood clot.
How to Apply Sutures to Avoid Gum Ischemia
Wound edges should not be tightly pulled together, and suture punctures and knots should be positioned away from the wound edge. Sutures after tooth extraction are primarily used to prevent the loss of the blood clot and PRF, rather than to close the wound.

Suturing soft tissues after placing PRF and installing a healing cap YouTube / Dr. Kamil Khabiev / Dental Guru Academy
Suture material must be soft to avoid irritating the tongue and cheeks. In this example, monofilament suture material was used.
Features of Monofilament Suture Materials:
- Homogeneous structure:The smooth, single-strand structure minimizes bacterial adhesion.
- Minimal tissue reaction:They cause less inflammation due to their low surface area.
- Reduced friction: They pass through tissues more easily and cause less damage.
- Resistance to infections:Unlike braided materials, monofilaments do not create a “capillary effect” that can trap liquid (including infection) along the suture line.
Essentially, the thread is like a fishing line, doesn’t prick, and ties well into knots.
What We Do Not Recommend Using When Extracting Teeth
We strongly advise against using Physical Forceps (or Carl Misch forceps). These are heavily marketed and may be common in some regions.

Physical forceps for tooth extraction YouTube / Dr. Kamil Khabiev / Dental Guru Academy
We do not claim these forceps are of poor quality or intend to denigrate the manufacturer. However, for our purposes, they are not ideal. They require support on the buccal jaw wall and can cause significant soft tissue injury, especially during difficult extractions.

Tooth extraction with Carl Misch forceps YouTube / Dr. Kamil Khabiev / Dental Guru Academy
The lower right image clearly shows the indentation from the forceps even after some time has passed after the extraction.
What are the Contraindications to Immediate Implantation?
The primary contraindications include inflammatory and purulent bone lesions such as:
- osteomyelitis
- periodontal abscess
- periostitis
However, granulation tissue in the socket is not a contraindication, but thorough cleaning of the socket is necessary. Cysts or cystic granulomas are also not contraindications, as they do not involve an inflammatory process in the surrounding bone; the body encapsulates the lesion.
The challenge with implantation in these cases is that there may not be enough dense bone to support the implant due to the existing cavity. In such cases, the delayed prosthetics protocol should be used, with the implant placed under a healing screw, the soft tissue sutured and the bone integration is waited for.
Lucas and Hemingway curettes are used to clean the socket, differing in the shape of their working tips.

Types of curettes YouTube / Dr. Kamil Khabiev / Dental Guru Academy
Both are actively used, but Lucas curettes are easier for beginners. Hemingway’s design is considered outdated, but they are still used by those accustomed to them.
Luxators and Elevators: Types and Application Features
An elevator is essentially a screwdriver with a rounded blade. Its purpose is to loosen a tooth so that it can be gripped with forceps. The operating principle is shown below. The elevator should be perpendicular (at a 90° angle) to the tooth.


Operating principle of a dental elevator YouTube/Dr. Kamil Khabiev / Dental Guru Academy
Luxators are used to disrupt the periodontal ligament, making the tooth more mobile and preventing soft tissue damage during extraction. Forceps alone are often sufficient, but for less experienced dentists, using a luxator along the tooth contour is recommended.
Two types of luxators exist:
- Straight: for anterior teeth
- Curved: for molars and premolars

The luxator sample is available with a straight and curved tip YouTube / Dr. Kamil Khabiev / Dental Guru Academy
Both types have a flat tip and should be positioned parallel to the tooth, along the root.

Operating principle of a luxator YouTube/Dr. Kamil Khabiev / Dental Guru Academy
IMPORTANT! Luxators are not intended for lever-type movements or for prying the tooth root, as this can easily damage the alveolar wall. However, sometimes they are used as elevators, directed perpendicular to the tooth, when a suitably sized elevator is not available.
The tips of luxators and elevators have different shapes.
Never direct the elevator or luxator towards the vestibular wall of the tooth.

How not to direct an elevator YouTube / Dr. Kamil Khabiev / Dental Guru Academy
Why You Should Have Apex Extraction Tools in Your Clinic
Thin elevators with a thin tip, as shown below, are useful for removing root fragments. Obtaining a root fragment without them is problematic.

A thin elevator is also suitable for extracting the apex YouTube / Dr. Kamil Khabiev / Dental Guru Academy
Why Do You Need a Piezo Device for Low-Traumatic Tooth Extraction?
While burs are preferable for sectioning the tooth itself, a piezo device is necessary for cutting the surrounding bone. The hard enamel and dentin of the tooth will wear down the tip and ruin it if you attempt to section bone with a burr.
If there is a root fracture at the level of the crown with no space to grasp, a piezo device is indispensable. Trying to remove the root with an elevator in such cases can cause more bone damage compared to a precise cut with a piezo cutter.


Using the piezo device during tooth extraction YouTube / Dr. Kamil Khabiev / Dental Guru Academy
Although the procedure may cause more soft tissue damage than a truly low-traumatic extraction, a piezo device will cause less trauma than other methods for challenging extraction too.
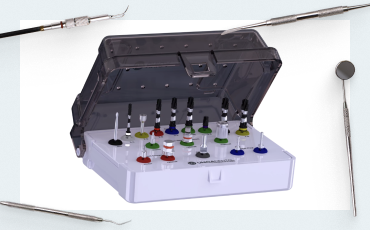
Our colleagues are familiar with all other instruments. We would like to mention the Easy X Trac set; we will not go into its operational principle, as there are many videos on the internet explaining its use.

Easy X Trac Teeth Extraction Kit YouTube / Dr. Kamil Khabiev / Dental Guru Academy
That concludes our discussion. If you have any questions or suggestions, please contact us. We hope to see you in our next publication.