Complex Implantation Cases: A Surgical Guide to Minimally Invasive Approaches
Contents
1. Introduction
Every practitioner sooner or later encounters difficult cases. For example, there might not be enough bone tissue, and bone grafting could be risky. In this article, we have collected problematic cases. For some patients, solutions were found immediately, while others had to endure complications and problems before receiving a functional prosthesis. We do not claim to have the ultimate truth, but we believe that cases from our colleagues will be useful for both beginner and experienced dental surgeons.
2. Patient No. 1: Total Restoration Without Bone Grafting
The patient is 64 years old with a history of chronic diseases. This case is particularly interesting because the situation is quite common, and a significant proportion of patients have a similar clinical picture.
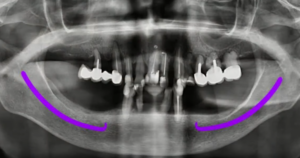
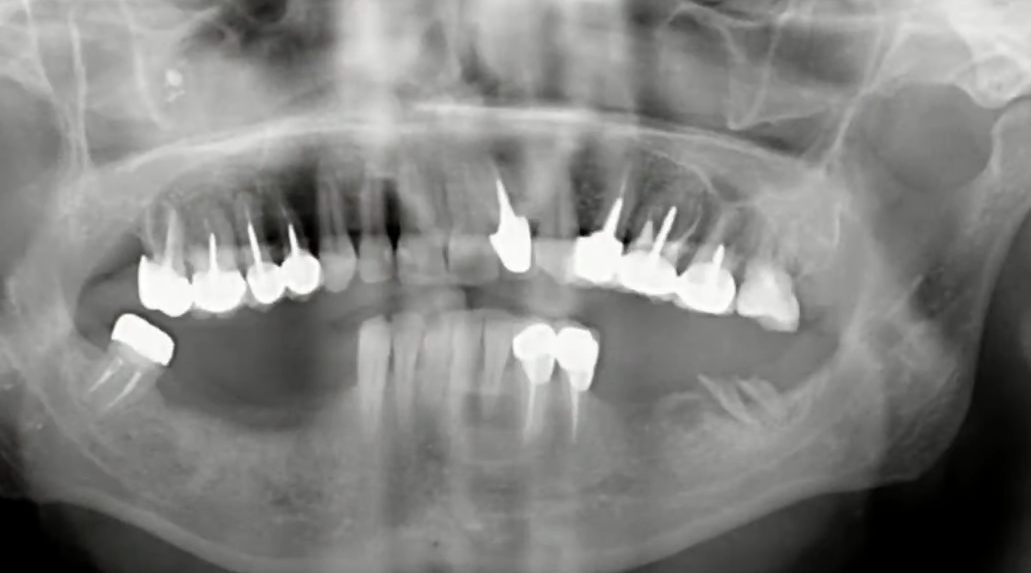
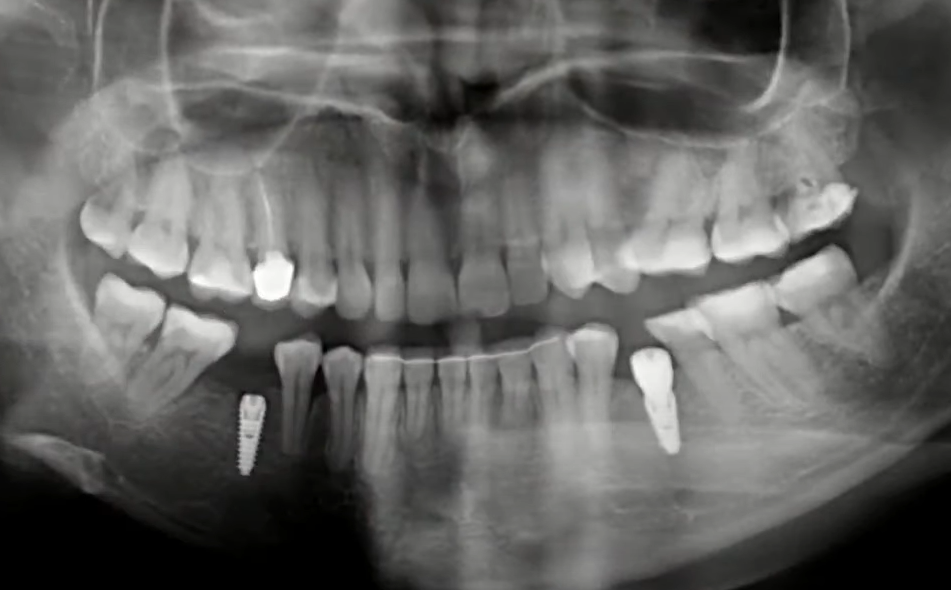
Orthopantomogram of the patient: Purple lines indicate the mandibular nerve. YouTube / Dr. Kamil Khabiev / Dental Guru Academy
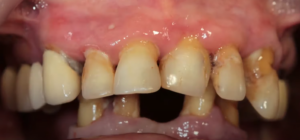
Condition of the remaining teeth on the lower jaw: Very poor, only 4 teeth left. YouTube / Dr. Kamil Khabiev / Dental Guru Academy
Pay attention to the condition of the lower jaw, specifically in its lateral sections. There is significant bone deficiency and loss of alveolar ridge height. For orthopedic reasons, it was decided to remove all teeth for complete restoration of both dentitions. The situation is complicated by the aggressive course of generalized periodontitis and the slightly atypical (high) position of the mandibular nerve, where the distance from the top of the alveolar ridge to the mandibular nerve is only about 6 mm. This makes installing implants according to the standard protocol impossible.
Possible treatment options:
- Reconstruct the lower jaw with bone blocks, but the risk of complications with such a large-scale operation is high.
- Install implants where possible without resorting to bone grafting, namely, to make maximum use of the space between the mental foramina.
Sequence of procedures for the lower jaw of Patient No. 1
2.1. Stage One: Lower Jaw Treatment
- Atraumatic removal of the front teeth; the roots came out very easily, two teeth were removed literally with fingers.
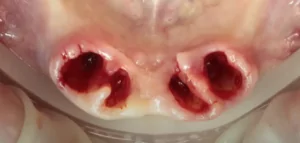
Condition of soft tissues immediately after tooth extraction. YouTube / Dr. Kamil Khabiev / Dental Guru Academy
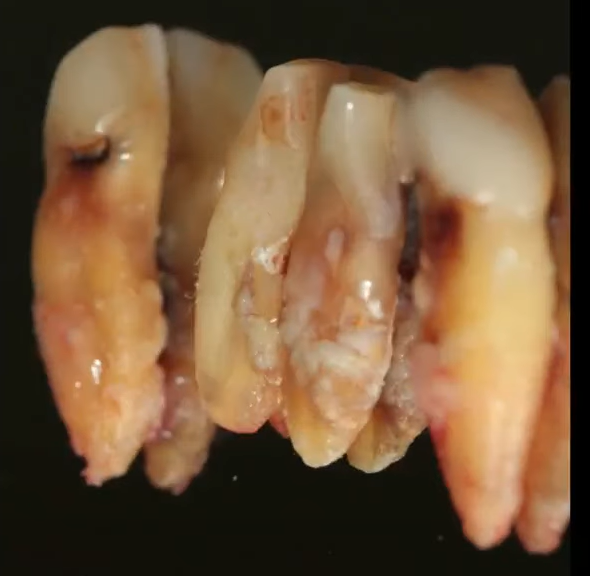
Pay attention to the condition of the extracted teeth: they were absolutely hopeless.
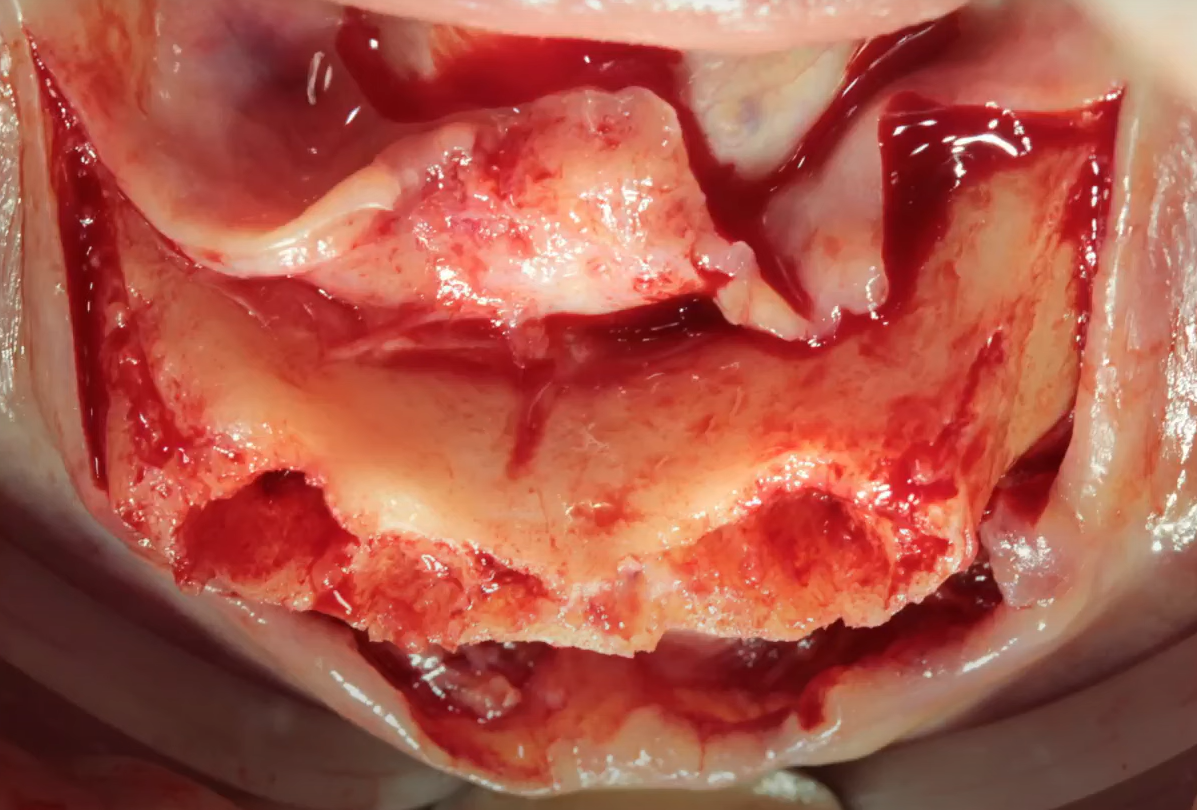
- After detaching the mucoperiosteal flap, we see that the bone is not very good. The cortex is dense, but the structure is brittle and cracks even with moderate force.
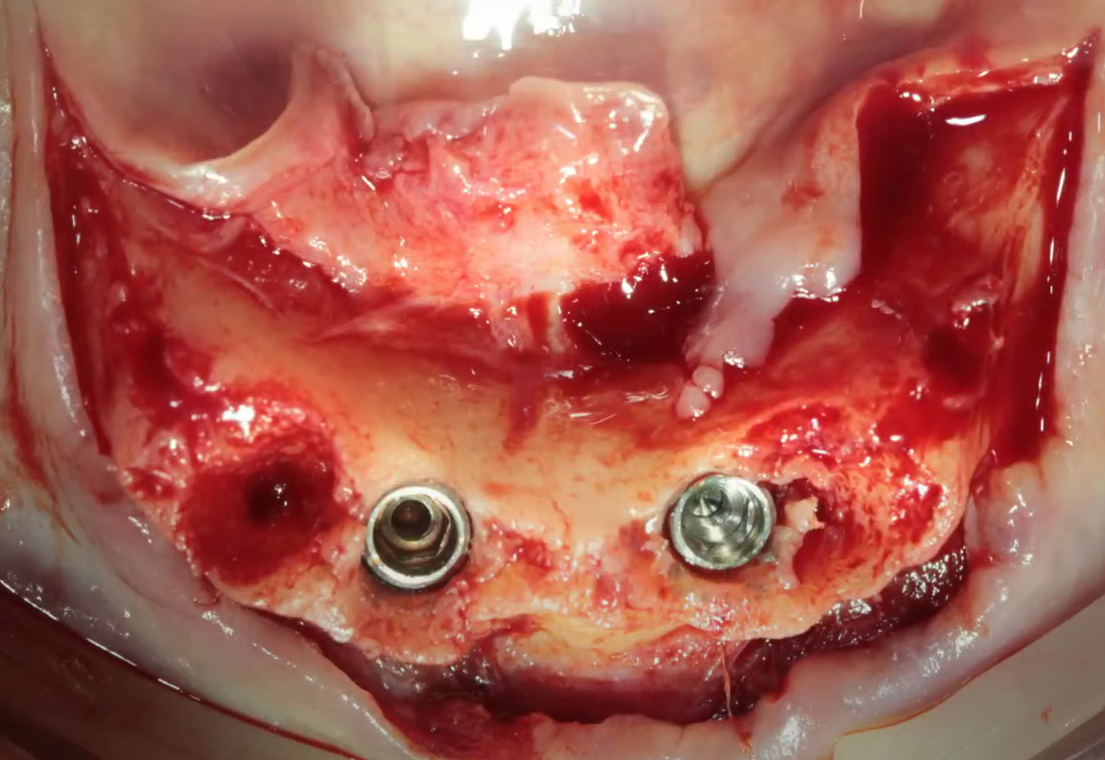
First, implants were installed at positions 32 and 42 teeth.
Next, the implants were installed at positions 34 and 44 at an equal distance from each other.
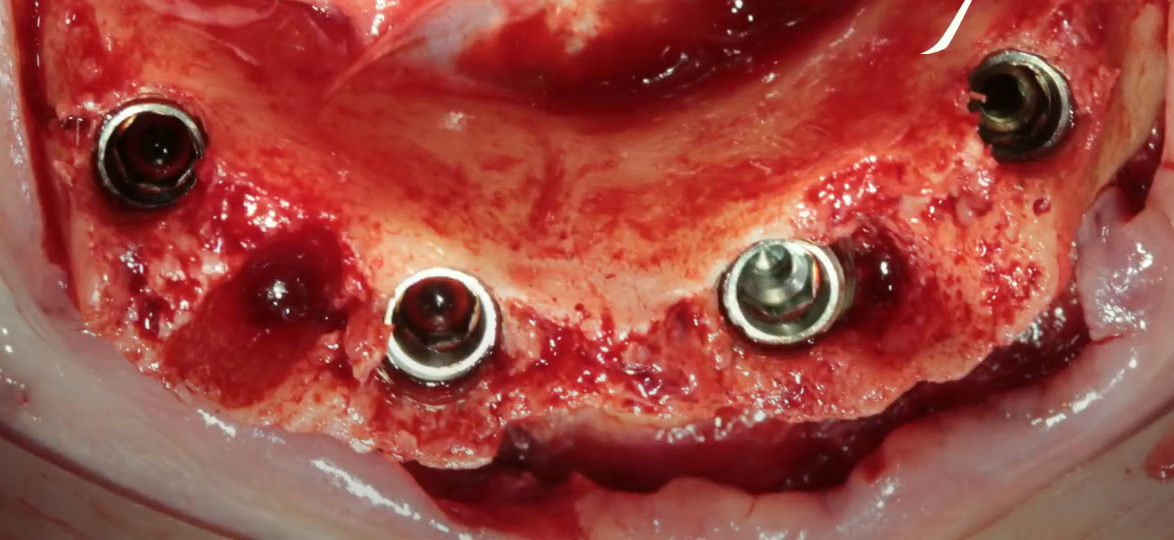
Installed implants in the front part at positions 32, 42, 34, 44. YouTube / Dr. Kamil Khabiev / Dental Guru Academy
Due to the bone quality in this elderly patient, drilling was carried out according to the 1/1 protocol, where the implant diameter matched the last drill’s diameter, namely 4.0 mm. The torque during installation was approximately 40 Ncm, and although there were two cracks upon immersion, the implants were left for osseointegration due to sufficient stability.
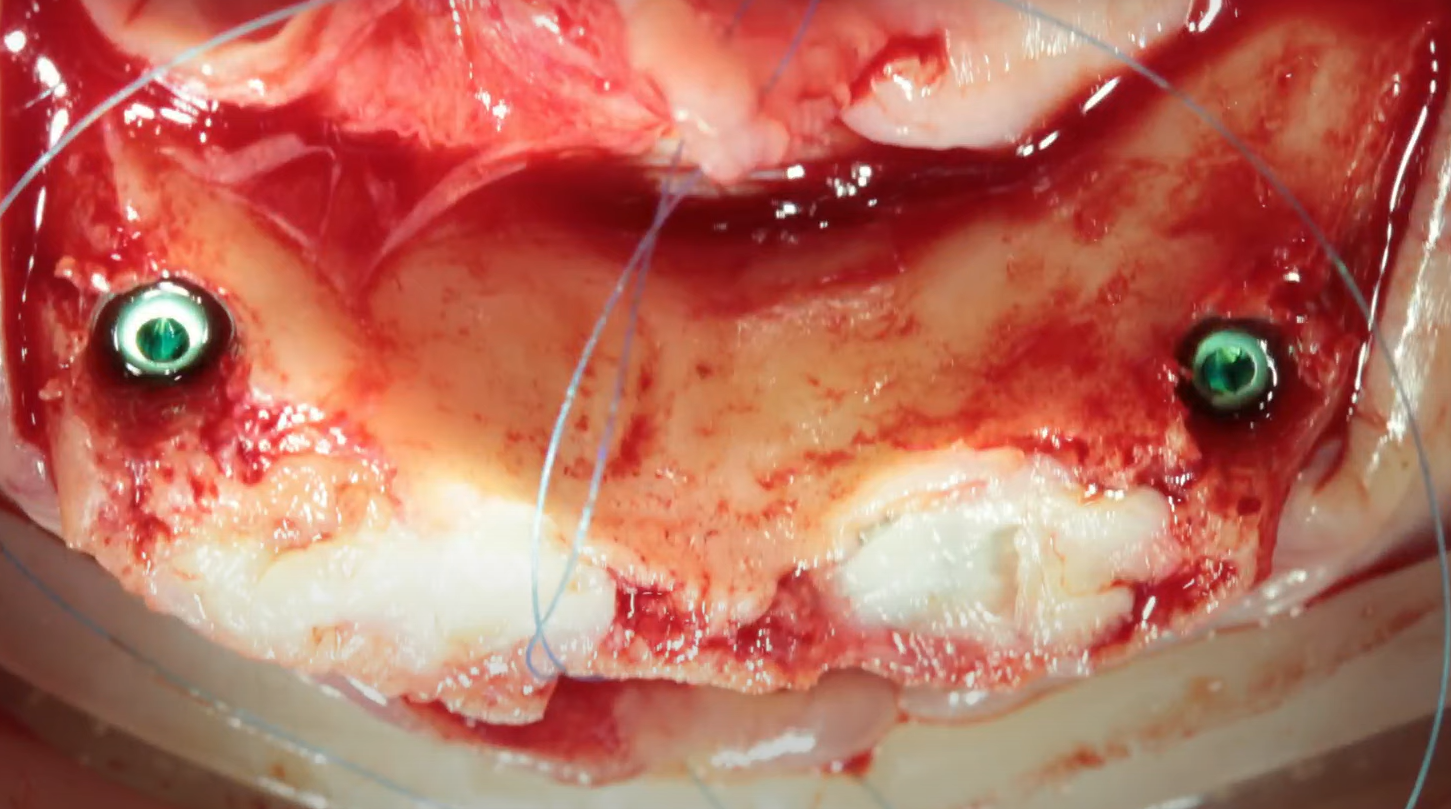
- Next, we place FRP clots into the voids and suture the soft tissue.
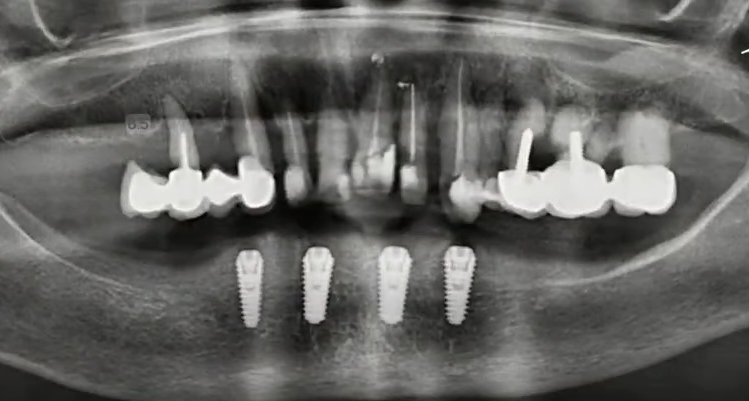
- We send the patient for an orthopantomogram and see that the implants are parallel to each other. The distance between the implants is sufficient for normal nutrition of bone tissue; the implants are installed subcrestally, the immersion depth is approximately 1.5 mm.
At this point, the first stage of treatment is considered successfully completed. The entire operation took less than an hour, including the photo protocol, and was completed on Friday evening.
The second stage was scheduled for the next morning. This timing allowed the patient sufficient rest before the second stage while avoiding repeated antibiotic administration, beneficial given the patient’s age and health.
2.2. Stage Two: Upper Jaw Treatment
- Removal of all teeth in the upper jaw is as atraumatic as possible. All teeth are collected on the table to ensure none are missed.
- After peeling off the flap, implants are installed in positions 11, 13, 21, 23; on the other side, implants are installed in positions 21, 23.
- Next, a bilateral sinus lift was performed, accompanied by the placement of implants in the lateral regions for teeth #7.
- To ensure the result of the sinus lift, an orthopantomogram is taken along with the pins before suturing.
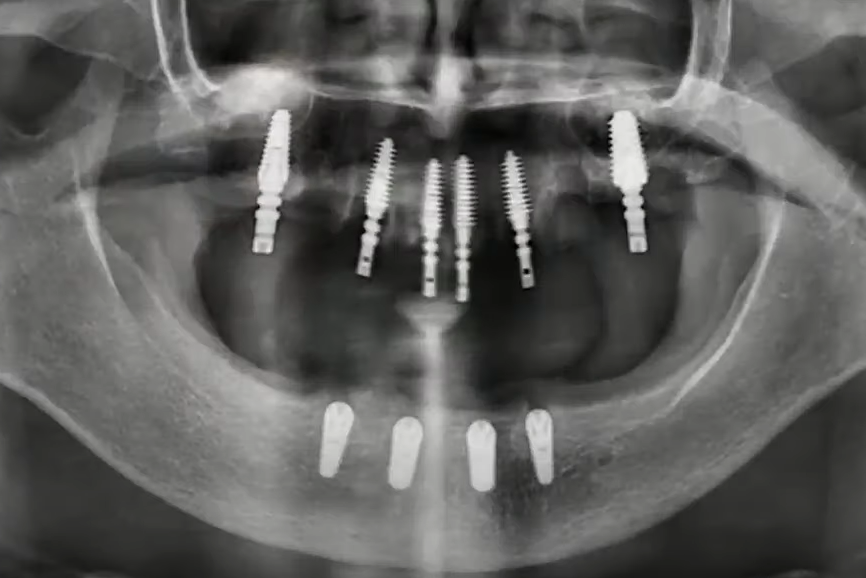
Orthopantomogram after installation of implants before suturing soft tissues on the upper jaw. YouTube / Dr. Kamil Khabiev / Dental Guru Academy
The image shows dome-shaped elevations in the area of the lateral implants (result of the sinus lift), with optimal immersion and convergence angles.
- We close all the voids and holes with FRP clots, install healing caps, and suture the soft tissues. The primary torque was at least 40 Ncm, which allowed us to immediately install healing caps instead of plugs, except for one implant in the lateral section.
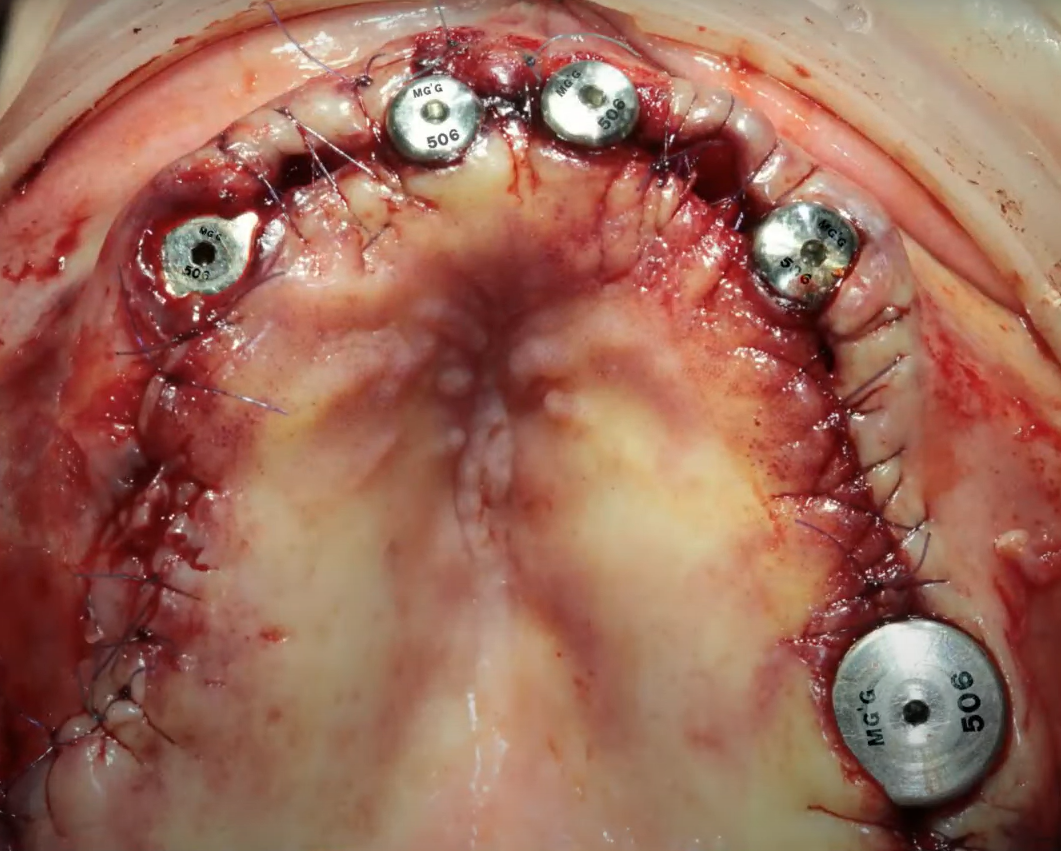
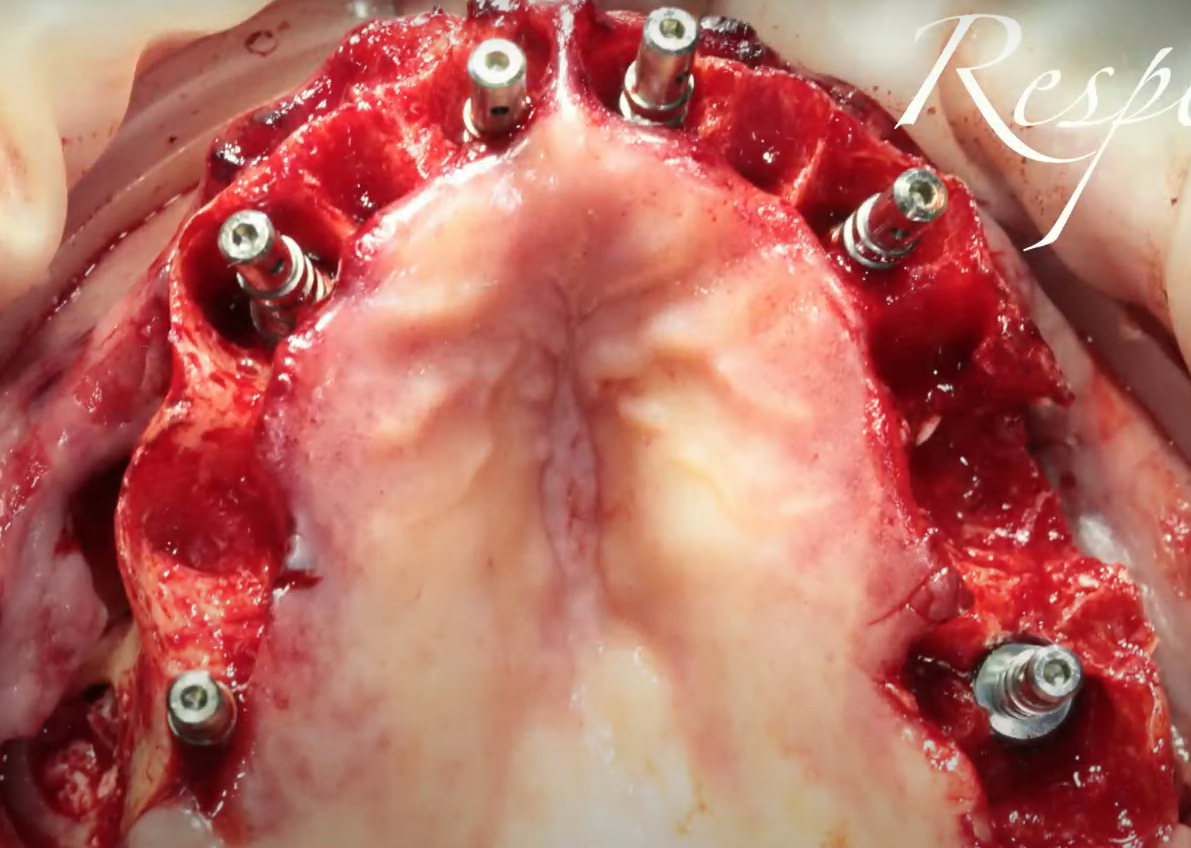
The moment of completion of the operation on the upper jaw of Patient No. 1. YouTube / Dr. Kamil Khabiev / Dental Guru Academy
The control orthopantomogram shows that the implants were installed successfully. This indicates that the implant installation was performed in a gentle manner, without the need for bone augmentation operations. There were only two surgical interventions during one course of antibiotics, which was the intended approach for this patient.
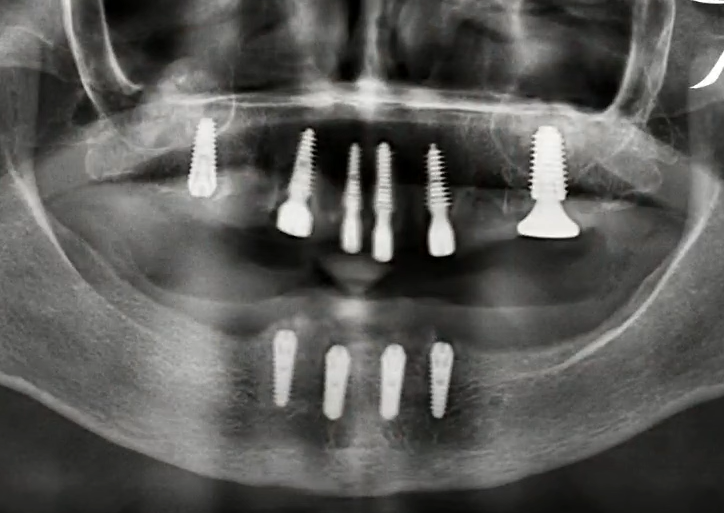
Control orthopantomogram of the first and second stages of treatment. YouTube / Dr. Kamil Khabiev / Dental Guru Academy
The implants were successfully installed by the orthopedist, minimizing the risk of complications.
Given the patient’s complex health condition, a period of six months is allotted for osseointegration. After this period, the patient will receive a conditionally removable prosthesis on a beam for the lower jaw and a horseshoe-shaped prosthesis for the upper jaw.
3. Bone Block Osteoplasty: Risks and Considerations
When describing the previous case, one might get the impression that bone grafting is harmful and should be avoided. This is, of course, not true. We have a series of articles on our website dedicated to guided bone regeneration. These articles discuss in detail the advantages and disadvantages of different types of membranes, from collagen to Teflon and titanium, as well as the effectiveness of various bone grafts and the optimal proportions for mixing the patient’s own autogenous material with xenografts. They also mention that plastic surgery with bone blocks is the riskiest method for increasing bone tissue volume.
Here, we will analyze the case of Patient No. 2, where it will become clear that even the same patient can have completely different results in different areas of the jaws.
4. Patient No. 2: Partial Restoration with Bone Grafting
This patient is much younger than 47 years old and is somatically healthy. She was referred to a surgeon by an orthopedist with a request to do everything possible to completely restore her dentition.
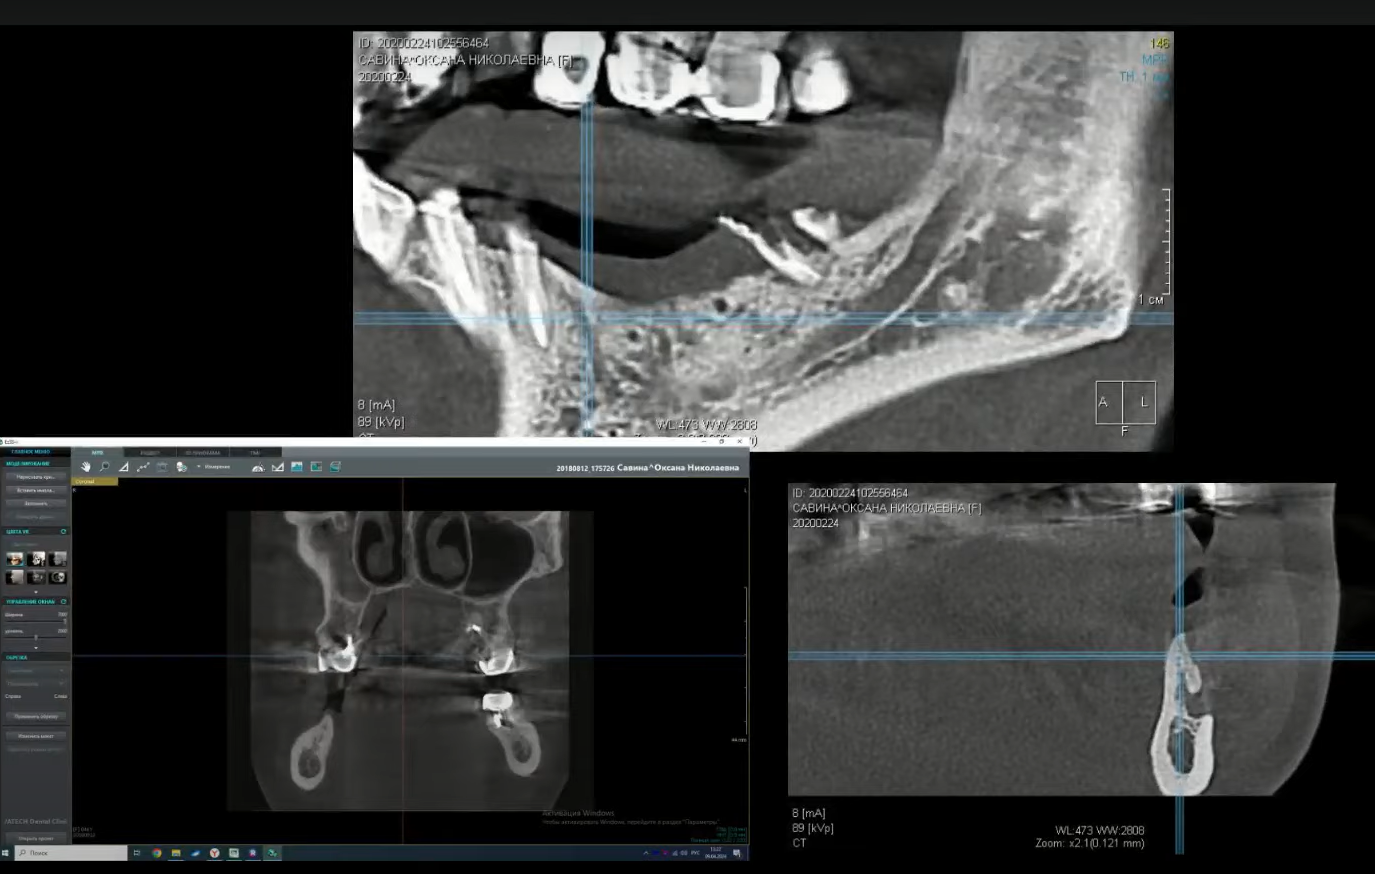
The image below shows a significant deficiency of bone tissue in the lateral parts of the lower jaw, indicating the necessity of bone grafting. The most critical situation is in the area of the fourth quadrant.
At the first stage, the treatment was planned and autotransplantation with a bone block was performed.
4.1. Successful Right Side Surgery
Sequence of surgery on the right side of the lower jaw of Patient No. 2:
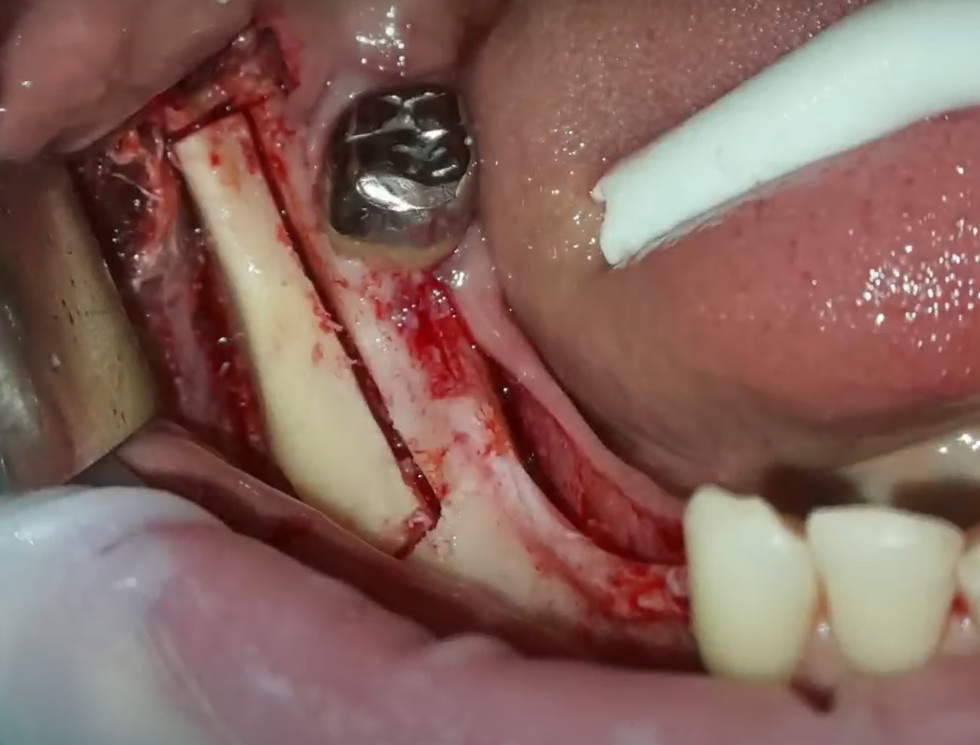
- Detachment of the mucoperiosteal flap, revealing a thin bone ridge resembling a blade. The most concerning aspect is that this type of alveolar ridge completely lacks a broad nutritional base. Therefore, splitting it and filling it with a bone graft is not advisable, as the bone graft would only contact the cortical bone.
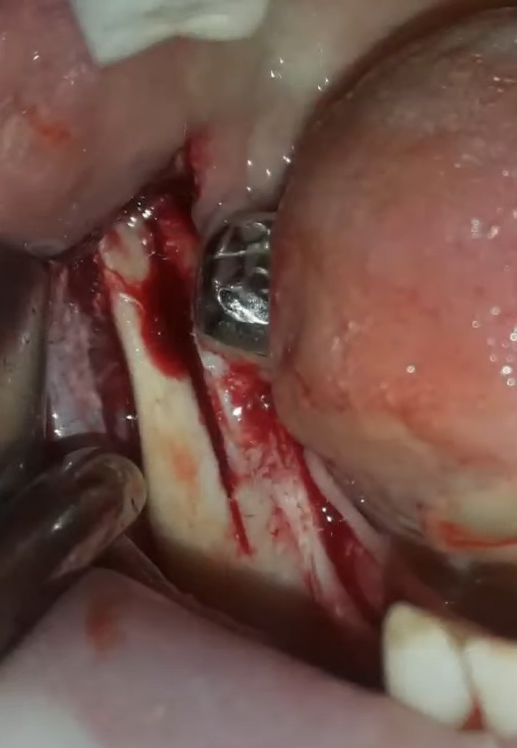
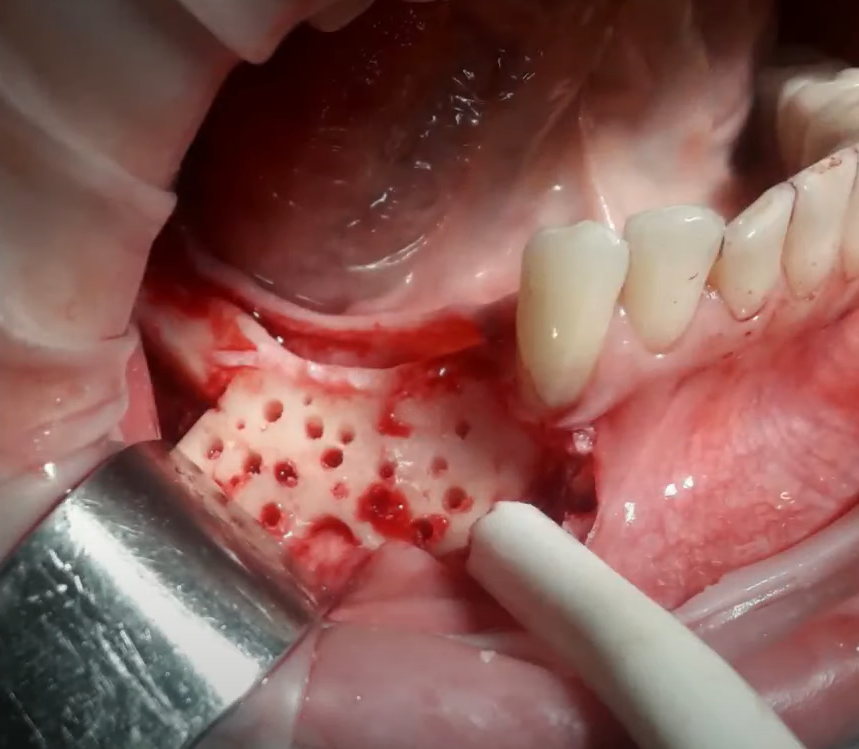
Cuts in the alveolar ridge at the stage of preparation for augmentation with bone blocks. YouTube / Dr. Kamil Khabiev / Dental Guru Academy
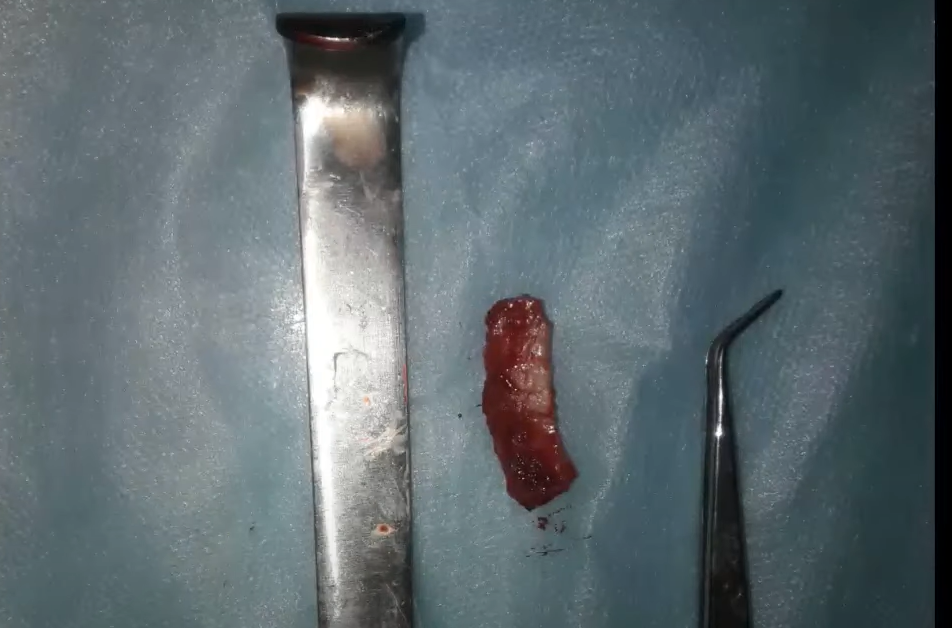
Using a piezo cutter, we make cuts to the full depth. Next, we make two lateral cuts, file the base to break it, and remove the part.
- Preparation of the recipient site, specifically removing the superficial layer with a bone scraper and perforating the cortical layer. This controlled trauma to the bone stimulates the release of growth factors and the formation of an adequate blood clot, beneficial for new bone formation.
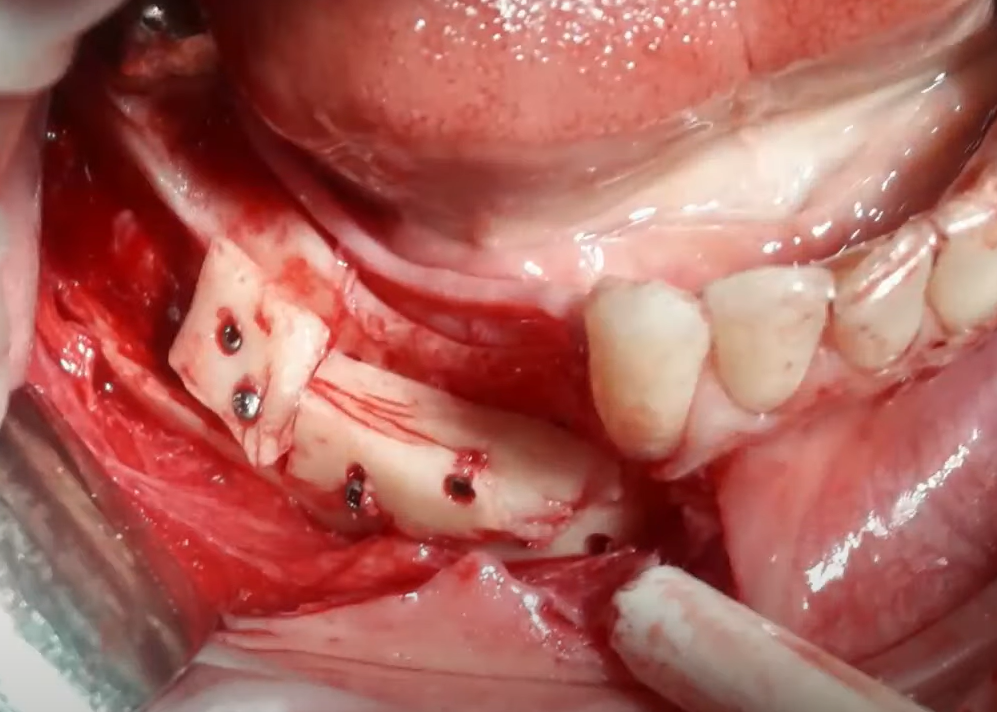
- Installation of the bone block and fixation with pins.
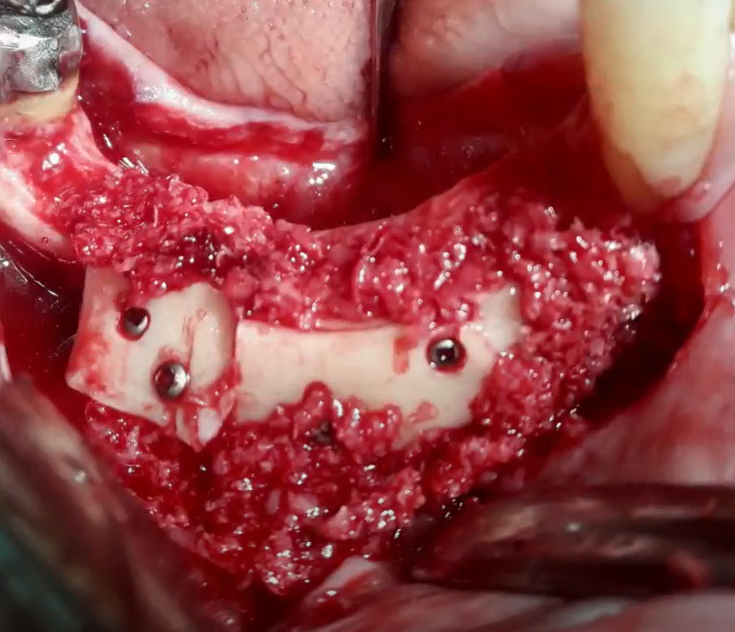
- All cavities and adjacent surfaces are covered with bone shavings obtained during the preparation for the operation.
- The soft tissue was sutured, and the patient was sent home to allow the alveolar ridge to heal and form. The follow-up examination showed an excellent result, with a significant increase in bone tissue volume
- After 10 months, the surgeon began installing the implants. Note the width of the alveolar ridge after bone grafting—excellent results and complete freedom of action for the surgeon.
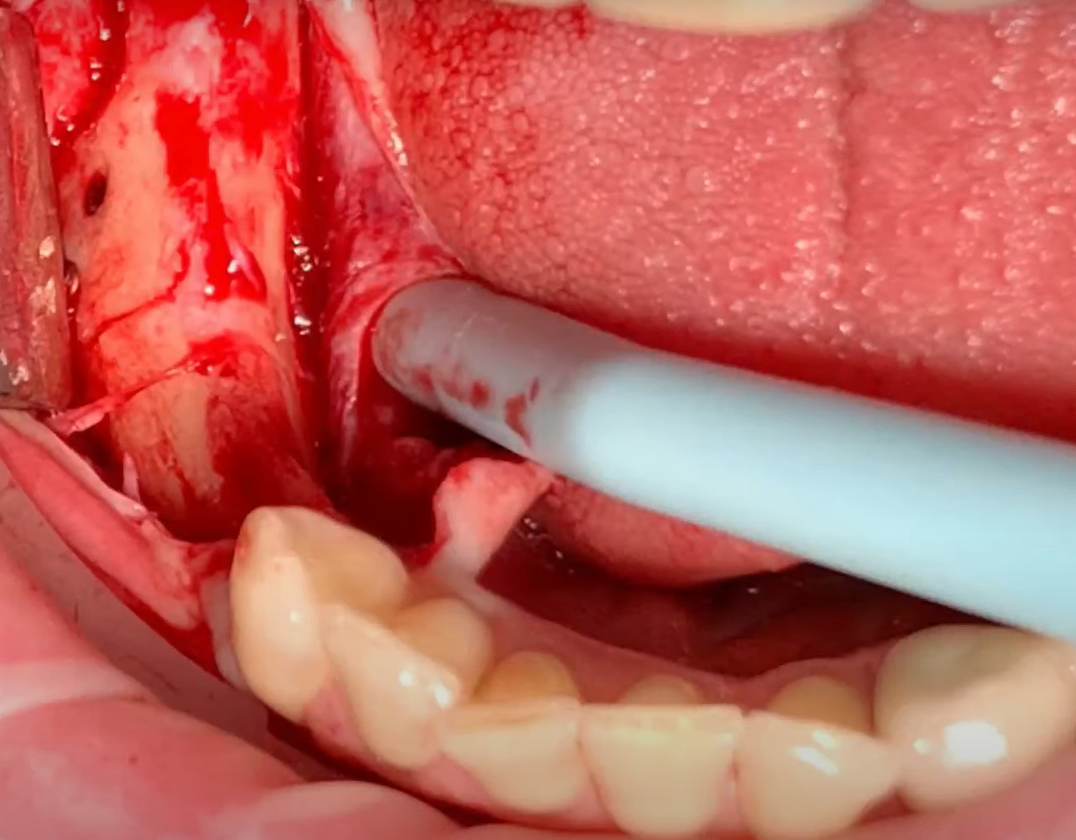
The bone block was completely engrafted, vascularized and did not show even the slightest resorption. YouTube / Dr. Kamil Khabiev / Dental Guru Academy
If all operations ended like this, the procedure would be used without any restrictions.
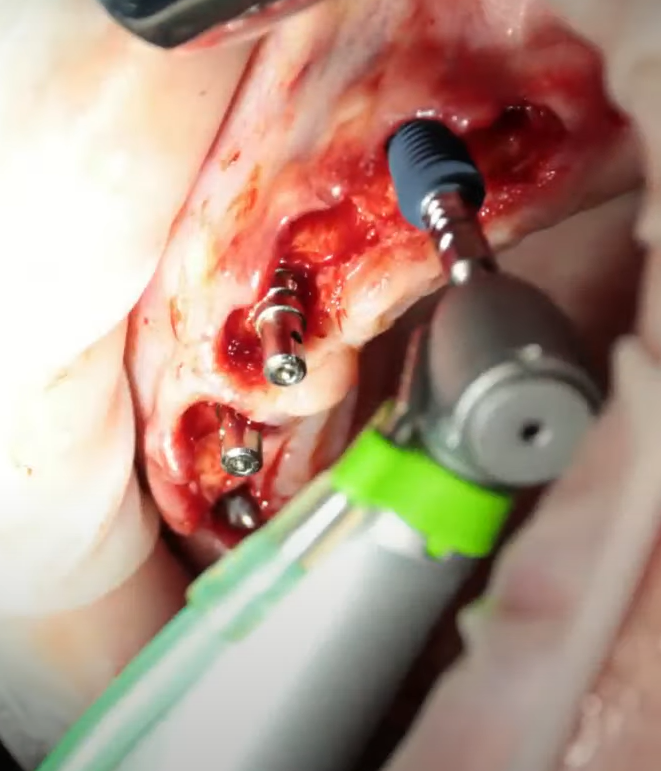
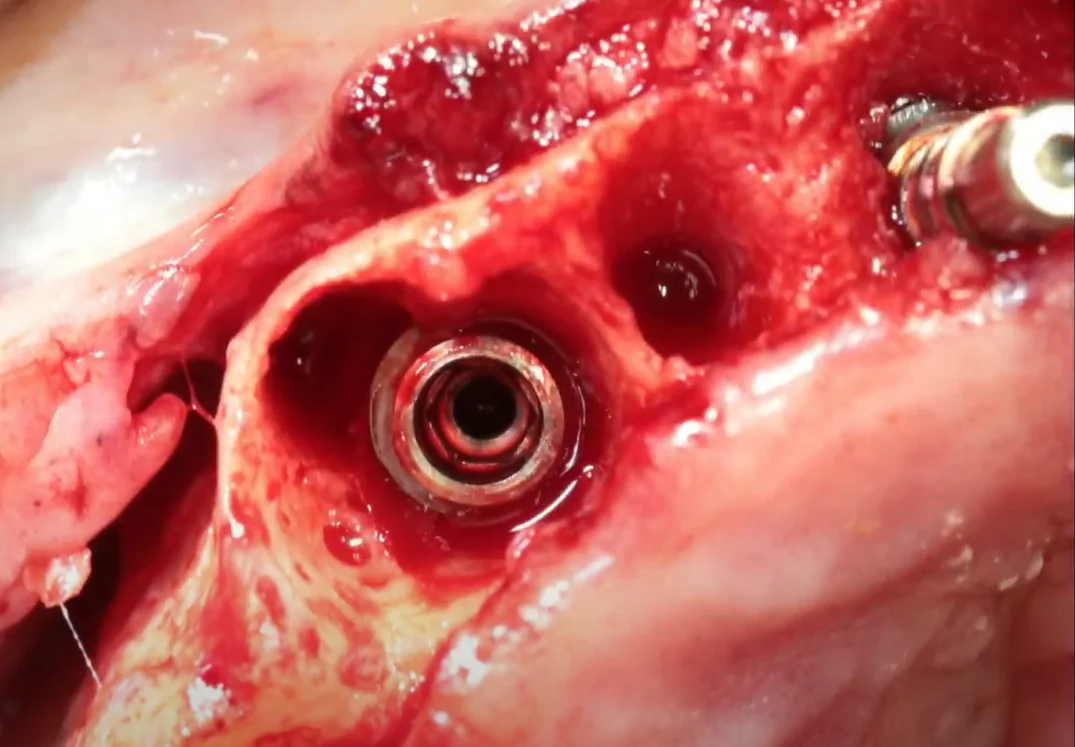
- The screws that fixed the bone block were removed, and the holes for the implants were prepared
- The implants are placed slightly below bone level to provide sufficient space for the formation of a soft tissue connection.
The implants are closed with plugs, and the soft tissues are sutured with a double-sided locking suture.
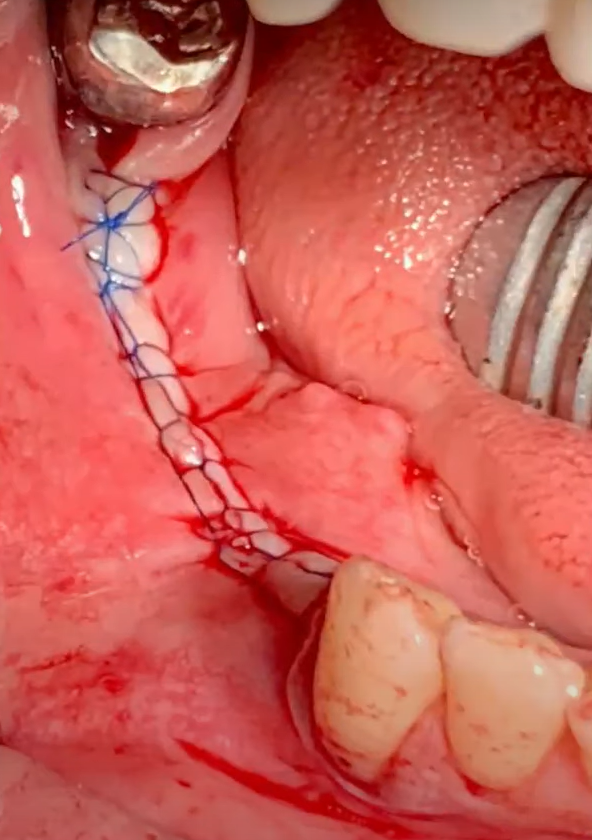
The final stage of implant installation is a sewn suture. YouTube / Dr. Kamil Khabiev / Dental Guru Academy
The control X-ray shows that the implants are installed in a position favorable for the orthopedist.
- After the completion of osseointegration, the patient was fitted with a prosthesis. It is fully functional and aesthetic, although this is less critical in the molar and premolar areas.
Unfortunately, the patient’s good fortune ends here. The patient and surgeon were encouraged by this success and decided to repeat it on the contralateral side of the mandible.
4.2. Left Side Complications and Solutions
Sequence of actions and problems on the contralateral side of the jaw of Patient No. 2
Surprisingly, almost the same actions by the same surgeon, with the same patient, led to completely different results.
- Bone grafting was planned and performed identically to the opposite side.
- The flap was reflected, and the same instrument was used to harvest the bone block.
- The bone blocks were fixed, and bone chips were added around the perimeter.
- The bone graft was covered with a membrane, and the wound was sutured.
The control X-ray showed a good result, with a positive prognosis for successful engraftment.
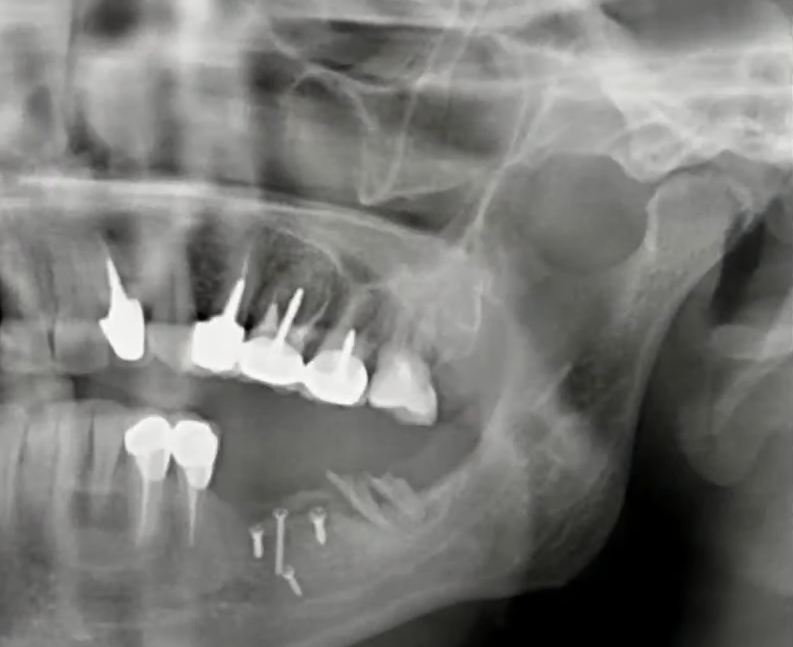
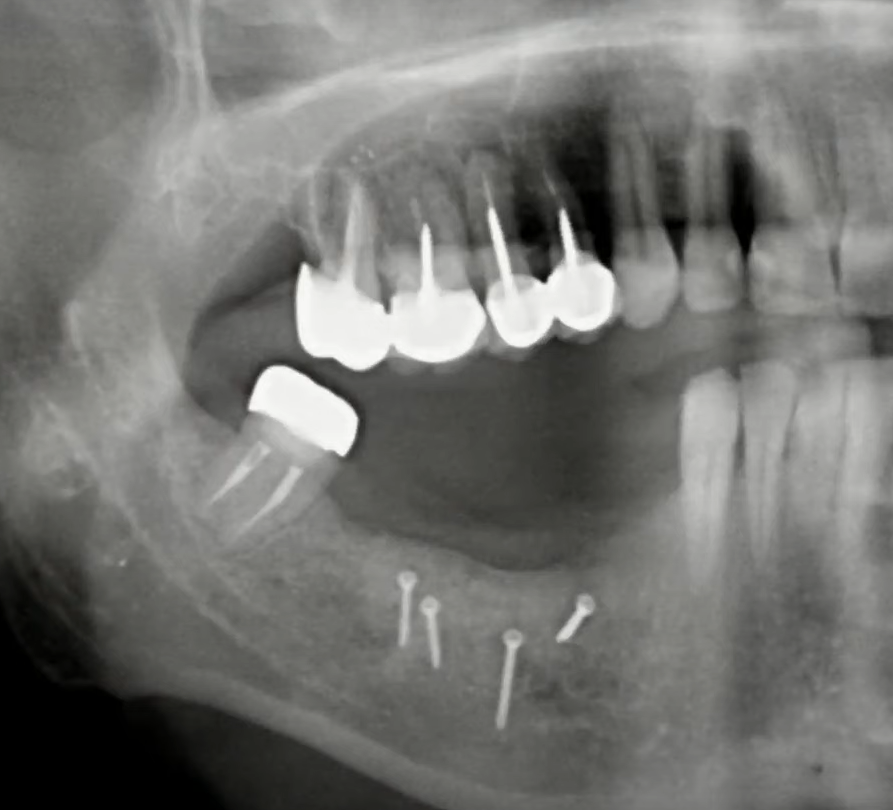
X-ray immediately after bone block grafting on the left side of the lower jaw. YouTube / Dr. Kamil Khabiev / Dental Guru Academy
It seemed that nothing could go wrong, but after only a few weeks, the patient sent pictures to the clinic showing fragments of the membrane.
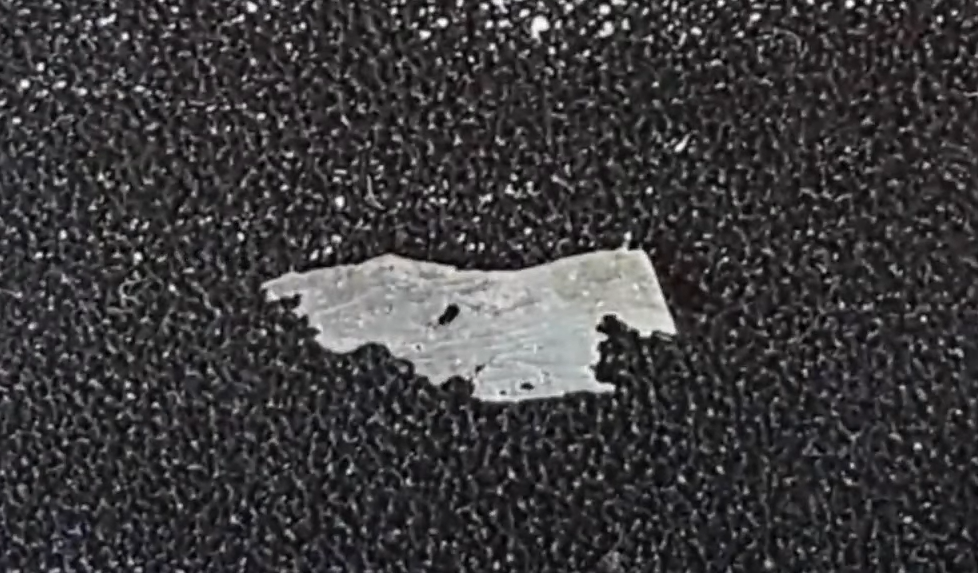
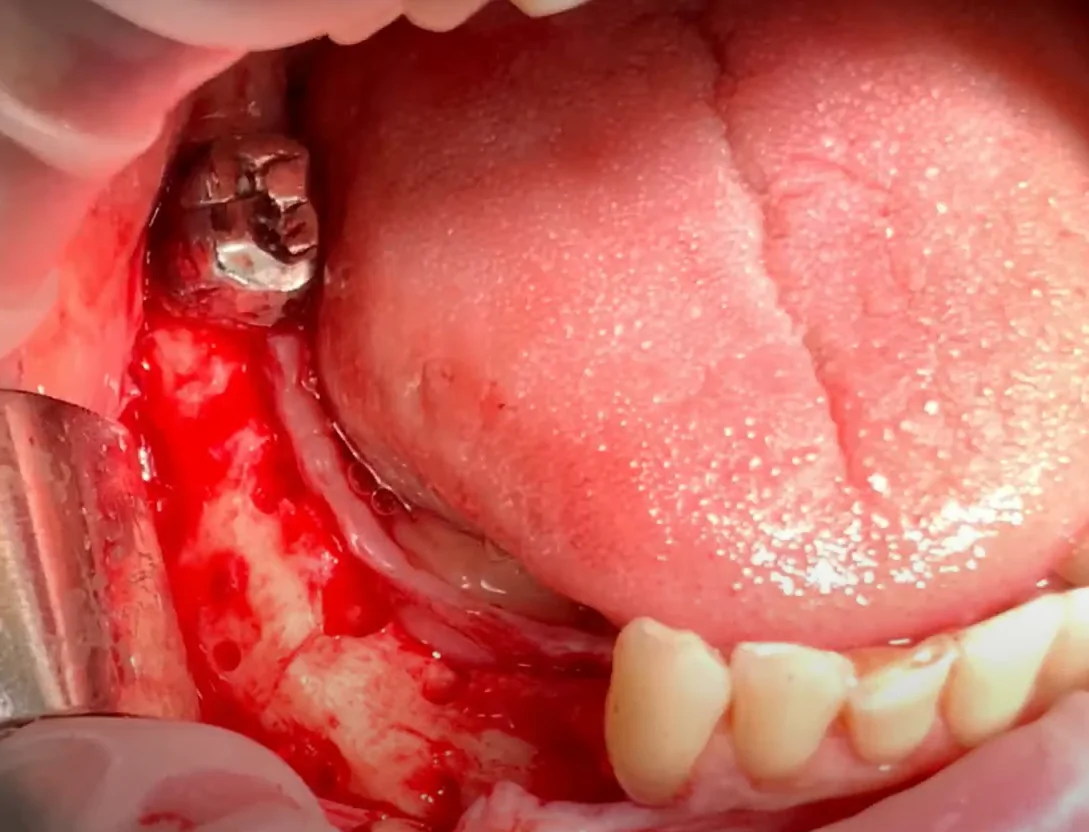
A fragment of the membrane that separated and was expelled through a mucosal rupture due to complications during bone grafting. YouTube / Dr. Kamil Khabiev / Dental Guru Academy
Upon examination, it was discovered that the bone blocks had not integrated and partially decomposed remnants were found on the screws. Unfortunately, a photo of the patient’s condition at the follow-up visit was not saved. But the picture was bleak.
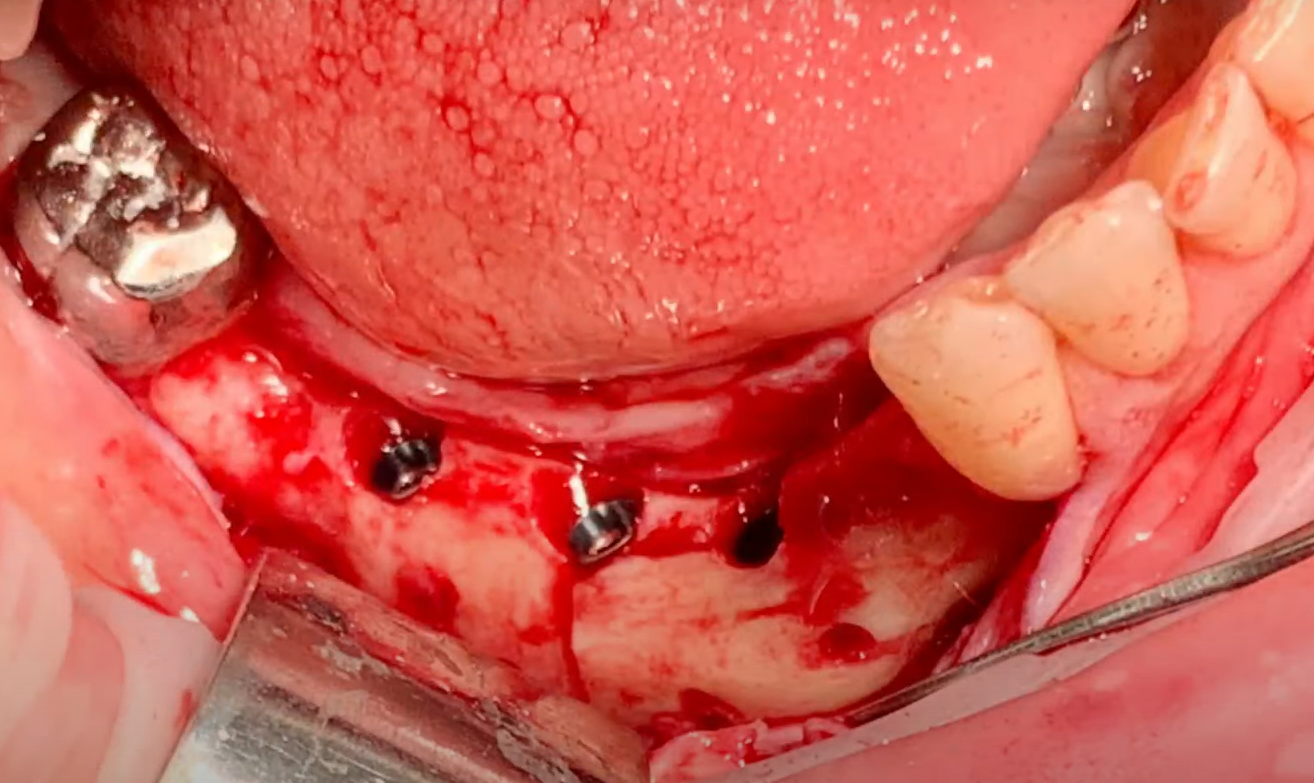
The necrotic segment had to be removed, the area debrided, and the soft tissue allowed to heal. The patient, as well as her prosthodontist, were still waiting for a solution, namely, a reliable support for a prosthesis.
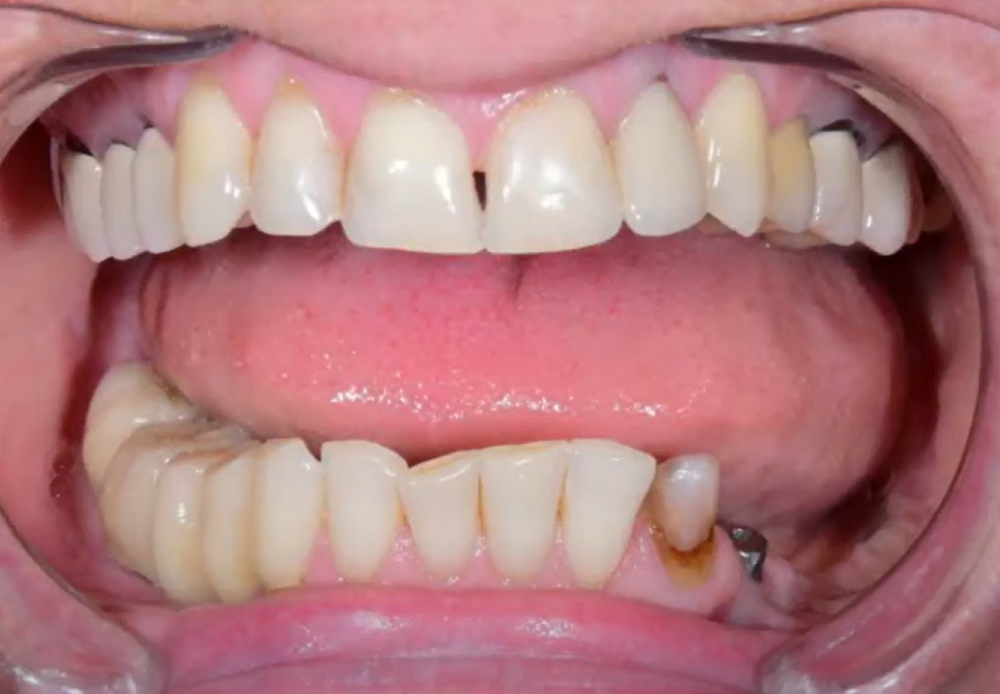
The patient’s oral cavity after addressing the consequences of unsuccessful bone grafting. YouTube / Dr. Kamil Khabiev / Dental Guru Academy
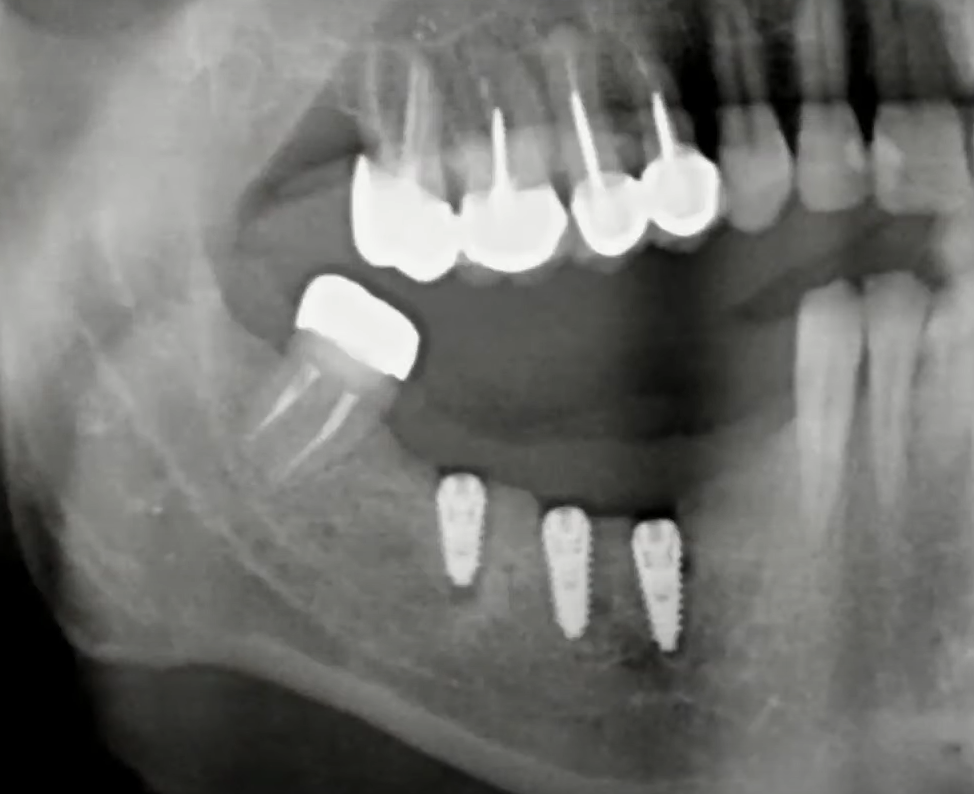
As a result, the surgeon decided to extract tooth #34 to allow implant placement in its position. The bone defect site where bone grafting was initially planned was bypassed, and two additional implants were placed in the positions of teeth #37 and #38, along with GBR around the implant necks. A prosthesis supported by these three implants was then fabricated. This approach is quite reliable, the chewing function was restored, and the patient is satisfied.
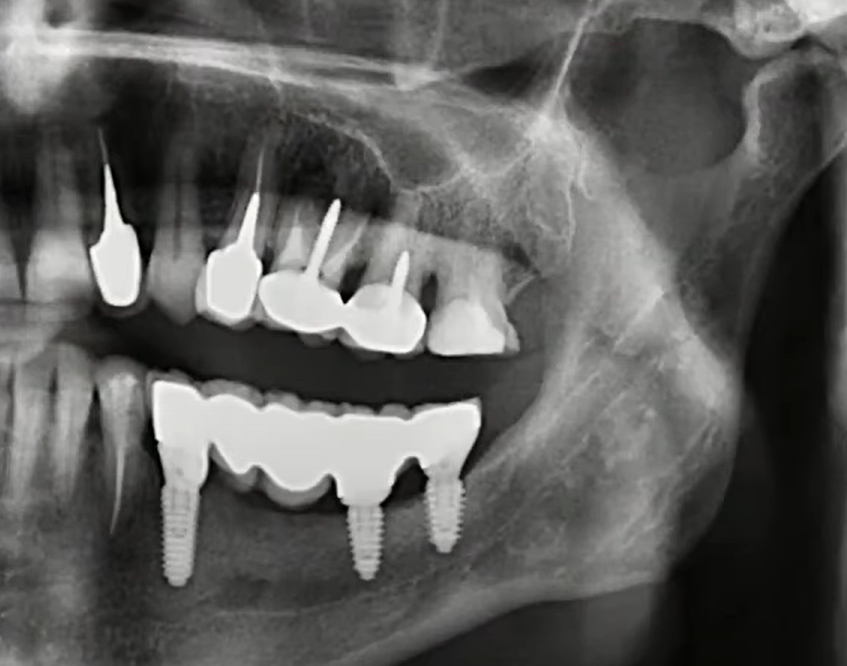
Restoration of the left lateral segment of Patient No. 2. Tooth #34 was extracted, an implant was placed in its position, and implants were placed in positions #37 and #38 with GBR. YouTube / Dr. Kamil Khabiev / Dental Guru Academy
As shown, identical decisions can result in either complete success or complete failure in the same patient. This is a significant disadvantage of large-volume bone grafting. The risk of complications is high even in relatively young and healthy patients.
Disadvantages of bone augmentation with bone blocks:
- Very narrow range of patients will tolerate this procedure without complications.
- High demands on the clinician’s experience and dexterity.
Nevertheless, a solution was found, and 4 years later, the follow-up images showed the success. There is practically no bone loss in the area where the implants are located. Clinically, the restorations look excellent on both sides.
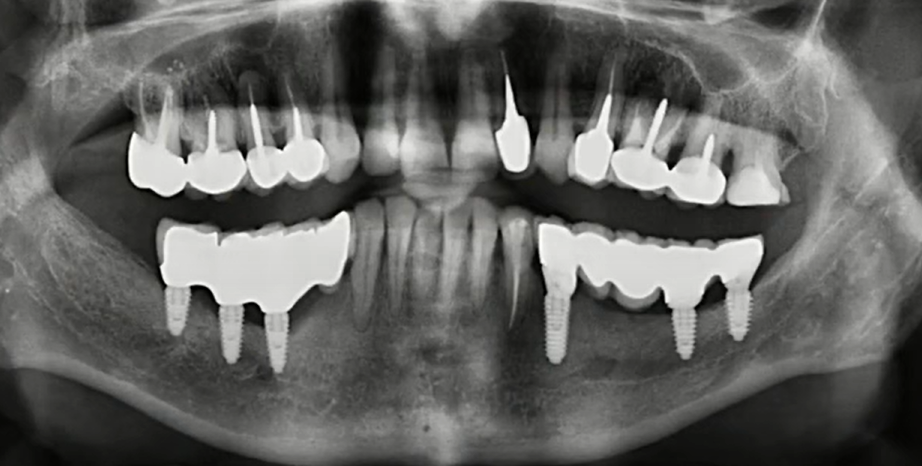
Orthopantomogram of Patient No. 2, 4 years after restoration placement. YouTube / Dr. Kamil Khabiev / Dental Guru Academy
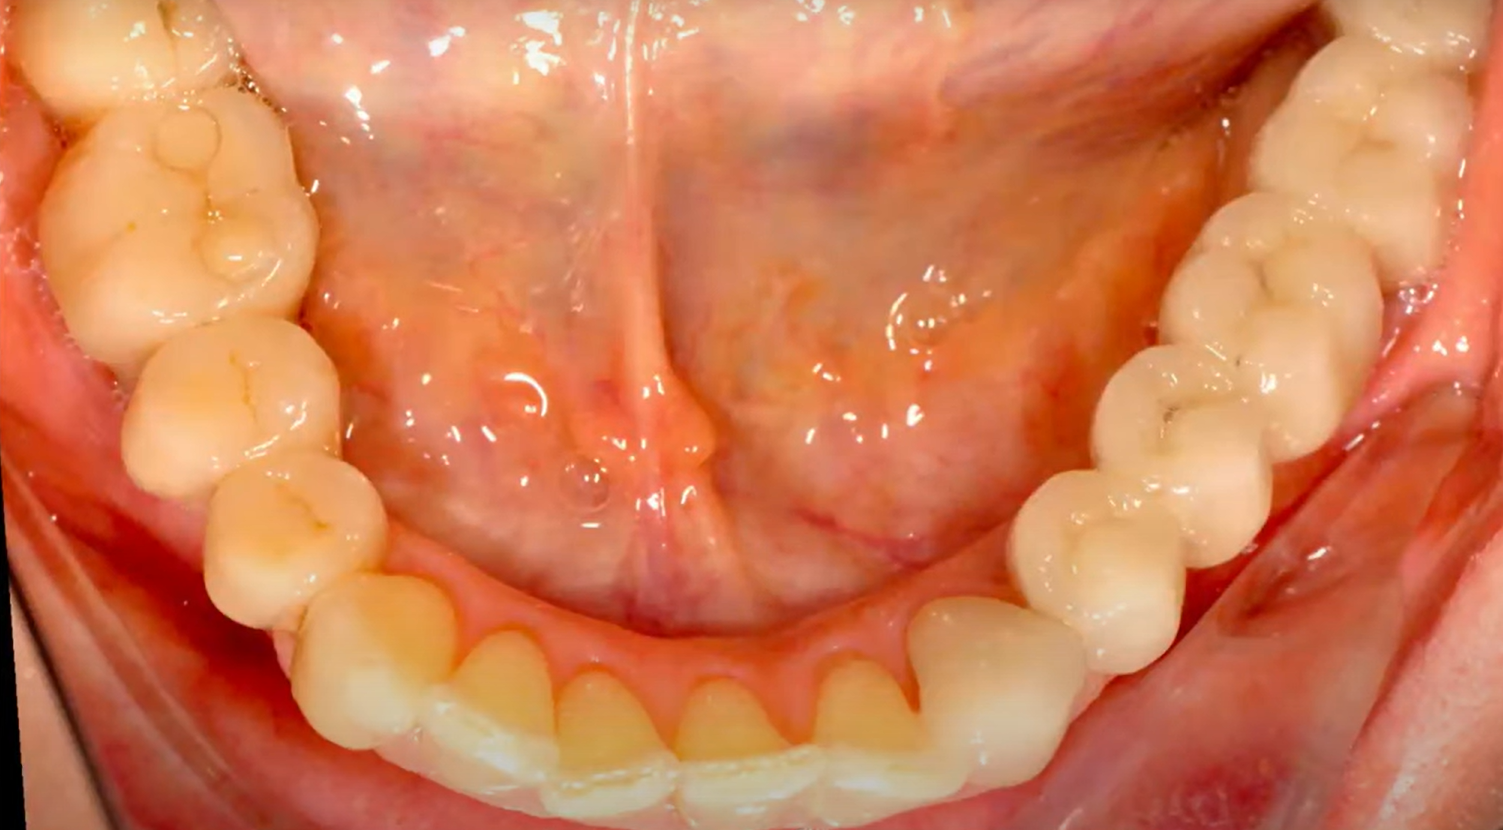
Image of the lower jaw of Patient No. 2; restorations on both sides are clinically successful. YouTube / Dr. Kamil Khabiev / Dental Guru Academy
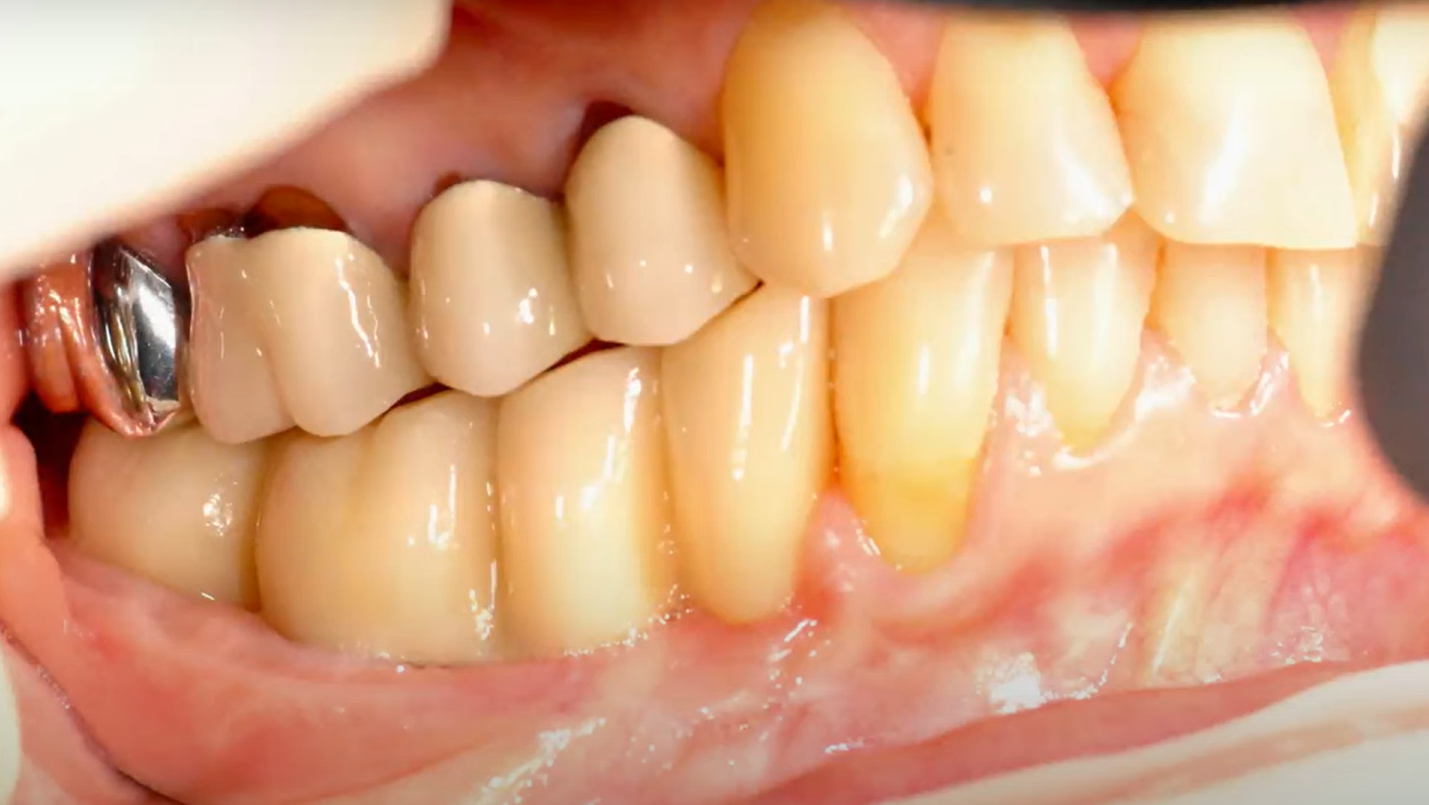
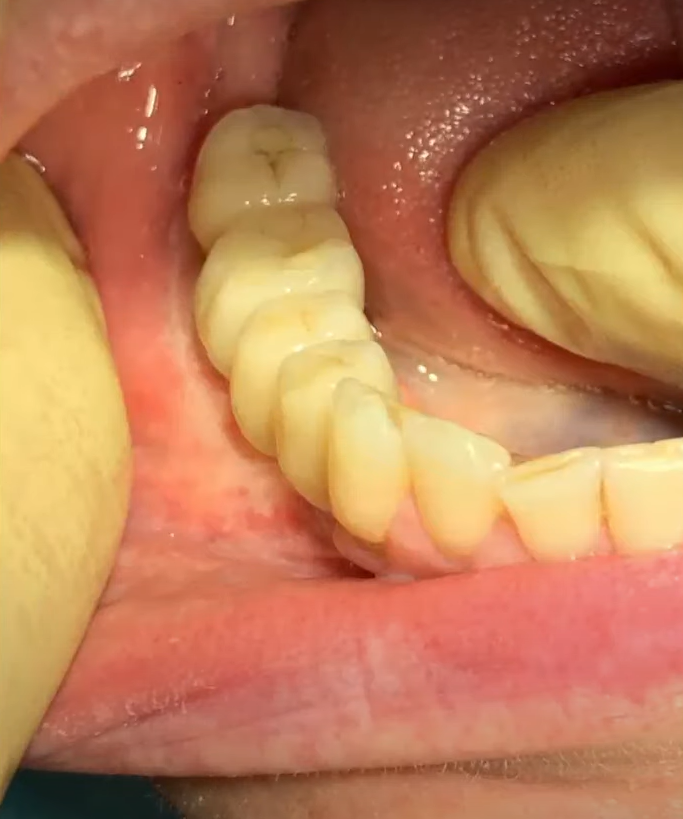
Restoration on the 4th quadrant of the lower jaw after a successful bone grafting procedure. YouTube / Dr. Kamil Khabiev / Dental Guru Academy
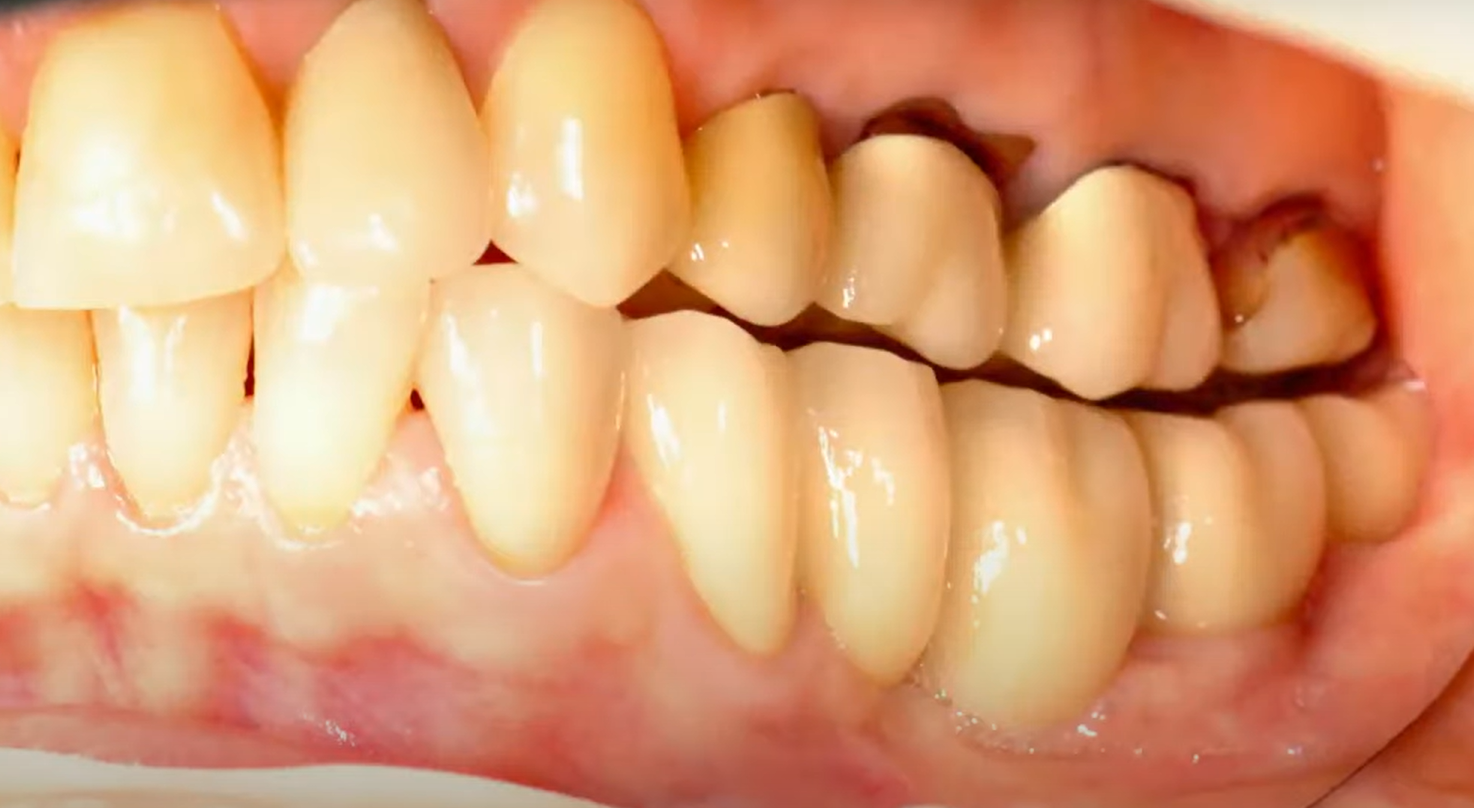
Restoration on the 3rd quadrant of the lower jaw after failure of bone block augmentation. YouTube / Dr. Kamil Khabiev / Dental Guru Academy
5. Patient No. 3: Complications in Aesthetic Zone Augmentation
5.1. Previous Treatment Analysis
Based on the initial condition, it is clear that successful restoration cannot be achieved without further intervention. Therefore, it was decided to perform a new procedure to augment the bone using bone blocks.
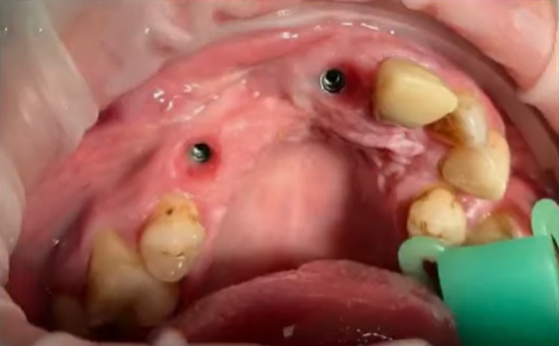
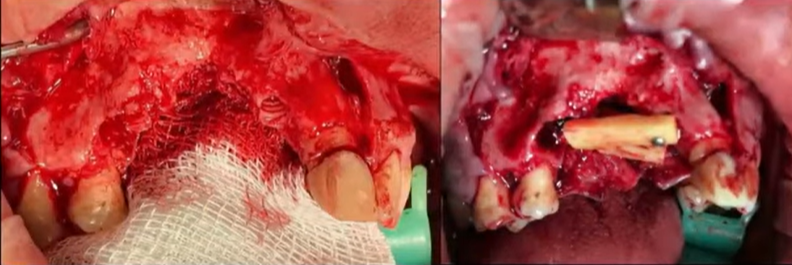
Condition of the patient’s oral cavity after unsuccessful GBR. YouTube / Dr. Kamil Khabiev / Dental Guru Academy
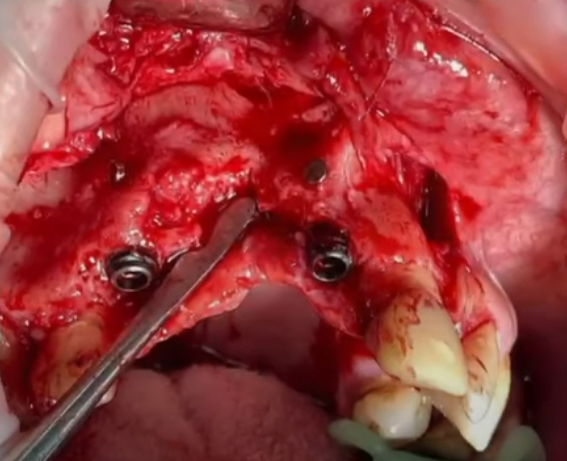
Condition of the bone tissue between and around the implants after flap reflection. YouTube / Dr. Kamil Khabiev / Dental Guru Academy
After evaluating the situation, the surgeon removed the fixation screws from the previous GBR procedure and extracted the previously placed implants.
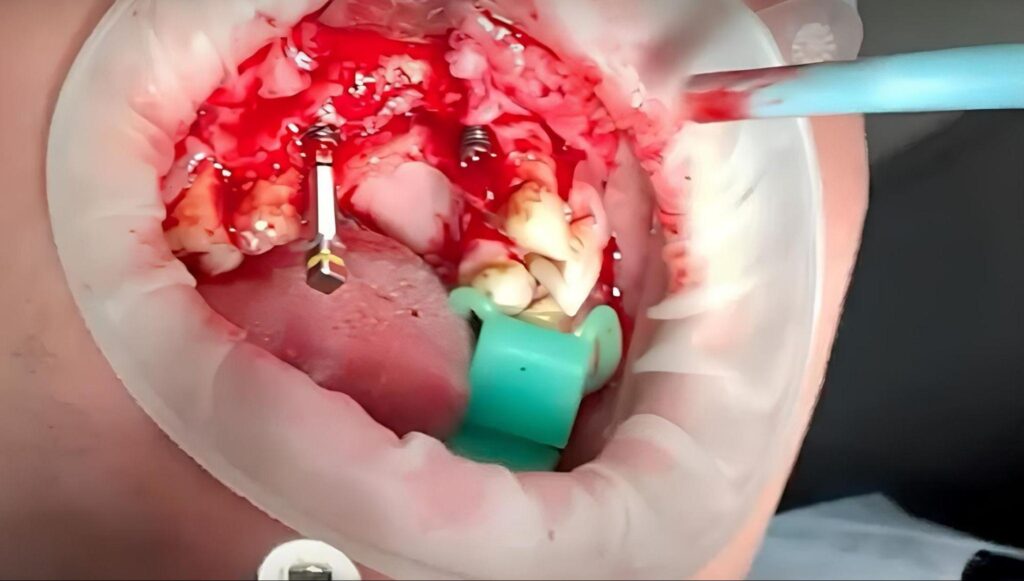
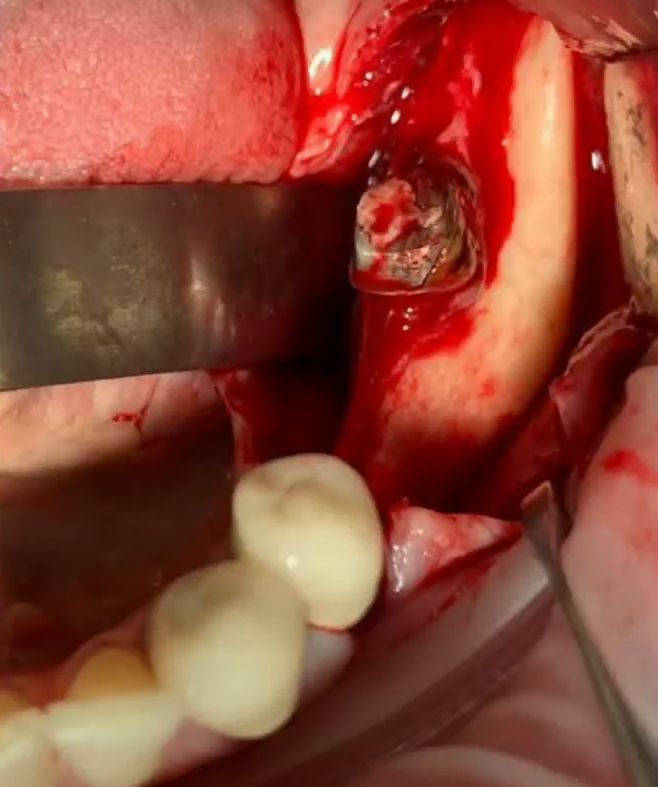
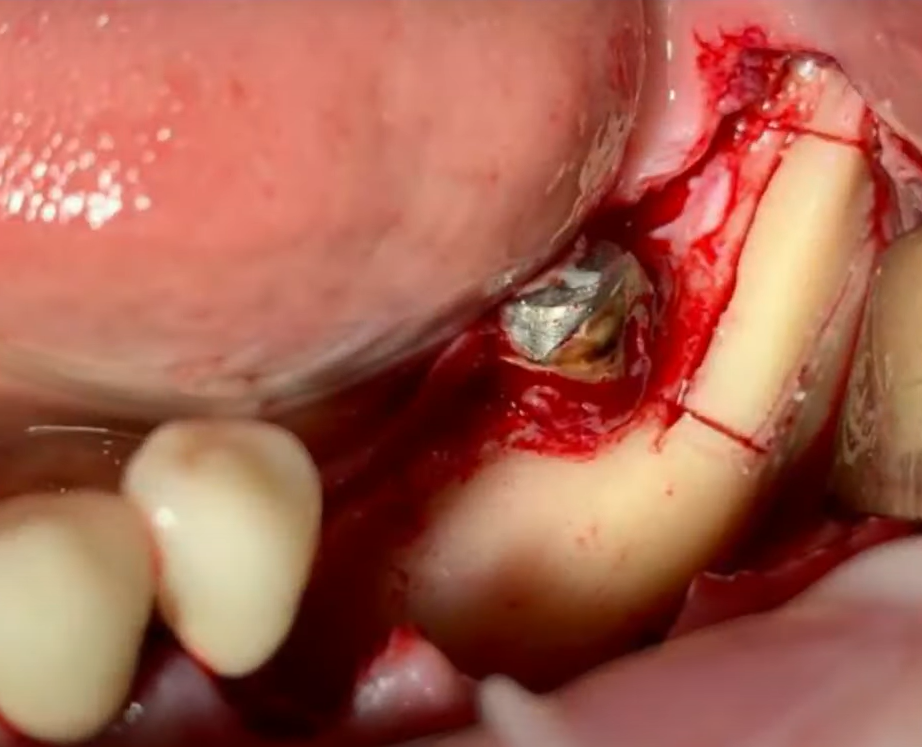
The process of removing previously placed implants. YouTube / Dr. Kamil Khabiev / Dental Guru Academy
5.2. Bone Block Surgery and Complications
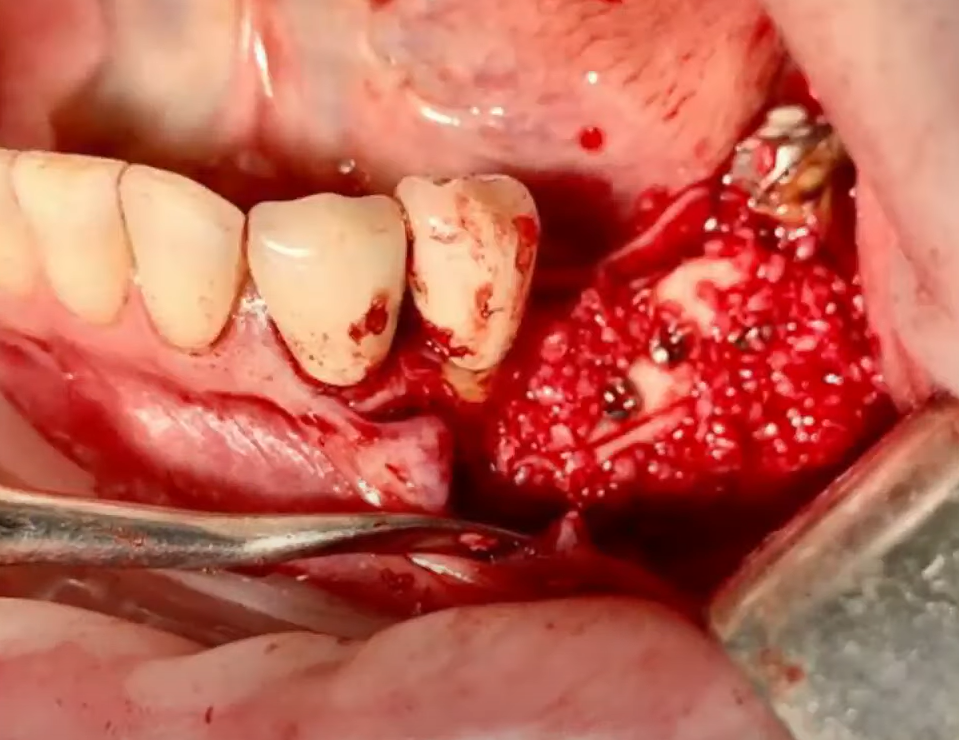
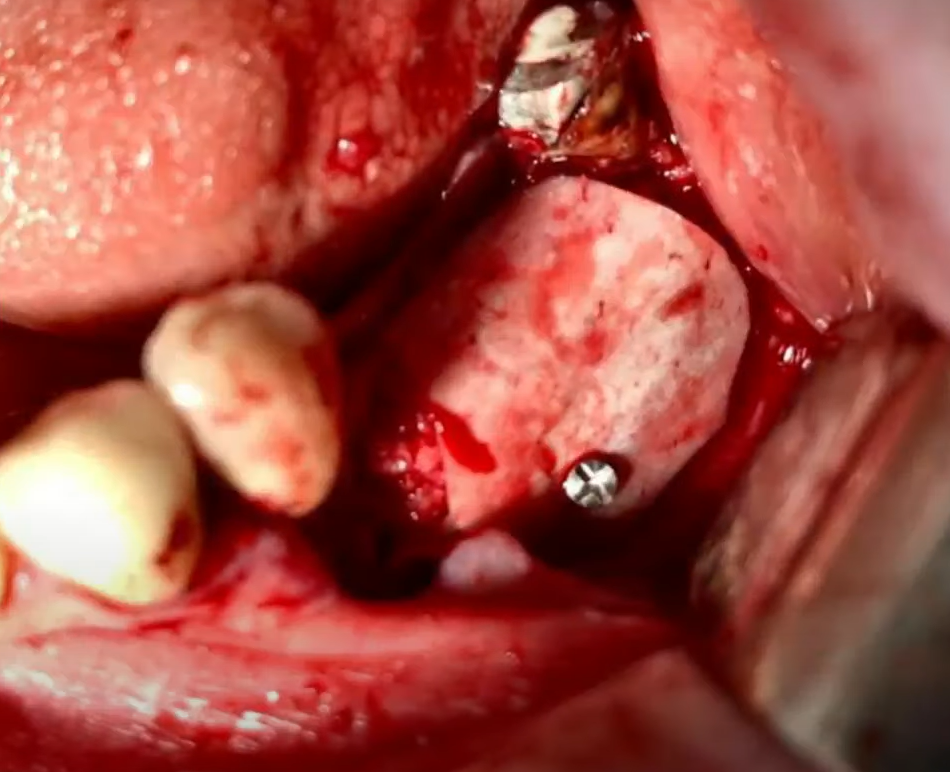
Next, the surgeon created a “formwork” from bone blocks and filled the cavities with bone graft.
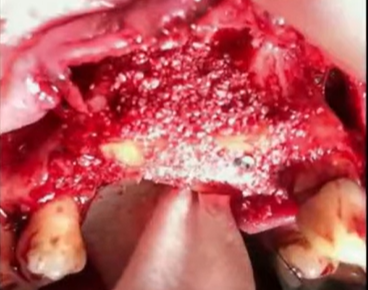
The process of surgery to restore the alveolar ridge with bone blocks. YouTube / Dr. Kamil Khabiev / Dental Guru Academy
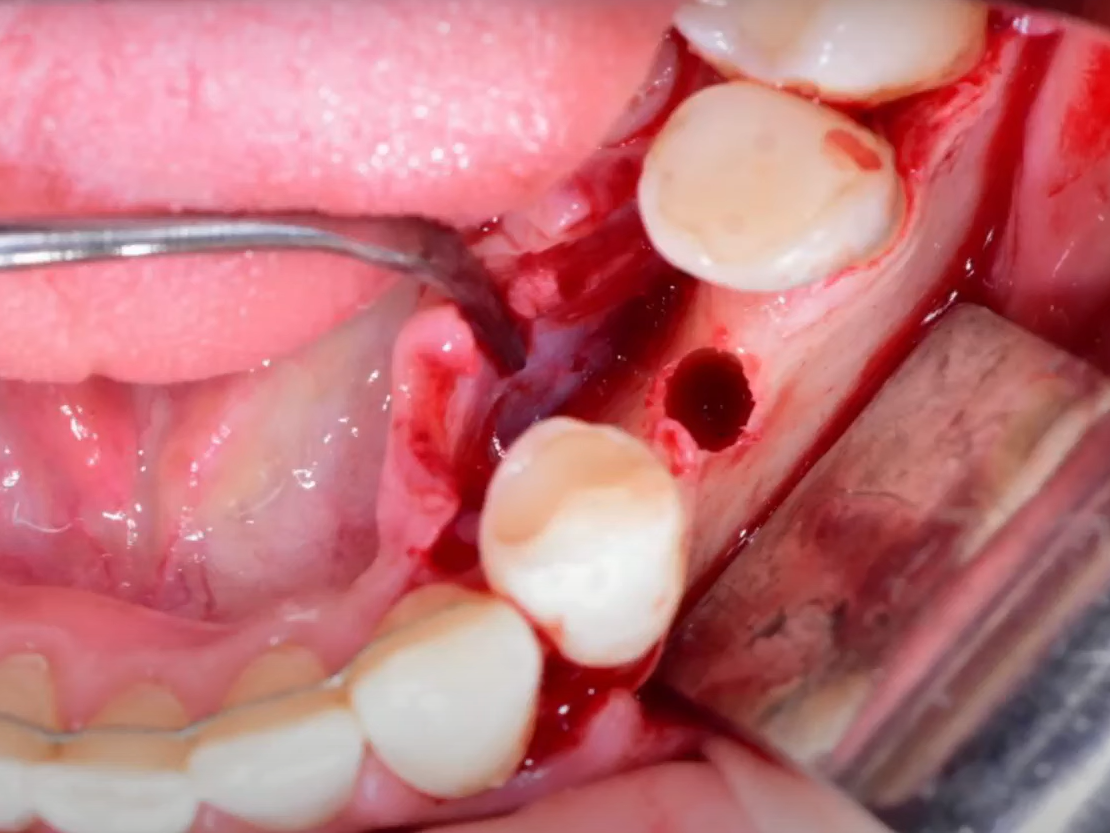
The last photo indicates the need to add a trapezoidal bone block from the facial side. During the harvesting of a bone block using a piezosurgical device, the tip fractured. The surgeon was working in the area of the external oblique ridge of the mandible. Since the bone block was nearly detached, the surgeon opted to use a chisel to detach the bone plate.
Despite careful actions, the patient sustained a mandibular fracture. The fracture was incomplete, more like a crack, but the situation was still extremely concerning.
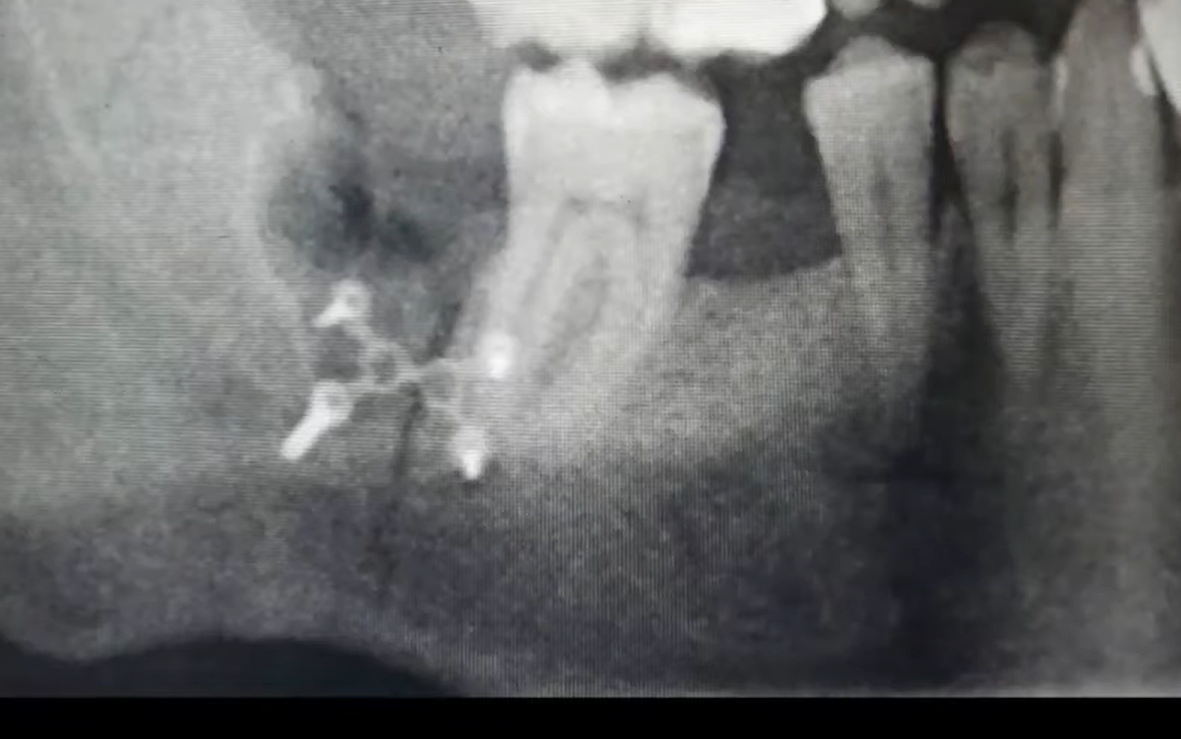
Crack (fracture) of the lower jaw that occurred during the harvesting of bone material. YouTube / Dr. Kamil Khabiev / Dental Guru Academy
The fracture was splinted, the soft tissue was sutured, and the patient was referred for rehabilitation.
Ultimately, everything ended well, but this case serves as another cautionary tale that any practicing surgeon may encounter.
6. Patient No. 4: Minimal Intervention Approach
6.1. Initial Assessment
The patient is a young woman, 30 years old, with no significant medical history, but undergoing orthodontic treatment, as indicated in the image below.
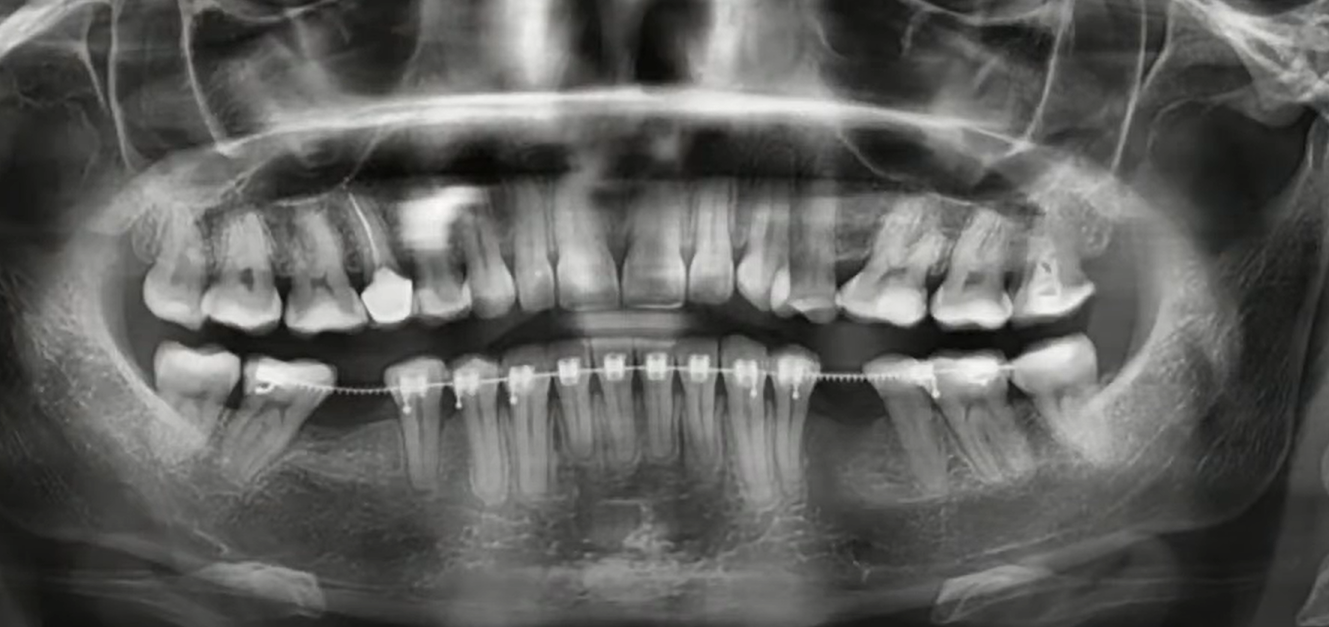
Orthopantomogram of Patient No. 4 before treatment. YouTube / Dr. Kamil Khabiev / Dental Guru Academy
Orthodontic treatment was nearing completion, and the patient was referred to address molar defects in the lateral areas of the mandible.
The image shows that the 35th tooth had been moved to the 36th position. In fact, the patient now has room for an additional third premolar. However, as shown in the picture below, the alveolar ridge is very narrow, and this thinning is a direct consequence of the orthodontic treatment.
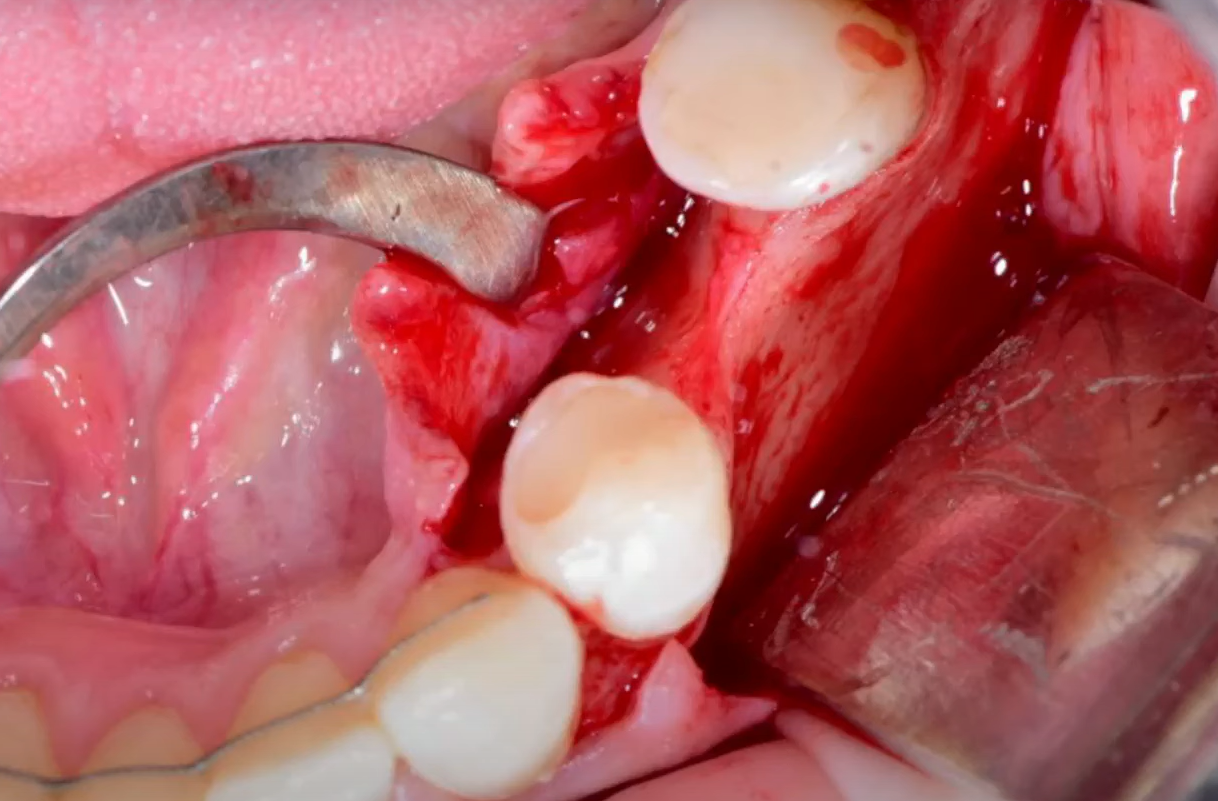
Thinning of the ridge due to tooth movement by the orthodontist. YouTube / Dr. Kamil Khabiev / Dental Guru Academy
One treatment option is bone grafting, which would require harvesting bone from another site and a waiting period for graft integration. We remember the negative experience with Patient No. 2.
A second option is ridge splitting, but given that the patient is in the final stage of orthodontic treatment and the bone tissue is less dense, splitting carries a risk of further bone loss.
6.2. Surgical Procedure
Therefore, the surgeon decided to minimize intervention, and this is what was done:
- A site was prepared for a thin (3 mm diameter) implant using the available bone volume.
- A 3 mm diameter implant was placed. Bone deficiency is visible, but the implant is well-positioned, remaining within the biological envelope.
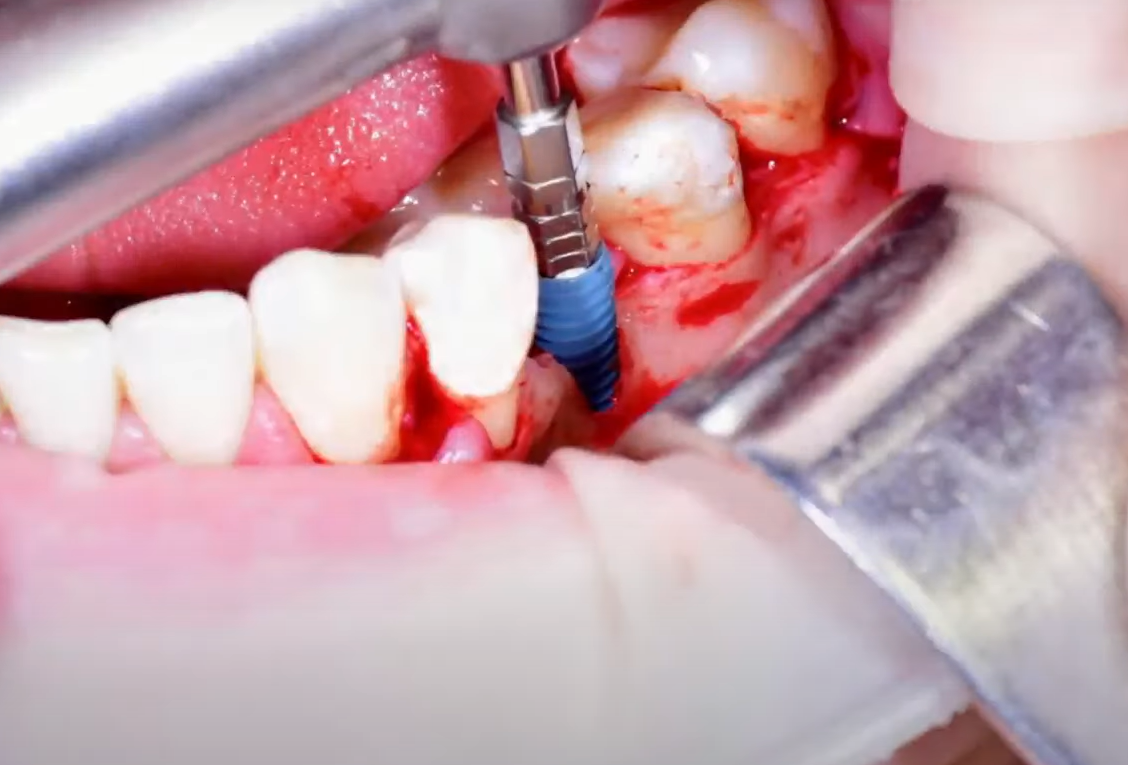
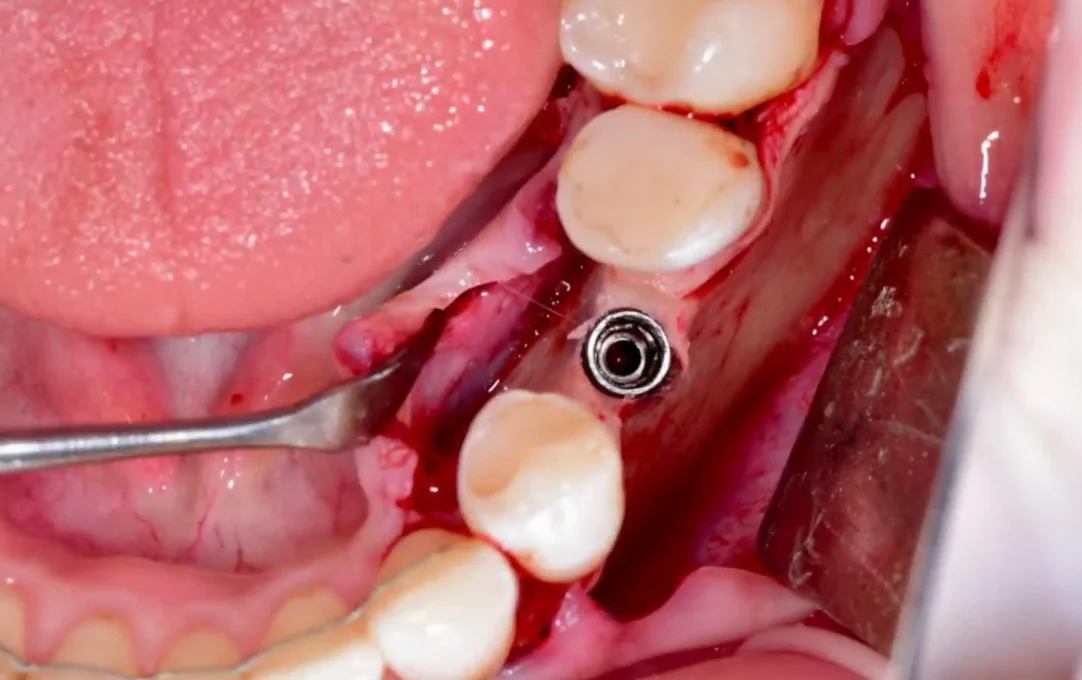
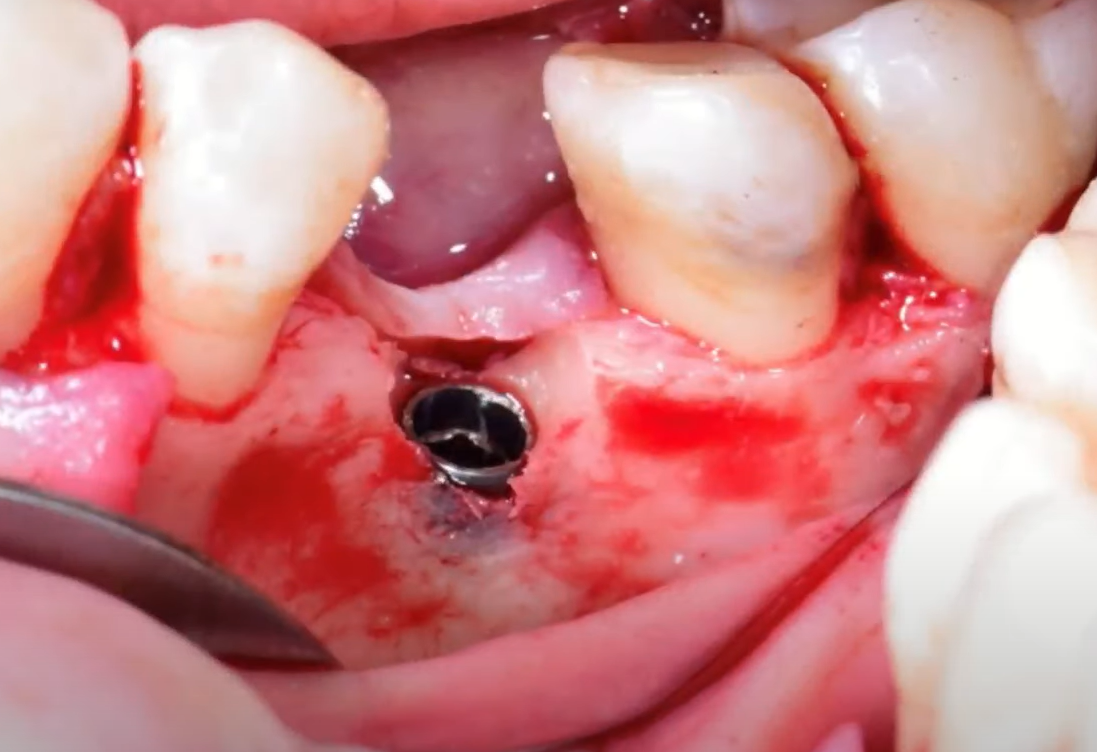
Parameters of the placed implant: ideal position, but bone deficiency on both sides YouTube / Dr. Kamil Khabiev / Dental Guru Academy
The bone around the implant is slightly profiled for soft tissue augmentation.
- A connective tissue graft was harvested from the patient’s palate and prepared. This involved de-epithelialization and perforation strictly in the center.
- The graft is positioned simultaneously with the healing abutment (Carlos technique). Its widest portion is on the buccal side.
- The flap was repositioned and sutured. The distal releasing incision was closed with two simple interrupted sutures.
Next, mattress sutures were placed through the gingival papillae, four in total in this case.
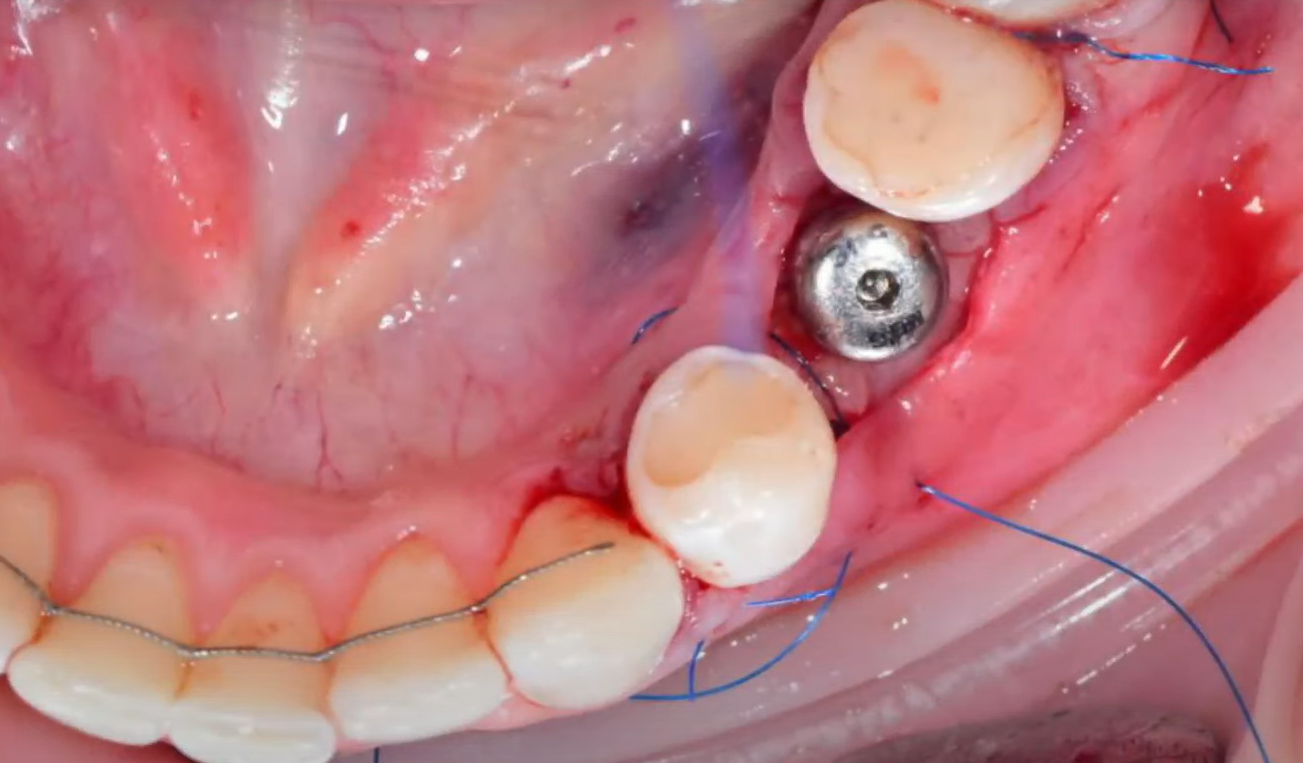
Mattress sutures for restoration of gingival papillae. YouTube / Dr. Kamil Khabiev / Dental Guru Academy
Finally, a continuous suture was placed to secure the superficial layer of the gingiva.
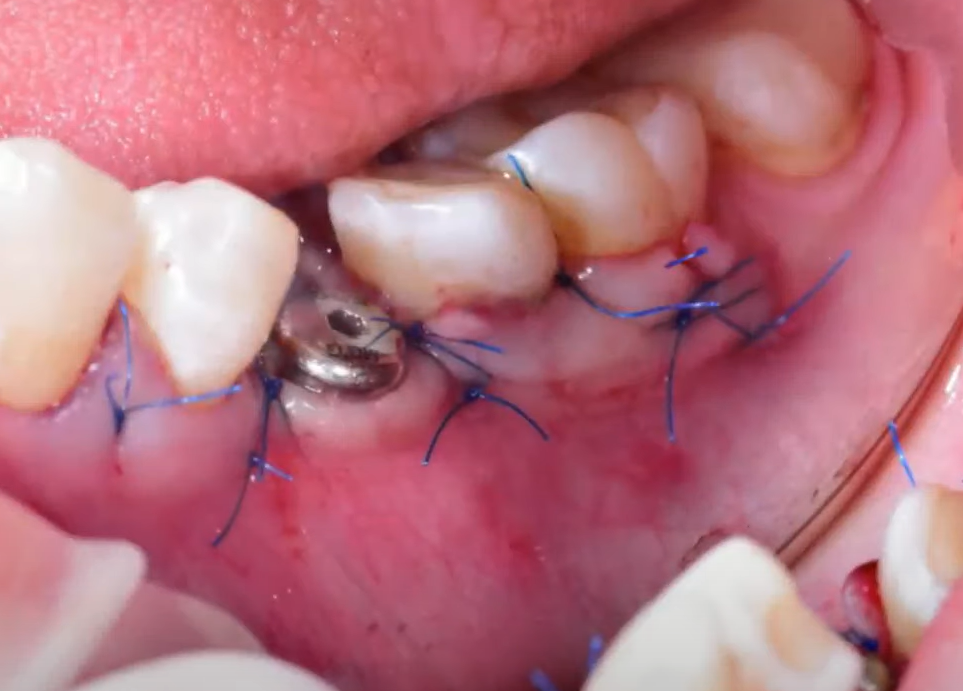
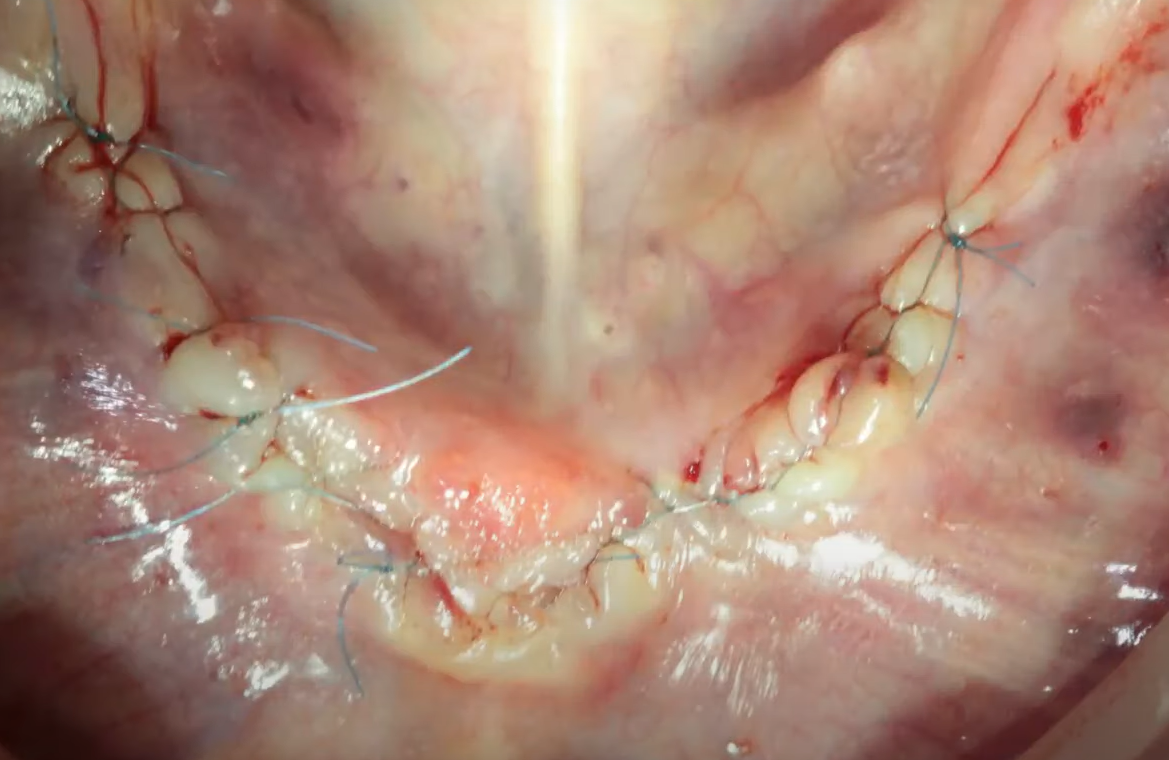
Sutures for fixation of the superficial layer of the gums. YouTube / Dr. Kamil Khabiev / Dental Guru Academy
6.3. Post-operative Results
The surgeon’s work was complete at this point. The control X-ray reveals proper implant placement with sufficient bone support on both sides. We then waited for the completion of osseointegration.
This approach will prevent a gingival recession. A robust soft tissue cuff will form around the implant. Good soft tissue volume will retain the entire bone volume present at the time of implantation. Furthermore, in this particular case, given the patient’s young age and the fact that bone tissue continues to mineralize after orthodontic treatment, secondary stability will be very high. This is key to the longevity of the restoration, for at least 20 years.
7. Conclusion
In clarifying the main topic of this article, gentle implantation can be defined as minimally iatrogenic.
The topic of risks, errors, and complications is a concern for any practicing clinician. We publish articles like this with the hope that, despite the inherent complexity and responsibility, our readers will learn from challenging cases. Of course, it is easier to limit oneself to a few simple procedures, which carry minimal risk. However, this limits specialists both professionally and financially.
In the second part of our article, we will examine more cases of unsuccessful treatment attempts that were addressed successfully through the skill and experience of the surgeon. We hope that this information will help prevent the same errors and complications experienced by your colleagues.
We look forward to presenting the second part of this article.

