Implantation for Beginners. Part 2
Contents
In the previous part, we considered issues related to selecting implants for different bone types. We explored the search for universal solutions, methods for checking primary stability, and briefly touched on the simplicity of modern surgical protocols. In this part, we will continue to analyze the criteria for selecting implants and prosthetic components, as well as key points in the surgical and prosthetic stages of treatment.
How the Simplicity and Versatility of Superstructures Facilitates Prosthetic Work
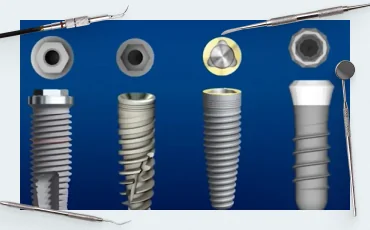
A key feature of modern systems is a single implant/abutment interface that allows for platform switching across all implant lengths and diameters. The illustration below shows an abutment with a conical interface that functions equally well in a 3.2 mm diameter, 16 mm long implant and in a 6 mm diameter, 8 mm long implant.

A universal implant/abutment connection for all implant diameters YouTube / Dr. Kamil Khabiev / Dental Guru Academy
Most manufacturers already adhere to this principle, but it is better to clarify this point when choosing a new implant system. Moreover, the interfaces of many manufacturers are compatible. For example, Uniqa Dental abutments support two popular interfaces:
- Straight with an internal hexagon
- Conical 11°
These are fully compatible with implants from at least 42 other brands. This is a great advantage, because a patient might present with an implant from one manufacturer, placed several years ago, while the doctor primarily uses another brand. If the interfaces are compatible, the doctor can place one or more new implants and fabricate a new prosthesis supported by both the new and the previously placed implants, using new abutments.
This interface versatility also extends to cover screws, healing caps, transfers, and other prosthetic components.
Some manufacturers scale their interfaces, meaning each implant diameter has a different connection and a corresponding set of components. While this approach is also valid, it’s a crucial detail to verify when selecting an implant system.
A Comprehensive Set of Superstructures
This is also an important parameter when choosing an implant system. A good system should offer a wide choice of abutments:
- Straight and angled abutments for cement-retained restorations, available in various gingival heights, with and without anatomical emergence profiles. Clinical situations vary; for multiple restorations, stock abutments with sufficient height and width are better suited for chairside modifications during the fitting appointment. The illustration below shows several options of abutments from Uniqa Dental for cement-retained restorations.


-
- Straight and angled abutments for screw-retained restorations, also known as multi-unit abutments (MUAs). For example, Uniqa Dental offers MUAs with angles of 17°, 30°, and even 45°. For a detailed selection guide, see our article How to choose the right multi-unit abutments.

-
Sale!Original price was: $680.$578Current price is: $578.
-
Sale!Original price was: $320.$288Current price is: $288.


- UCLA or burnout plastic abutments for casting custom abutments. This technology is used less frequently now, but there are still clinical cases where casting an abutment is more practical than milling a custom one.
- Healing caps for both implant-level and MUA-level healing, as well as implant cover screws

-
Sale!Original price was: $600.$510Current price is: $510.
-
Sale!Original price was: $600.$510Current price is: $510.


- Transfers, abutment analogs, and other components for fabricating laboratory models.
Why the Platform Switching Principle Is Important
Platform switching refers to using an abutment with a narrower diameter than the implant platform, creating a step-down transition between the two, as shown in the illustration below.

The principle of platform switching at the implant/abutment level YouTube / Dr. Kamil Khabiev / Dental Guru Academy
This space allows for the formation of a stable connective tissue cuff around the abutment, creating a tight and hermetic soft tissue seal. If the connection is platform-matched (with no step-down), the body will create this space by resorbing bone around the implant neck to accommodate the soft tissue attachment. This not only results in bone loss and potential exposure of the implant but also a lower-quality soft tissue seal, as collagen fibers attach better to the smooth abutment surface than to the rough implant surface.
 And With Platform Switching (Right) Youtube / Dr. Kamil Khabiev / Dental Guru Academy")
Implant/abutment connection example: without platform switching (left) and with platform switching (right) YouTube / Dr. Kamil Khabiev / Dental Guru Academy
The following images illustrate the difference. On the left, where platform switching was not used, the implants show significant bone loss and exposure, with one showing exposure down to the second thread.
: Significant Bone Loss. With Platform Switching (Right), Bone Levels Are Stable Youtube / Dr. Kamil Khabiev / Dental Guru Academy")
Consequences of no platform switching (left): significant bone loss. With platform switching (right), bone levels are stable YouTube / Dr. Kamil Khabiev / Dental Guru Academy
Therefore, when choosing an implant system, it is important to consider how a particular manufacturer implements platform switching.
Compatibility with Immediate Implantation Protocols, Including Immediate Loading
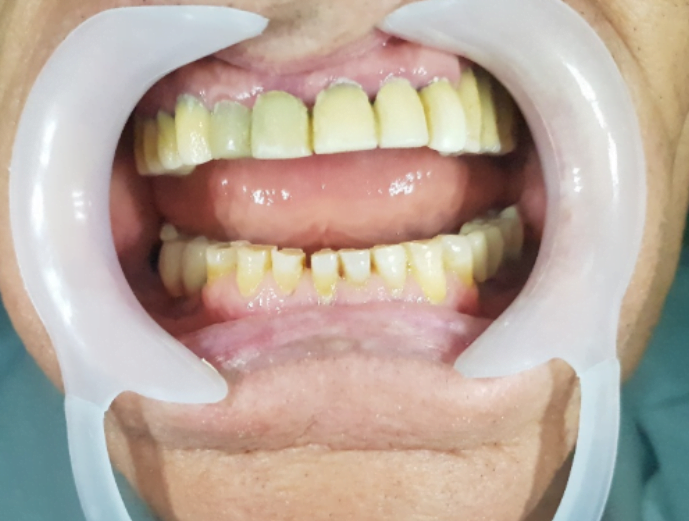
This is another of the most important criteria for choosing an implant system. Let’s look at a typical clinical example. The patient, a fairly young woman, presented with poor aesthetics and gingival inflammation in the anterior maxilla.

Soft tissue inflammation around a prosthesis in the anterior maxilla YouTube / Dr. Kamil Khabiev / Dental Guru Academy
The bridge seen in the photo was supported by the patient’s remaining teeth. After its removal, the doctor discovered the picture below.

The remains of destroyed teeth, some under silver inlays. The remains of teeth are hopeless and subject to extraction YouTube / Dr. Kamil Khabiev / Dental Guru Academy
The roots of the central incisors (11 and 21) and the lateral incisor and canine (22 and 23) were severely decayed and non-restorable. Therefore, the decision was made to extract the entire anterior group of teeth. Four implants were placed immediately following the extractions.

Four implants placed immediately after hopeless teeth extraction YouTube / Dr. Kamil Khabiev / Dental Guru Academy
The radiograph confirms the use of platform switching. The abutments are prepared for a cement-retained prosthesis.

Abutments for a cement-retained restoration after immediate implant placement YouTube / Dr. Kamil Khabiev / Dental Guru Academy
The temporary prosthesis was fabricated chairside, without a dental laboratory. Before removing the old prosthesis, an impression was taken. This impression served as a matrix for creating a temporary bridge using a fast-setting resin Luxatemp. The temporary prosthesis provides good aesthetics, though the final restoration will be superior. Immediately after the operation, the patient received the following result, see images before and after.

Radiographic and clinical views before and after implant placement YouTube / Dr. Kamil Khabiev / Dental Guru Academy
The most important takeaway for our topic is that the implants were successfully placed into the extraction sockets, achieving sufficient primary stability for immediate loading. In this case, the implants are quite thin, with a less aggressive thread design. This shape is well-suited for high-density bone, typical of the anterior region. As we discussed in the previous part, thread design is specialized for different bone densities. For more on how implant shapes vary between systems, see Differences Between Implant Systems:
- Aggressive threads with wide blades are suitable for low-density D3-D4 bone.
- Less aggressive, reverse-buttress threads are better for dense D1-D2 bone and are often recommended for immediate placement protocols.
- A variable thread profile, such as that of Uniqa Dental, can be considered a universal option. This type of thread is designed to facilitate implant placement even in difficult conditions. The sharp apical threads cut efficiently into the bone, requiring less insertion torque. As the implant advances, the wider coronal threads engage and gently condense the trabecular bone. The variable thread profile provides excellent bone-to-implant contact and, as a result, primary stability sufficient for immediate loading.

The variable thread profile of Uniqa Dental implants is advantageous for immediate implantation protocols
In addition to thread shape, the structure and purity of the implant surface are critical. Sterility is not enough. The surface may contain impurities of carbon and other materials that slow down osseointegration. Titanium is a biocompatible material, but carbon and other impurities are not. While these impurities are not typically toxic, they can slow osseointegration by preventing osteoblasts from forming new bone on the implant surface.
One of the most extensive studies on the surface impurities of titanium implants was published in the journal POSEIDO. 2014;2(1):37-55.
Why a 1.5–2 mm Gap Between the Implant Neck and the Buccal Bone Plate Is Important
This gap does not necessarily need to be filled with bone graft material, but its presence is crucial. It helps preserve the buccal soft tissue volume and provides space for the formation of a stable soft tissue attachment (biological width) around the implant and abutment. Otherwise, there is a high probability of gingival recession and exposure of the metal components.

The principle of maintaining biological width during immediate implant placement YouTube / Dr. Kamil Khabiev / Dental Guru Academy
Let’s look at a specific example. A patient lost a tooth due to an injury. The root remains were removed, and an implant was placed immediately. The image shows that the principle of maintaining the biological width is observed, with the implant positioned slightly toward the palate.

Immediate implant placement after tooth root extraction, observing the biological width principle YouTube / Dr. Kamil Khabiev / Dental Guru Academy
The clinician then fabricates a temporary crown chairside and secures it with a screw. It is good that the screw access hole is located on the palatal surface of the crown.
Although the crown is not ideal, it completely solves the patient’s problem before a permanent prosthesis is installed.

A temporary crown for immediate implantation helps maintain the buccal gingival contour and volume, preventing tissue blanching or recession YouTube / Dr. Kamil Khabiev / Dental Guru Academy
Techniques for Immediate Implant Placement After Multi-Rooted Tooth Extraction
The classic method is to place the implant into the interradicular septum, aligning the implant axis with the central fossa of the future crown. This technique relies on apical fixation, where the implant’s apex engages the bone beyond the socket to achieve primary stability. Here is an example in the radiograph below. The healing cap shows the implant’s favorable restorative axis.

Implant placed in the interradicular septum, with stability achieved through apical fixation YouTube / Dr. Kamil Khabiev / Dental Guru Academy
However, clinical situations can vary: the interradicular septum may be compromised, or there could be pathology in the ideal implant position. Therefore, many placement options exist, some of which are shown below. The main goal is for the restorative axis of the implant to emerge through the center of the future crown’s occlusal surface, even if the implant itself is placed at an angle.

Implant placement options after multi-rooted tooth extraction YouTube / Dr. Kamil Khabiev / Dental Guru Academy
Let’s look at a clinical case where one of the implants had to be placed into the mesial root socket. Note the red line, which indicates the original position of the tooth root and the subsequent position of the implant placed in its socket.

Implants placed immediately after extraction. The molar implant was placed in the mesial root socket, not the interradicular septum YouTube / Dr. Kamil Khabiev / Dental Guru Academy
The images clearly show that the implant’s restorative axis is well-positioned, emerging near the central fossa of the future restoration. This means it will be easy for the prosthodontist to make the prosthesis, the occlusal loads will be distributed axially, and the risk of complications like screw loosening or implant overload is minimal. Similarly, implants can be placed in the distal sockets of extracted teeth.
A common question is whether osseointegration can be successful when the implant is initially stabilized only by its apex or a few threads. In this regard, healing is predictable; the body forms new bone, and after several weeks to months, the gap between the implant and the socket walls completely fills with bone, as seen in the following images.
 And After Osseointegration (Right) Youtube / Dr. Kamil Khabiev / Dental Guru Academy")
An implant with aggressive threads: immediately after placement in an extraction socket (left) and after osseointegration (right) YouTube / Dr. Kamil Khabiev / Dental Guru Academy
Another common concern for new implant surgeons is the parallelism between implants and adjacent teeth. When placing an implant into a root socket instead of the septum, some degree of tilt is often unavoidable.

Implant placed in the distal root socket, resulting in a noticeable angulation YouTube / Dr. Kamil Khabiev / Dental Guru Academy
While the implant itself is angled, this is not a problem as long as the restorative axis is correct. This can be verified by the emergence profile of the healing abutment. At the prosthetic stage, an angled abutment can be used to correct the angulation, allowing the final crown to be seated properly. However, if the implant’s restorative axis emerges too close to an adjacent tooth instead of the center of the prosthetic space, creating an acceptable crown will be problematic.
Sinus Lift and Immediate Implantation
Novice surgeons often avoid sinus lift procedures (subantral augmentation). This hesitation is somewhat justified, as the risk of complications, such as membrane perforation, can be higher than with other bone grafting procedures. If a functional restoration is possible without this surgery, avoiding it can be a sound decision.
However, sometimes the desire to avoid a sinus lift leads to highly compromised and irrational treatment plans, such as the one shown below.

An example of a poorly designed removable prosthesis, likely created to avoid a sinus lift procedure YouTube / Dr. Kamil Khabiev / Dental Guru Academy
It is difficult to imagine how a patient can live and use such a prosthesis in the 21st century.
Therefore, we believe that mastering the sinus lift technique is beneficial for all dentists who place implants. We have a dedicated article on sinus lift procedure, which mentions this clinical case.
In this article, we will focus on the criteria for choosing implants, instruments, and methods that will help a novice specialist reduce the risk of complications.
One of the most common problems is perforation of the Schneiderian membrane. It can be damaged if:
- The membrane has lost its elasticity and is adhered to the bone due to chronic inflammation in the maxillary sinus. In such cases, the procedure should be aborted, and the patient referred to a specialist for treatment. After treatment, the sinus lift can be reconsidered.
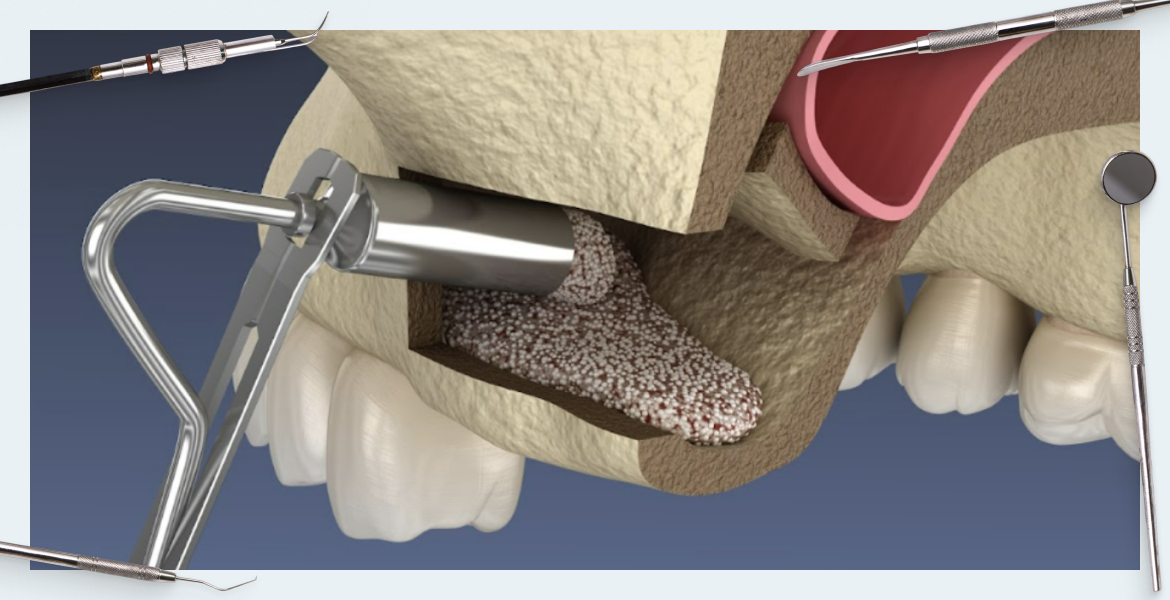
- The surgeon is careless during the creation of the bone window or the placement of the bone graft material. Various techniques exist to minimize this risk, such as detaching the Schneiderian membrane along with the bone fragment (the “lid”) that was cut from the lateral sinus wall, as shown below.

Introduction of osteoplastic material during open sinus lift surgery YouTube / Dr. Kamil Khabiev / Dental Guru Academy
Osseointegration Times: Do Implants from Some Manufacturers Really Integrate Faster?
This question relates to the implant surface—its micro-topography and any chemical modifications. The original Brånemark implants had a smooth, machined surface. They integrated successfully, and some are still in function after more than 40 years. However, their success rates were lower than today’s standards (around 85-90% compared to the current 96-99% for a minimum 1-year follow-up).
Modern titanium implants have a roughened surface. This macro- and micro-topography accelerates osseointegration by providing a larger surface area for bone cells to attach and proliferate. There are several options for surface modification, and each manufacturer chooses one or combines several methods. Some add hydroxyapatite, which serves as a mineral source during healing; others make the surface hydrophilic, which improves the distribution of biologically active fluids on the implant and accelerates healing.
When choosing an implant system, it’s important to differentiate between scientifically proven benefits and marketing claims. While we cannot endorse or criticize specific manufacturers, any implant system with FDA approval is capable of supporting a stable, long-term restoration (15+ years).
The table below provides brief information on the main methods of titanium surface treatment:
| Method name | The essence of the process | Note |
| SLA (Sand-blasted, Large grit, Acid-etched) | Sandblasting with a hard abrasive (aluminum oxide) + acid etching | Creates a micro-roughness (2–4 µm) favorable for osteoblast adhesion, but residual abrasive particles can be a concern |
| RBM (Resorbable Blast Media) | Sandblasting with β-tricalcium phosphate particles + soft acid etching | A cleaner surface with deeper micro-pores (5-10 µm). The resorbable media eliminates the risk of residual abrasive contaminants |
| Anodized | Electrochemical oxidation of titanium | Creates a thickened oxide layer, can increase hydrophilicity, and may accelerate osseointegration |
| Plasma-sprayed | Sputtering of titanium or hydroxyapatite | Applies a porous coating, but the coating’s long-term stability under load can be a concern |
| Laser-treated | Laser modification of the surface | Allows for precise control over surface micro-topography with high repeatability and excellent biocompatibility |
| Pure&Porous | Combined SLA + RBM technology | Creates a structured, clean surface free from abrasive residues, which is considered optimal for osseointegration |
This is what the surface of a Uniqa Dental implant looks like under a microscope.

Titanium surface modified with Pure&Porous technology
Certain surface technologies can indeed shorten the osseointegration period—for example, reducing the time to achieve sufficient secondary stability from 8 weeks to 6. However, at the beginning of one’s career, is this reduction critical? It is often wiser to be conservative and allow for a longer, more predictable healing period.
When selecting your first implant system, the key is to find a balance between cost, proven surface properties, and a straightforward, well-supported surgical protocol. Special drill coatings can further reduce the risk of complications — read more here.
That’s all for now. Stay tuned for next publications.