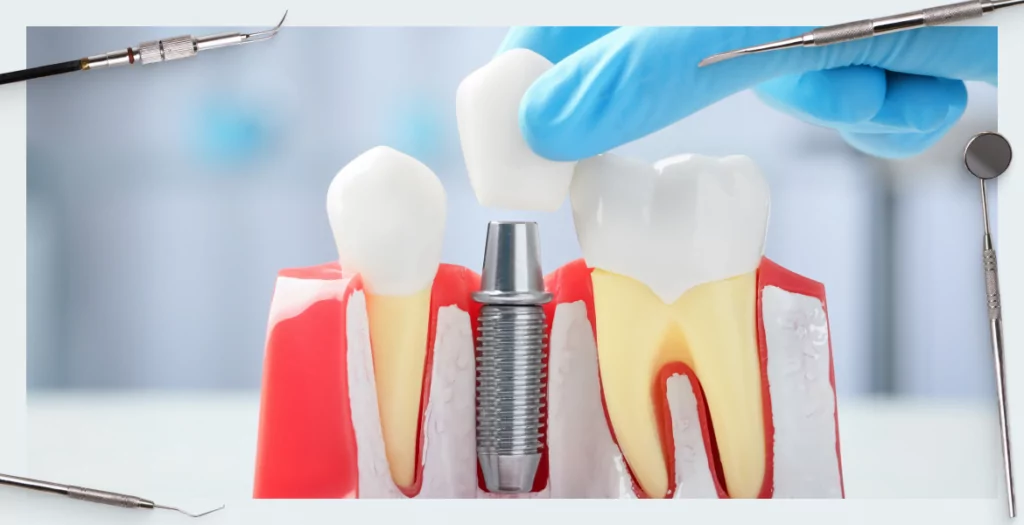
Reosseointegration of the implant. Can a rotated implant “take root”?
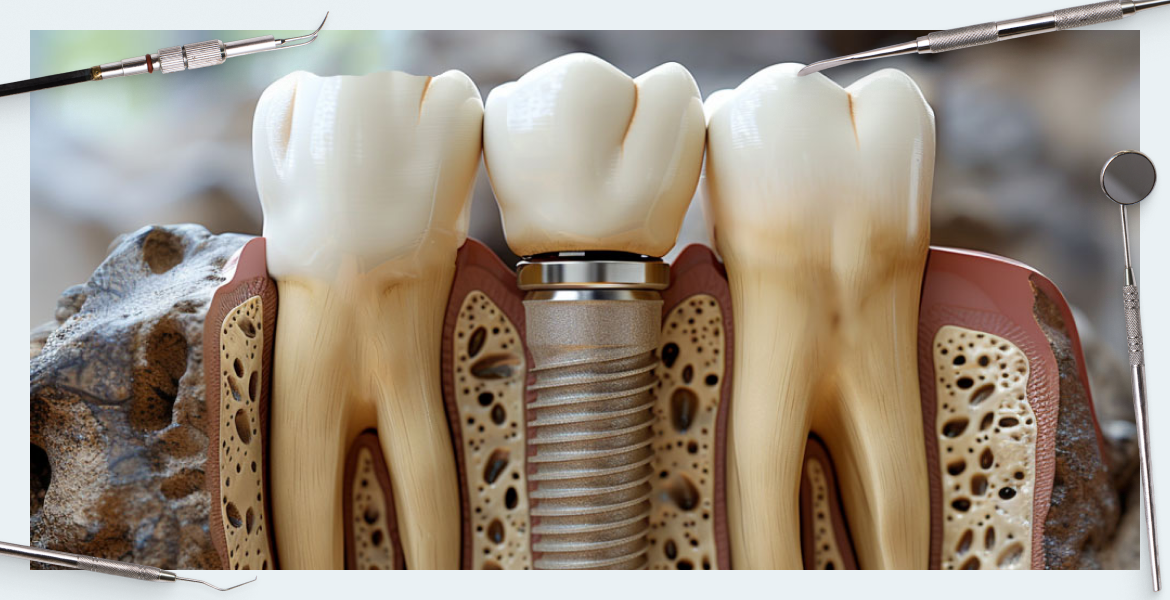
Unsuccessful implant integration is a “nightmare” for practitioners. In this article, we will explore potential actions and consider if it’s possible to avoid removing the implant. Picture this scenario: a patient returns 2-3 months post-implantation for prosthesis installation. Upon removing the healing cap—which can often be done with just your fingers—you place the abutment. However, when attempting to secure it with a torque of 35 Ncm, the implant begins to rotate. This may cause a sharp cry of pain from the patient. In such instances, one might recall advice from literature or films, such as the “Hitchhiker’s Guide to the Galaxy” series: keep calm and “know where your towel is” as a precaution. This advice is apt for both fans of the series and those who prefer other genres.
What to do if an implant rotated when placing an abutment
The rotation of an implant is indeed a disheartening event. However, there is a silver lining: if the implant is left undisturbed, it may reosseointegrate in its new position after approximately two months. Subsequently, the prosthesis can be fabricated, and the implant can be loaded. It’s true that unscrewing the abutment after the implant has moved can be challenging. There’s also the risk that the implant may be extracted along with the abutment. As a result, the patient may have to endure the inconvenience of a “bare” abutment during this period. Yet, after an additional two months, the previously placed abutment can be readily removed and repositioned, or a new abutment can be fitted if the clinical situation necessitates it. Achieving the necessary torque and successfully placing the restoration should then be feasible without issue.
It is noteworthy that reosseointegration is more common than not, with a considerable number of similar clinical cases documented.
What does reosseointegration look like in an in-vivo experiment?
Despite the fact that almost every practicing dentist will sooner or later encounter a similar problem, there are few publications on this topic. To be more specific, they exist, but high-quality ones are rare. However, we believe we have identified some of the most exemplary among them.
This is a very interesting article from Korean colleagues, which clearly explains the processes and phenomena that many practicing dentists have already observed. It sheds light on the biological patterns occurring at the interface where living tissue fuses with titanium.
The title of the article, “Reosseointegration of mechanically disintegrated implants in dogs: mechanical and histometric analyses”, reveals that the research involved placing implants in the jaws of dogs.
The study featured two groups of dogs:
- Control group: No manipulations were performed post-implantation until the experiment concluded
- Experimental group: The implants were unscrewed, examined, and reinserted after a period, followed by a comparison of tissue conditions around the implants with those in the control group.
The study employed a split-mouth design, wherein experimental and control interventions are randomly allocated to different sections of the oral cavity (teeth, surfaces, arches, quadrants), effectively negating individual variability’s impact on results.
Notably, the implants were placed with intentionally reduced torque, lacking primary stability and hand-screwed into the sockets. This was achieved using a 3.7 mm drill for a 3.7 mm implant, a practice not recommended in actual clinical settings. Typically, the socket’s diameter is marginally less than that of the implant to ensure engagement and primary stability. The appropriate reduction in the last drill’s size and any necessary socket expansion are contingent on the patient’s bone density. A description of the stock preparation protocol with recommended cutter diameters and video files can be found in this article.
Returning to the study, researchers placed implants with minimal primary stability, sealed them with a plug, and sutured the soft tissue overhead.
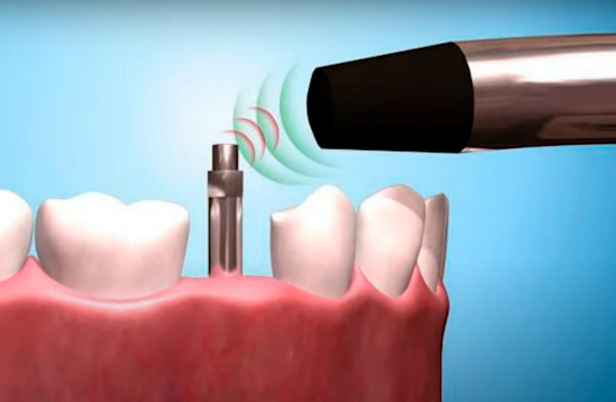
After four weeks, the researchers reopened approximately half of the implants, removed the plugs, and fitted special positioners to assess the implant’s stability quotient. Besides the resonance frequency analysis for evaluating implant stability, the Periotest device was also employed. This device measures the mechanical interaction between the implant and the bone tissue.
All data were meticulously recorded, and it is remarkable that the implants exhibited satisfactory secondary stability after four weeks. This can be attributed to the accelerated metabolism and tissue regeneration in dogs compared to humans, coupled with the fact that the subjects were young and in good health. Nonetheless, this indicates that the implants, despite being placed without any torque, achieved successful integration.
Following the assessments, all implants from the experimental group were extracted by reversing the drill’s motion, effectively unscrewing them.
The condition of the implants was documented photographically before they were reinstalled. As expected, following such a procedure, the implants were manually screwed back into the sockets. Positioners were immediately inserted into the implants to gather stability data once more. Subsequently, the plugs were reinserted, and the soft tissue was sutured for an additional four weeks.
After this interval, the implants were accessed from both the control group, where the implants remained undisturbed for eight weeks, and the experimental group, which experienced mechanical disintegration at the midpoint of the period. The stability quotient of all implants was then measured using both the resonance frequency analysis and the Periotest device.
Subsequent to these procedures, detailed histological analyses were conducted. These studies meticulously examined the interface between bone and implant, as well as the surrounding biological activities.
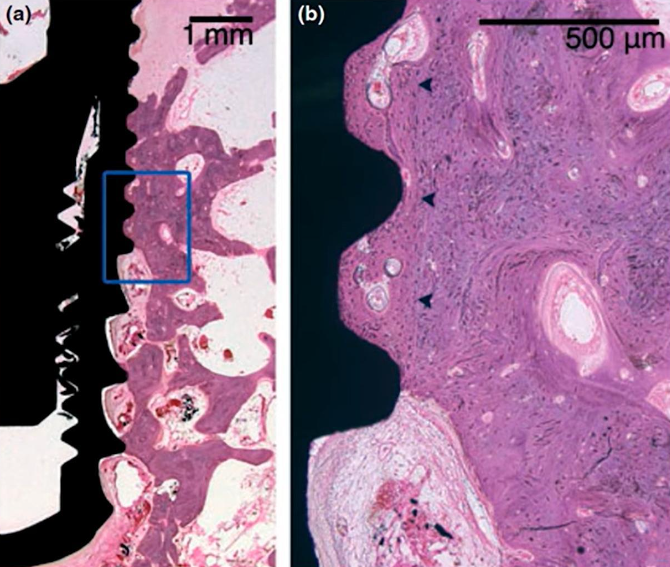
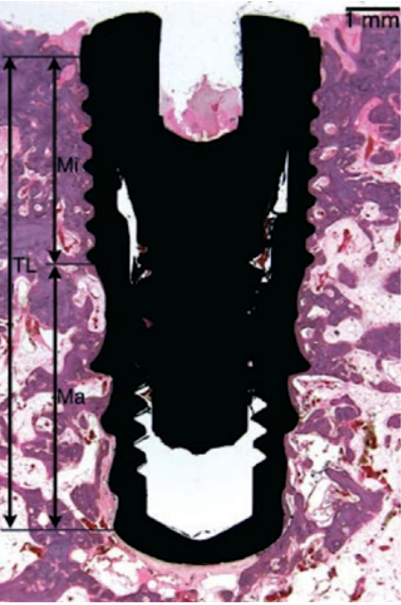
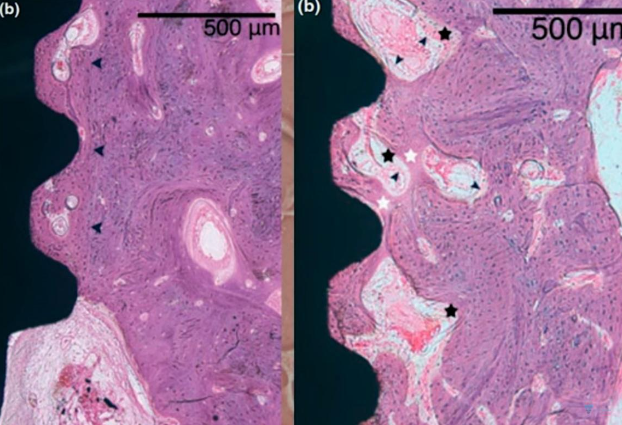
Microscopic section at the interface between bone tissue and the implant under high magnification; control group, 8 weeks without interventions
The results turned out to be very interesting; pay attention to the illustration above. The dark arrows on the right image delineate the boundary of the preparation bed, indicating that the milling cutter passed through this area during the formation of the hole, which was larger than the implant itself.
Nevertheless, the gap between the implant body and the preparation bed’s boundary is filled with well-developed and mature bone tissue. It’s important to note that in dogs, healing and new tissue growth occur at a faster rate than in humans, so the process would take longer in human patients. Despite this, the results are promising, demonstrating successful osseointegration.
Let’s now examine the experimental group, where the implants were removed and reinstalled after a four-week period.
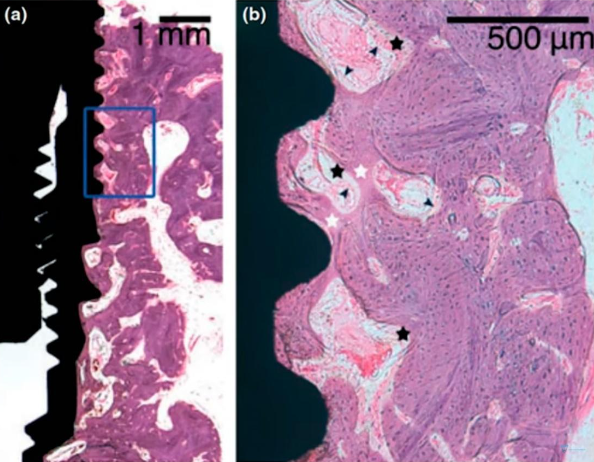
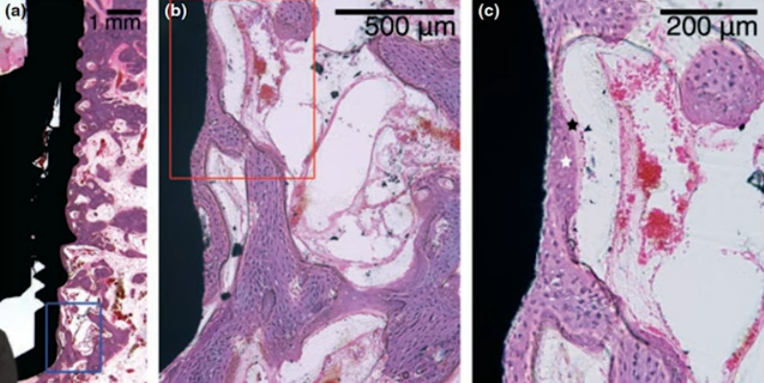
Microscopic section at the interface between bone tissue and the implant of the experimental group after mechanical disintegration at the 4th week of the experiment
The images demonstrate that osseointegration has occurred, with new bone tissue forming in ample quantity. The demarcation between the new and old bone tissue is not as distinct, which is evident in the right image. This is understandable, given that an injury occurred and some tissue was dislodged during the implant’s removal. In the experimental group, the presence of fibrous bone tissue was common, indicating that the bone tissue has not fully healed. However, with additional time, the bone tissue is expected to mature fully, and the quality of osseointegration should align with that of the control group.
Upon comparing the two images, it is observable that the control group exhibits a greater amount of lamellar bone, whereas the group subjected to implant disintegration shows notable inclusions of fibrous bone.
The photographs of the bones from the experimental group, taken at an even higher magnification, are particularly intriguing. Equally compelling is the accompanying description provided by the researchers.
Here’s a description by the research team:
“The image, highly magnified, reveals the development of coarse fibrous bone surrounding the pre-existing residual bone on the implant’s surface and within the original bone bed. The implant’s exposed surface exhibited appositional bone growth, integrating into the pre-existing residual bone.”
In essence, the implant that was unscrewed had already become encased in bone. Since the tissue fragments were not removed but rather re-screwed into place, the new tissue developed, anchored to the remnants of the bone previously formed. Thus, the bone tissue that adhered to the implant after the initial four weeks endured the injury and remained functional. New bone was then generated, building upon these existing fragments.
What methods will help reliably verify that osseointegration is successful or how to clinically determine whether the implant has taken root?
Let’s examine the outcomes obtained from measuring the implant stability quotients at various stages of the experiment. It’s important to highlight that resonance frequency analysis has proven to be the superior method for determining the implant stability quotients. Currently, it stands as the most dependable method for assessing the volume and quality of bone tissue attachment, aside from autopsy and histological analysis.
On the other hand, the Periotest method yielded such varied data that correlating its measurements with histological findings is nearly impossible. For those interested, the article can be located via the provided link, where the tables offer further insight.
Our focus, however, lies on different data, specifically the stability dynamics and the suitability of such implants for funnel installation. Refer to the table below for the implant stability quotients (ISQ) across various groups and experimental stages.
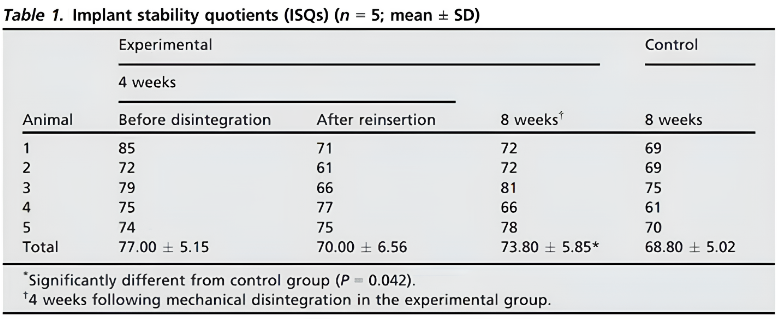
In the experimental group, the mean implant stability quotient (ISQ) reached 77 after four weeks and decreased to 70 during repositioning after mechanical disintegration. By the eighth week, the mean ISQ was significantly higher in the experimental group compared to the control group (P=0.042).
It’s significant that an ISQ of 77 allows for the safe placement of a single restoration. When considering group restorations, practical experience indicates that an ISQ of 65, and sometimes even 60, suffices, provided that it’s only one implant with such a low value and the others are more stable. Thus, observing an ISQ of 70 immediately after implant disintegration, when it was merely hand-screwed, was surprising.
Even more astonishing was the finding that, after an additional four weeks, those implants that were forcibly removed and reinserted exhibited greater stability than those left undisturbed for eight weeks.
Upon encountering such a result, one might be compelled to verify its accuracy. However, let’s proceed with the researchers’ line of reasoning and explore their explanation for this outcome.
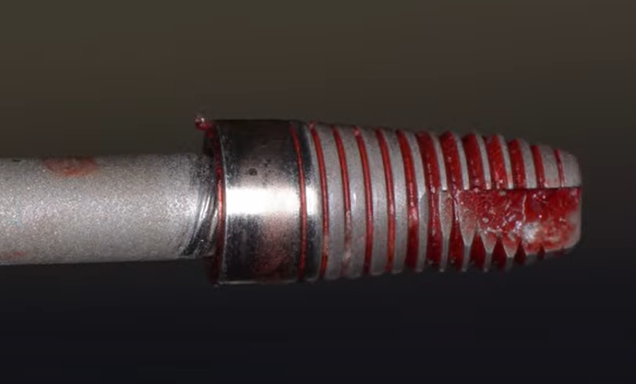
Let’s begin with the images of the implant surfaces provided by the researchers, specifically those that were unscrewed after four weeks.
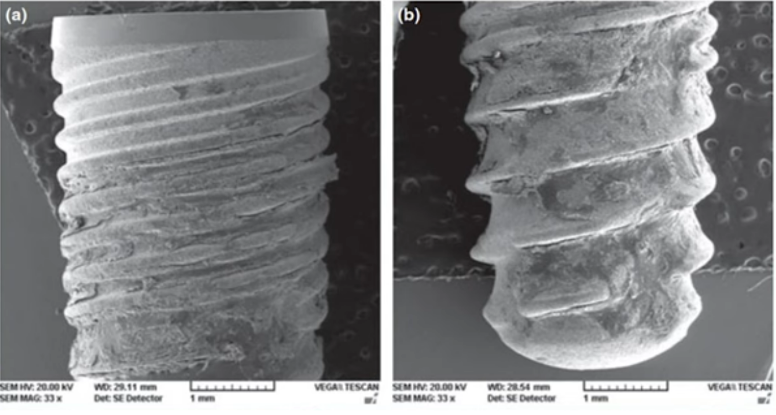
The surface of the implants was photographed using electron microscopy. Image – a) coronal part; Image- b) apical part of the implant. Residual bone tissue can be observed on the entire surface of the implant (The implant was removed at week 4 of the experiment)
The implants are well-covered with bone both coronally and apically. The resulting images are complemented by histometric data, wherein the area of bone-implant contact (BIC) was determined, as shown in the table below.

The mean BIC values in all areas of macro- and microthreads were significantly higher in the experimental group compared to the control group (P < 0.05)
Let us now quote the conclusion reached by the research team:
“Within the limitation of the small sample used in this study, it is concluded that following the mechanical disruption of osseointegration, an implant can be successfully reosseointegrated with unloaded and submerged healing for a certain period.”
In summary, this indicates that if there are no inflammatory processes in the vicinity of the implant, then there is a high probability that an implant which has rotated will successfully reintegrate, assuming the necessary time is allowed for healing. Our practicing colleagues have frequently encountered similar scenarios and have reported that in almost all cases, after a period of 8 weeks (2 months), they were able to successfully place the restoration.
However, it remains intriguing to understand the biological reasons behind this phenomenon. In the experiment described, an implant already partially enveloped by bone was placed into the socket. Similarly, in actual clinical practice, an implant that has rotated within its bed also retains a significant area of bone adhered to the titanium surface.
The injured bone begins to recover intensively, and it is much easier for the bone tissue to forge a strong connection between fragments of existing bone than to generate new bone tissue from a blood clot on the surface of a titanium implant. In the experiment, mechanical disintegration acted as a catalyst for tissue growth. Consequently, the stability indicators of the implant in the experimental group surpassed those of the control group, which did not undergo traumatic interventions.
This study also highlighted both the strengths and limitations of the resonance frequency analysis for assessing implant stability. On one hand, the method provided fairly reliable data when correlated with histological results. On the other hand, the resonance frequency analysis indicated a relatively high stability quotient for implants that were merely twisted by hand. In reality, such stability could not be assumed. The technique estimates the area of contact between the implant and the bone, and the mechanically loosened implant was covered with residual bone tissue, which the sensor detected.
It is important to comprehend this characteristic and to not rely solely on numerical data if any interventions have occurred.
Case with successful reosseointegration of the implant
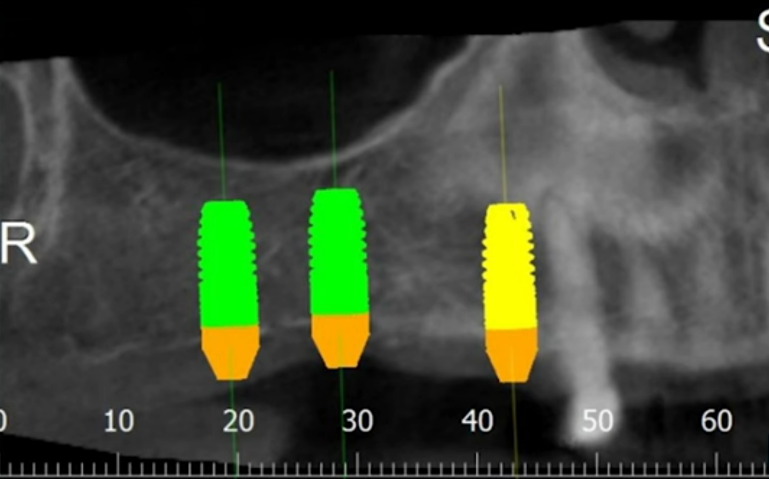
At the conclusion of this article, we will examine a successful clinical case. This case is relatively straightforward and may be familiar to many practitioners. The case involved a simple multi-unit restoration supported by three implants. These implants were placed in the first quadrant under favorable conditions, albeit with a minor bone deficit.
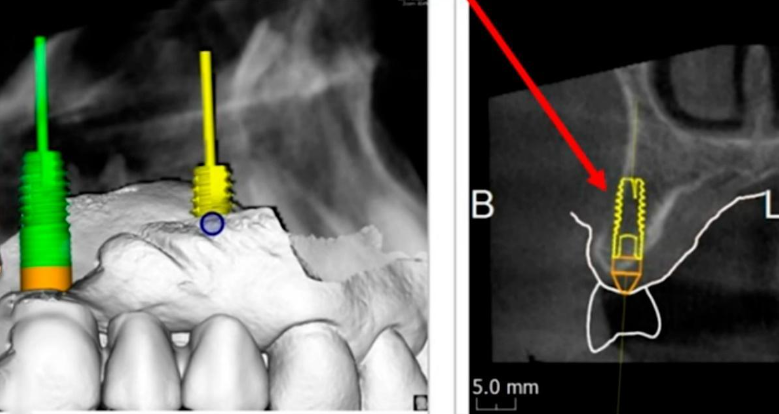
Virtual planning and 3D modeling of the patients’ jaws proved to be invaluable tools in our procedure. For instance, as depicted in the illustrations below, the alveolar ridge profile is pear-shaped, and there is a minor bone deficit in the apical region of the implant.
This represents one of the more straightforward types of bone deficiencies, which even a dental school trainee can address. It is sufficient to position the implant correctly, aided by a surgical template, and then to seal the defect with a bone graft. The area where the allogeneic bone material is placed can be closed using the Steigmann method. This procedure does not necessitate a membrane; instead, it is adequate to split the flap and isolate the periosteum, which will act as a natural membrane. Subsequently, healing and recovery typically proceed smoothly.
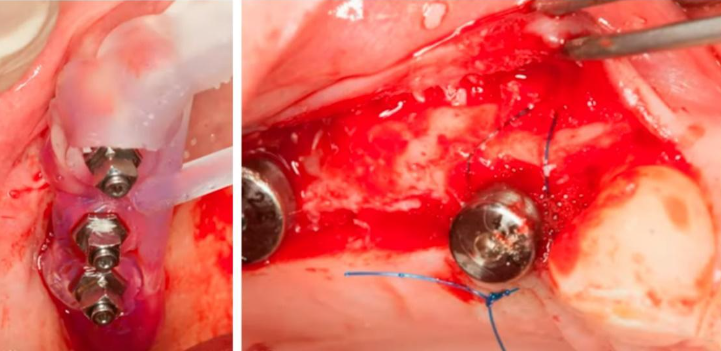
Implant placement sequence – surgical template (left), bone augmentation operation using the Steigmann method, stage of fixation with a periosteal suture (right)
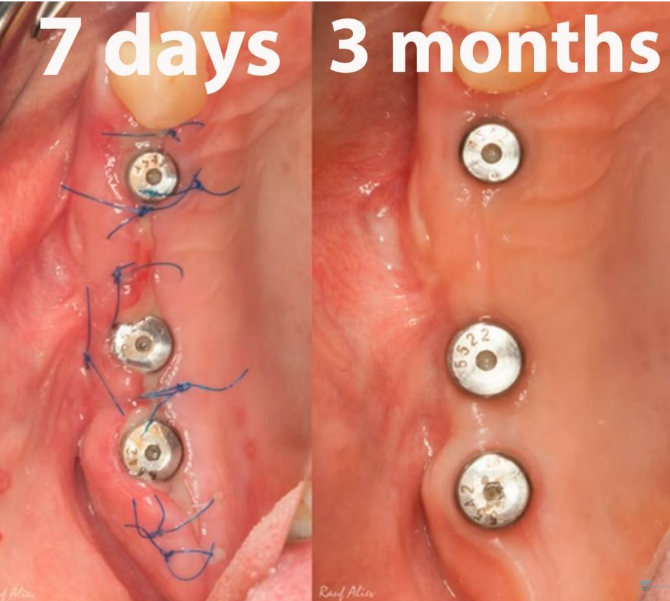
The operation was a success, as evidenced by the photographs taken 7 days and 3 months post-implantation.
There were no signs of inflammation; the x-rays were clear, and all indicators suggested that prosthetic procedures could commence.
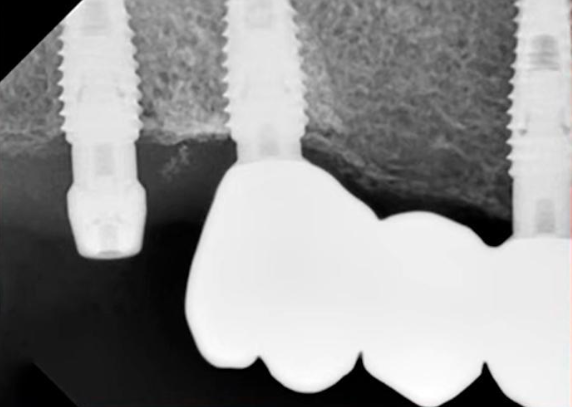
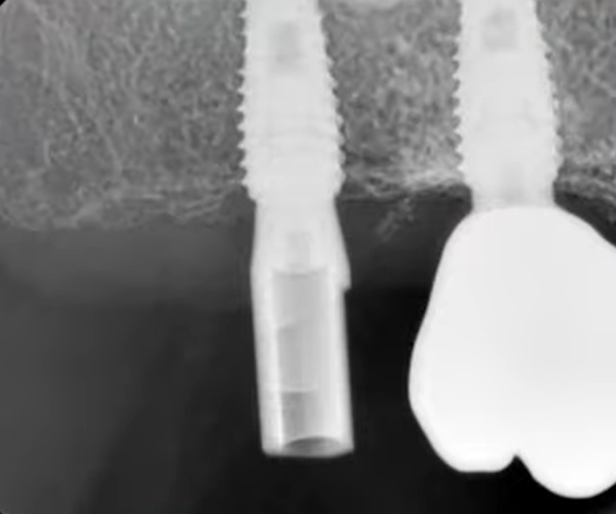
However, during placement of the multi-unit abutments, everything was ok in the area of teeth 14 and 16, but the implant in the area of tooth 17 rotated. The patient jumped up and exclaimed: Oh! An extremely unpleasant situation, but it happens.
Given that an experienced specialist had already completed the work, they opted not to remove the implant. Instead, they left the multi-unit abutment in place, merely fitting it with a healing cap. For the remaining two implants, a bridge-like prosthesis was fabricated, as depicted in the photo.
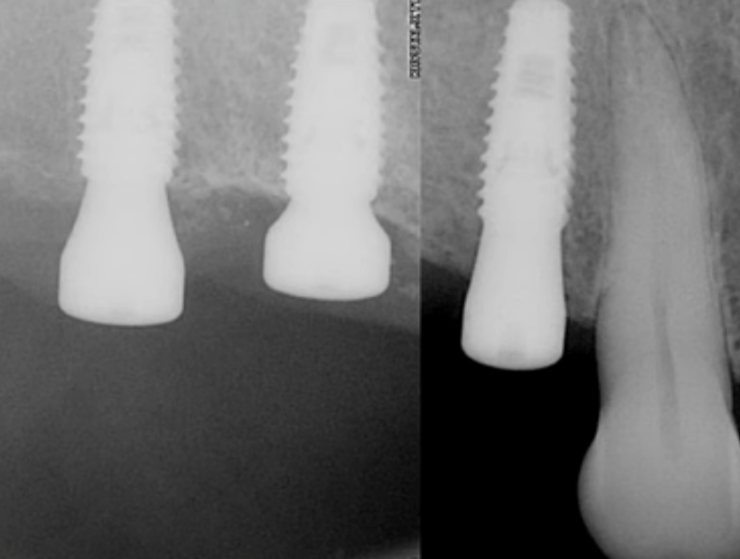
After this phase, the healing process began. However, due to circumstances, the patient returned later than anticipated. Typically, in such cases, we would expect the patient to return in 2 months, but in this instance, the patient returned after 6 months. The X-ray indicated a positive outcome, corroborated by the traditional method of tapping to assess the implant’s stability.
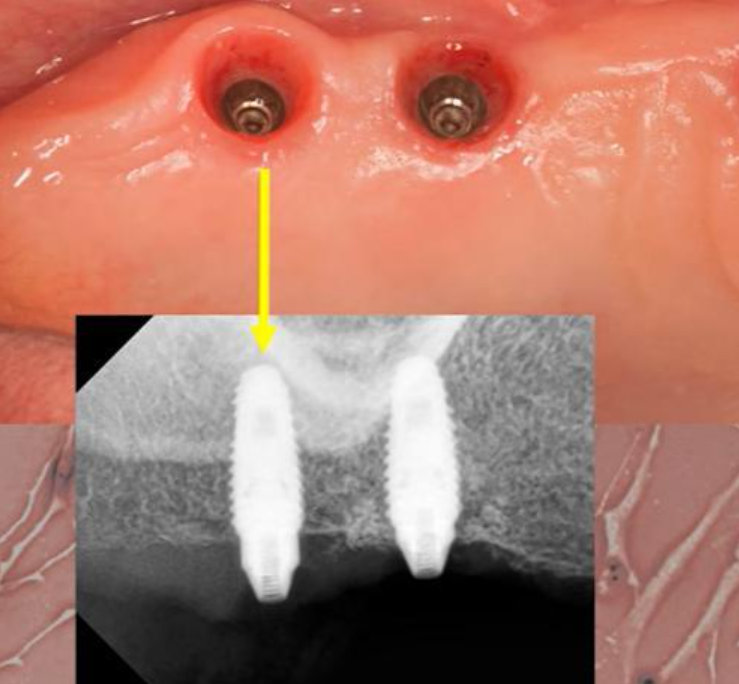
The bridge was temporarily removed, and the area beneath it was in good condition, as confirmed by the images provided.
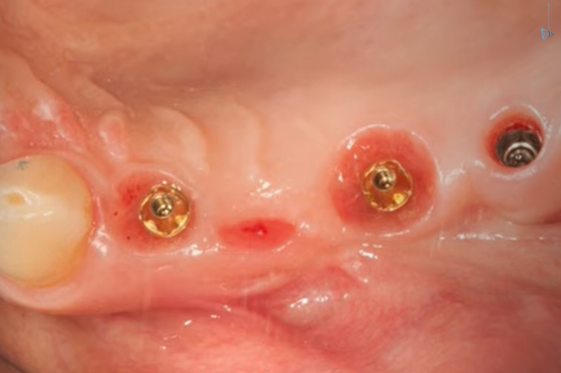
Condition of soft tissues after removal of the bridge and multi-unit abutment 6 months after the patient’s first visit
It was decided to keep the existing bridge supported by two implants and to fabricate a single crown for the implant at the position of tooth 17. For this purpose, a scan body was inserted into the implant, as illustrated in the image below. The oral cavity’s condition was captured using an intraoral scanner to generate a 3D model of the jaw.
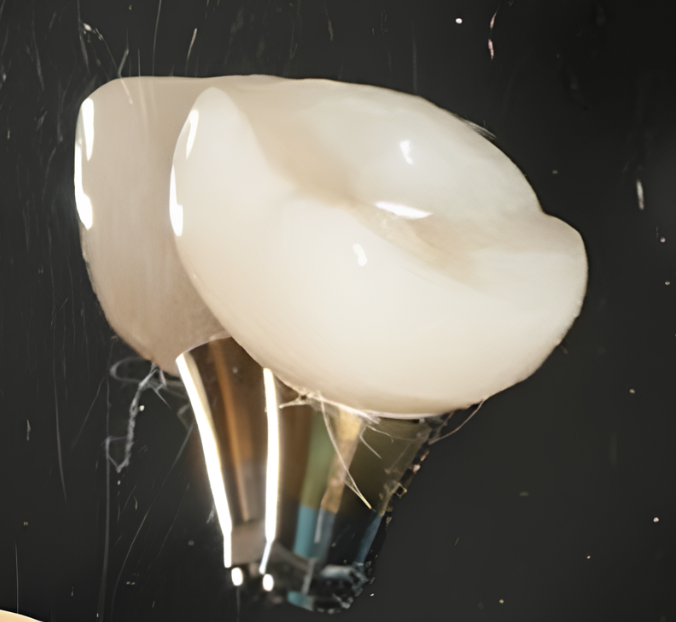
Based on the acquired data, a single-unit prosthesis was designed and fabricated. It consisted of a zirconia crown mounted on a tall abutment, conforming to the appropriate emergence profile.
During the fitting process of the prosthesis, the implant underwent the primary stability test successfully. Initially, an abutment was secured into it with a torque of 35 Ncm, and subsequently, it was unscrewed. This abutment was a locking type with a conical interface, which requires the same torque to unscrew as it does to place. Thus, despite all the manipulations, the implant remained stable.
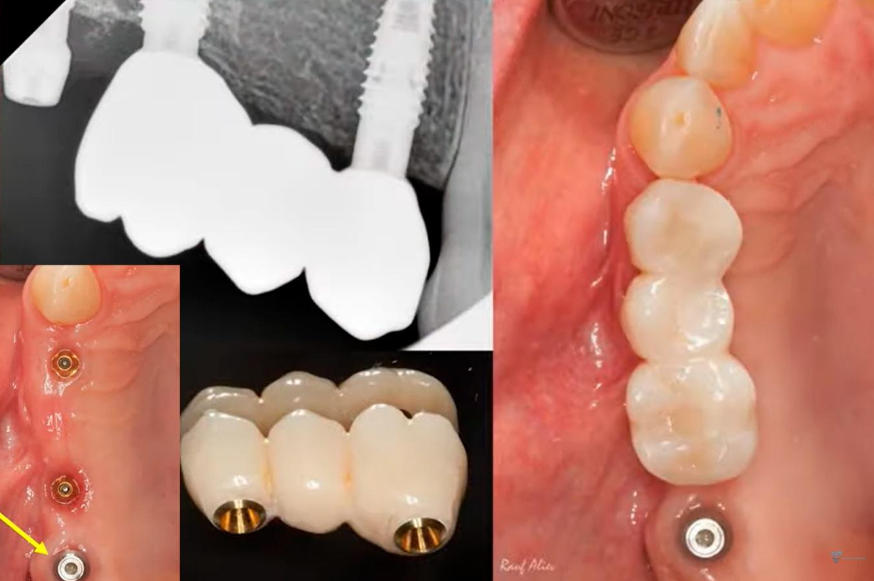
The restoration was successfully placed in September 2020. The patient returned for a routine check-up a year later, in September 2021. Visually, the prostheses appear satisfactory, and the soft tissues show no signs of inflammation.
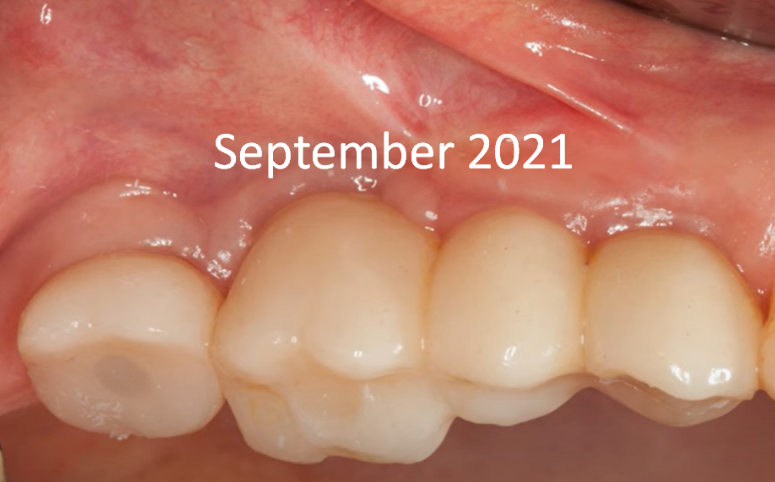
Screw-retained multi-unit restoration: single crown (left) bridge supported by two implants that restores three teeth (right)
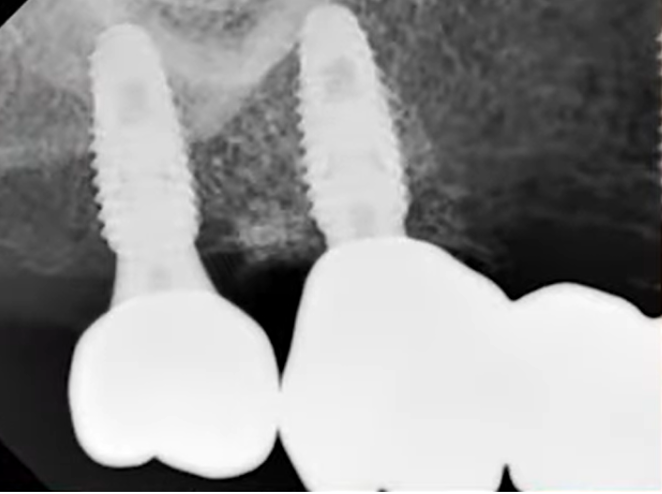
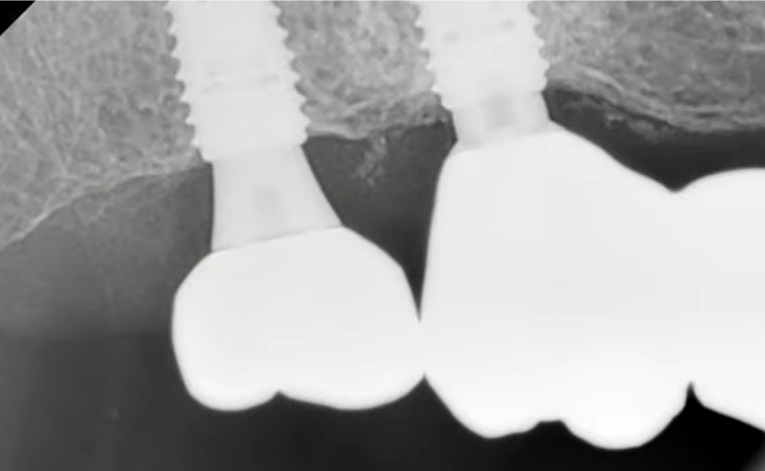
The favorable condition of the bone tissue in the restoration area is corroborated by an X-ray, as depicted in the image below.
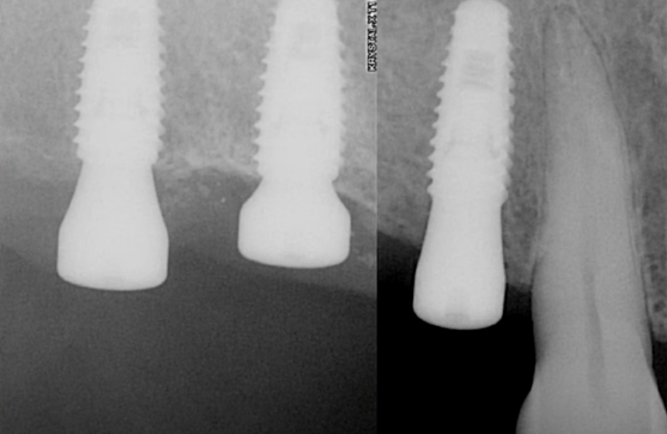
This outcome is typical for such scenarios. In the absence of inflammation or other complications, the implant is reintegrated, and typically, its stability surpasses that of implants integrated without any injury. Reviewing the image prior to the implant’s disintegration reveals no signs of inflammation or defects in the bone tissue.
Despite the high likelihood of successful reosseointegration, it is preferable to prevent the occurrence of implant ‘failure.’ Thus, every practicing dentist who performs a significant number of implant-supported restorations should possess a device for resonance frequency analysis of implant stability.
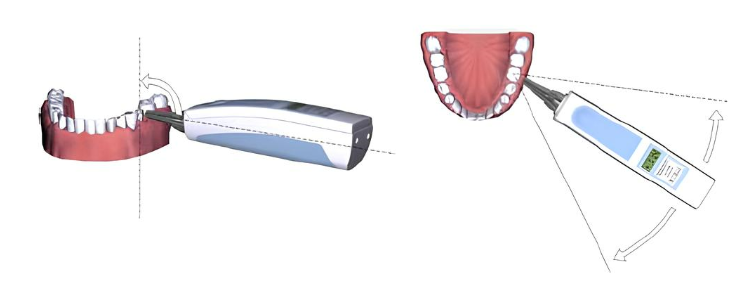
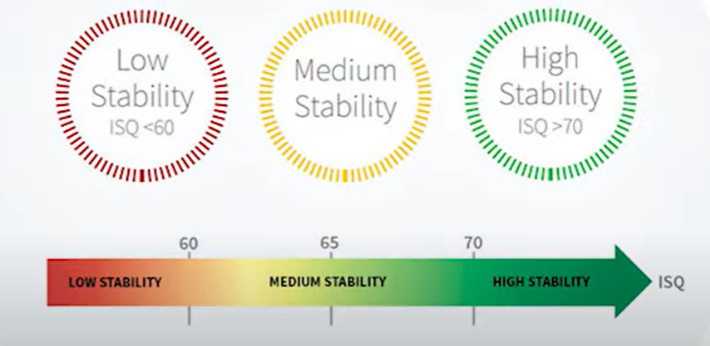
This device is not only convenient but also quite precise, as validated by the results of the study discussed earlier. The subsequent illustration demonstrates the distribution of stability across predefined levels.
Our seasoned colleagues, with over a decade of practice, assert that they undertake single restorations only when the ISQ is 70 or higher. While the officially acceptable threshold is an ISQ of 65, as previously mentioned, such stability levels are sufficient for group restorations. However, for single restorations, an ISQ of 70 or higher is advisable.
Nonetheless, we do not set rigid standards; there are general guidelines and the individual experience of each dentist to consider. There have been instances where prostheses were successfully placed with an ISQ as low as 60, but this requires considerable expertise and a bit of fortune. We strongly endorse the use of the frequency resonance method to determine implant stability. Furthermore, with the advent of new models, the prices for these devices have become more accessible.
Conclusions and recommendations
In the event of implant disintegration, we recommend the following steps:
- Do not panic, and particularly avoid displaying any excitement or confusion in front of the patient. Reassess the situation by taking new images and examining the bone for any depressions or cavities. Typically, no issues will be found; significant bone loss or an inflammatory process would likely have been identified earlier, preventing progression to the prosthetic stage.
- If the implant rotates during abutment placement, surprisingly, this is not a cause for concern. Do not attempt to unscrew the abutment; instead, place the healing cap. If you are apprehensive about manipulating the implant, you may leave the abutment as is. Avoid any action if the implant rotates while handling the healing cap. The situation is more complex if a transfer was attached to the implant at the time of failure. This is rare, as transfers are not typically applied with high torque. However, if this occurs, the transfer must be carefully unscrewed, possibly by securing the implant’s neck with tweezers or another suitable tool and unscrewing the transfer gradually, half a turn at a time. Once the transfer is removed, seal the implant with a plug or healing cap, attaching it manually.
- Allow the patient time to heal. A waiting period of 2-3 months is recommended. Afterward, evaluate the ISQ, and if satisfactory, proceed with the prosthetic application. Notably, our Korean colleagues have demonstrated that the bond strength following such disintegration is often greater than that of implants that were initially well-integrated.
We hope you find this article beneficial. Until next publications!


