Digital Dentistry – Benefits of CAD/CAM Systems

New technologies in dentistry mean speed, saving consumables and energy. In this article, we will analyze what advantages CAD / CAM technology provides and how it fundamentally differs from the classical (analog) protocol for the manufacture of dentures. The abbreviation CAD / CAM means the following: CAD - computer-aided design in this context - “creating a model using a computer”, and CAM - computer-aided manufacture. The history of CAD/CAM technology dates back to the advent of CNC machines. The first samples of such equipment appeared in the 1950s. Digital technologies began to come to dentistry in the late 1970s, but then these were the first experiments and attempts to adapt the numerical control protocol for the manufacture of dentures. Technology has evolved and it has been possible to optimize individual processes from measurements to the manufacture of restorations with the help of automation. The first complex of modern CAD/CAM equipment with a full cycle from taking a digital impression to obtaining the prosthesis was created in Germany in 2003. It was a system - CEREC. Modern digital dentistry equipment has become more advanced, economical, and faster and the cost of its use has decreased.
Classic prosthesis manufacturing sequence without the use of digital technologies
Before proceeding to the description of the digital protocol, we will analyze how prostheses are made not using digital technologies. Since this article is primarily for specialists, we will omit detailed descriptions of all stages, as they are already well known. Our task is to give an example to see the difference in the labor intensity of the two technologies. For example, let’s take the technology of manufacturing metal-ceramic restorations.
- The stage of installation and integration of implants or preparation of teeth, if the restoration will be based on a base of living teeth. This stage is common for both classical and digital dentistry.
- Removing an impression. It does not matter whether the method of open or closed spoon is used; the procedure is long enough and uncomfortable for the patient.

Procedure for taking an impression of the patient’s jaw
- Casting of the jaw model from plaster. At least two hours of waiting and then trimming the model. Then plastering into the articulator to create a dynamic model of the jaws. This is a few more hours of work, given the wait until the plaster hardens.

Plaster cast of the jaws in the occlusal plane
- Wax molding of the matrix from which the metal base for the prosthesis will be cast.

Casting of wax matrices for the manufacture of metal elements of a metal-ceramic prosthesis
- Casting of the metal base of the bridge, separation from the tides, cleaning of irregularities.

Metal bases for metal-ceramic prostheses after casting
- Installation on a plaster model and applying the primary coating – opaque dentin, and subsequent firing.

Base for dental restoration covered with opaque dentin
- Application of a shoulder material to mask the margin of the crown so that no metal can be seen through the lower part of the restoration, and subsequent firing. This procedure, despite its apparent simplicity, also requires experience and is quite laborious.

Crown base during application of the marginal mass
- Layer-by-layer, application of ceramic mass plus several intermediate firing procedures.

The procedure for layer-by-layer application of ceramic mass followed by firing
- Finishing restoration – polishing and glazing.

Polishing and glazing of dental prosthesis
The analog protocol for the manufacture of restorations takes from 7 to 10 days. Theoretically, all this can be done in 7 to 9 hours, but usually the dental technician’s laboratory works in queue mode and makes prostheses that come from dentists. During the manufacturing time, the patient needs to somehow live and eat. If we are talking about the restoration of 2 to 4 teeth and they will be attached to implants, then the implants are closed with healing caps (gingiva formers). If a living tooth had to be prepared to install the restoration, then a temporary structure needs to be installed. The production of which also takes a lot of time.
The sequence of manufacturing an all-ceramic prosthesis using CAD / CAM technologies
We will assume that the stage of installing implants or preparing teeth to prepare for prosthetics has already been completed. Then we have the following sequence:
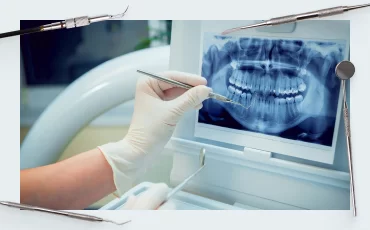
- Taking an electronic image of the patient’s oral cavity using an intraoral scanner. The result is a digital 3D file with the exact location of the preserved teeth and soft tissues. For precise positioning of implants, taking into account the angle of deviation, special scan markers are used, see the photo below.

Scan marker for intraoral scanner with installation at the level of the implant

Such a scan marker is made of PEEK plastic, which has good contrast and is clearly visible in high-speed shooting during scanning. There are varieties of scan markers with a fit at the level of the implant, both in the photo above and at the level of the abutment. The latter are most often used with the multi-unit screw fixation system.
The intraoral scanner itself can transmit data to a computer where software converts the received data into a 3D file suitable for further processing.

Working with an intraoral scanner
2. Creation of a digital model of the jaws and a digital model of the prosthesis. In some cases, an image file is created separately for printing individual elements or the entire jaw and the designed prosthesis on a 3D printer. In most simple cases, the stage of printing a model on a 3D printer is not needed. For digital processing, special software systems are used. Licensed software for working in CAD/CAM systems is constantly updated and improved. There are several independently developed software packages. Here is a list of the most popular:
- Exocad;
- Shape 3D;
- Avantis 3D;
- Planmeca;
- ZWSOFT;
- Excel-Dental.
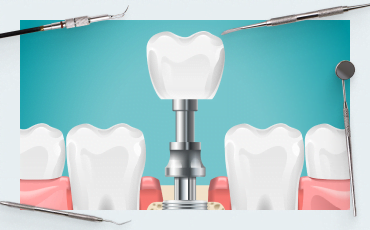
3. Making the prosthesis on a CNC milling machine. Depending on the complexity of the restoration, the manufacturing process can take from 15 minutes to several hours. In most cases, the production time does not exceed 30 to 40 minutes.

Production of an all-ceramic prosthesis on a CNC machine
4. Grinding and fitting of the prosthesis before installation.
5. Placement of the prosthesis in the patient’s mouth. There may be several options here. Screw fixation, in which all operations with adhesive cement are performed outside the patient’s oral cavity, and classical cement fixation on abutments.
The digital protocol for the manufacture and installation of the prosthesis takes 1 to 2 days, sometimes more, but this depends on the workload of the equipment. Theoretically, from the moment the digital model of the jaw is removed to the installation of the finished prosthesis, it can take 1 to 1.5 hours if we are dealing with a simple clinical case and the milling machine is free and in close proximity. The milling machine is the most expensive piece of equipment. Often one machine serves more than a dozen specialists who have only intraoral scanners and software in their laboratories.
Accessories and support procedures for CAD/CAM technologies
To begin with, let us recall what structures for dental treatment can be made using CAD / CAM technologies:
- dental crowns made of zirconium and ceramics;
- veneers;
- tabs;
- bridge structures;
- ceramic fillings;
- temporary prostheses, including those made of solid polymers, which can last from 2 to 4 months;
- frames of clasp (arc-shaped) prostheses and crowns for them; and
custom abutments and titanium bases.
Some operations may require additional accessories:
- Scan markers that are placed on the implant or abutment while the oral cavity is being scanned. We have already mentioned them. They differ in height, shape and material of manufacture. Most often they are plastic. There are also titanium scan markers, but to use them you need to additionally apply a spray to remove glare from a metal surface.
- Analogs of implants for CAD/CAM technologies. They look like analogs of implants for classical technology, only they are installed in a model printed on a 3D printer. They differ in the shape of the shank, because they are in contact with the transfer for transferring the impression and therefore simply screwed into the round nut. You can buy analogs of implants with a classic interface, for example, for an internal hexagon, or immediately an analog of an implant with an abutment as a single piece. Most often it is a multi-unit abutment.
Benefits of Digital Dentistry
To summarize, if we switch to the use of CAD / CAM technologies, we will get the following advantages as a result:
- Accuracy. Digital scanning is not affected by shrinkage or accidental deformation of the impression material. Modern scanners have a resolution in the range of 100-150 microns, and this significantly exceeds the reliability of a digital model compared to that obtained using a cast.
- Possibility to produce very complex designs in one step with a perfect fit.
- Comfort for the patient. Taking an impression is a long and extremely unpleasant process; many patients experience a gag reflex. Whereas scanning with an intraoral scanner does not take much time and does not cause noticeable discomfort.
- Manufacturing speed. If all the necessary equipment is free and ready to work, then it takes about an hour from creating a 3D model to the readiness of a dental prosthesis. In the case of complex operations, of course, more time is required, but still several times longer than with traditional methods. No need for multiple fittings, etc.
- The file with the project of the prosthesis is saved in the clinic’s archive. If necessary, a copy of the prosthesis can be made quite quickly.
- Absence of internal overstresses and complications due to inaccurate fit of the prosthesis. Passive fit is ensured by the high accuracy of creating a 3D model and the accuracy of the finished restoration.
The only drawback of digital dentistry is the relatively high price associated with the complexity of the hardware and software. Science and technology do not stand still, and the cost of using high-precision equipment is gradually decreasing.